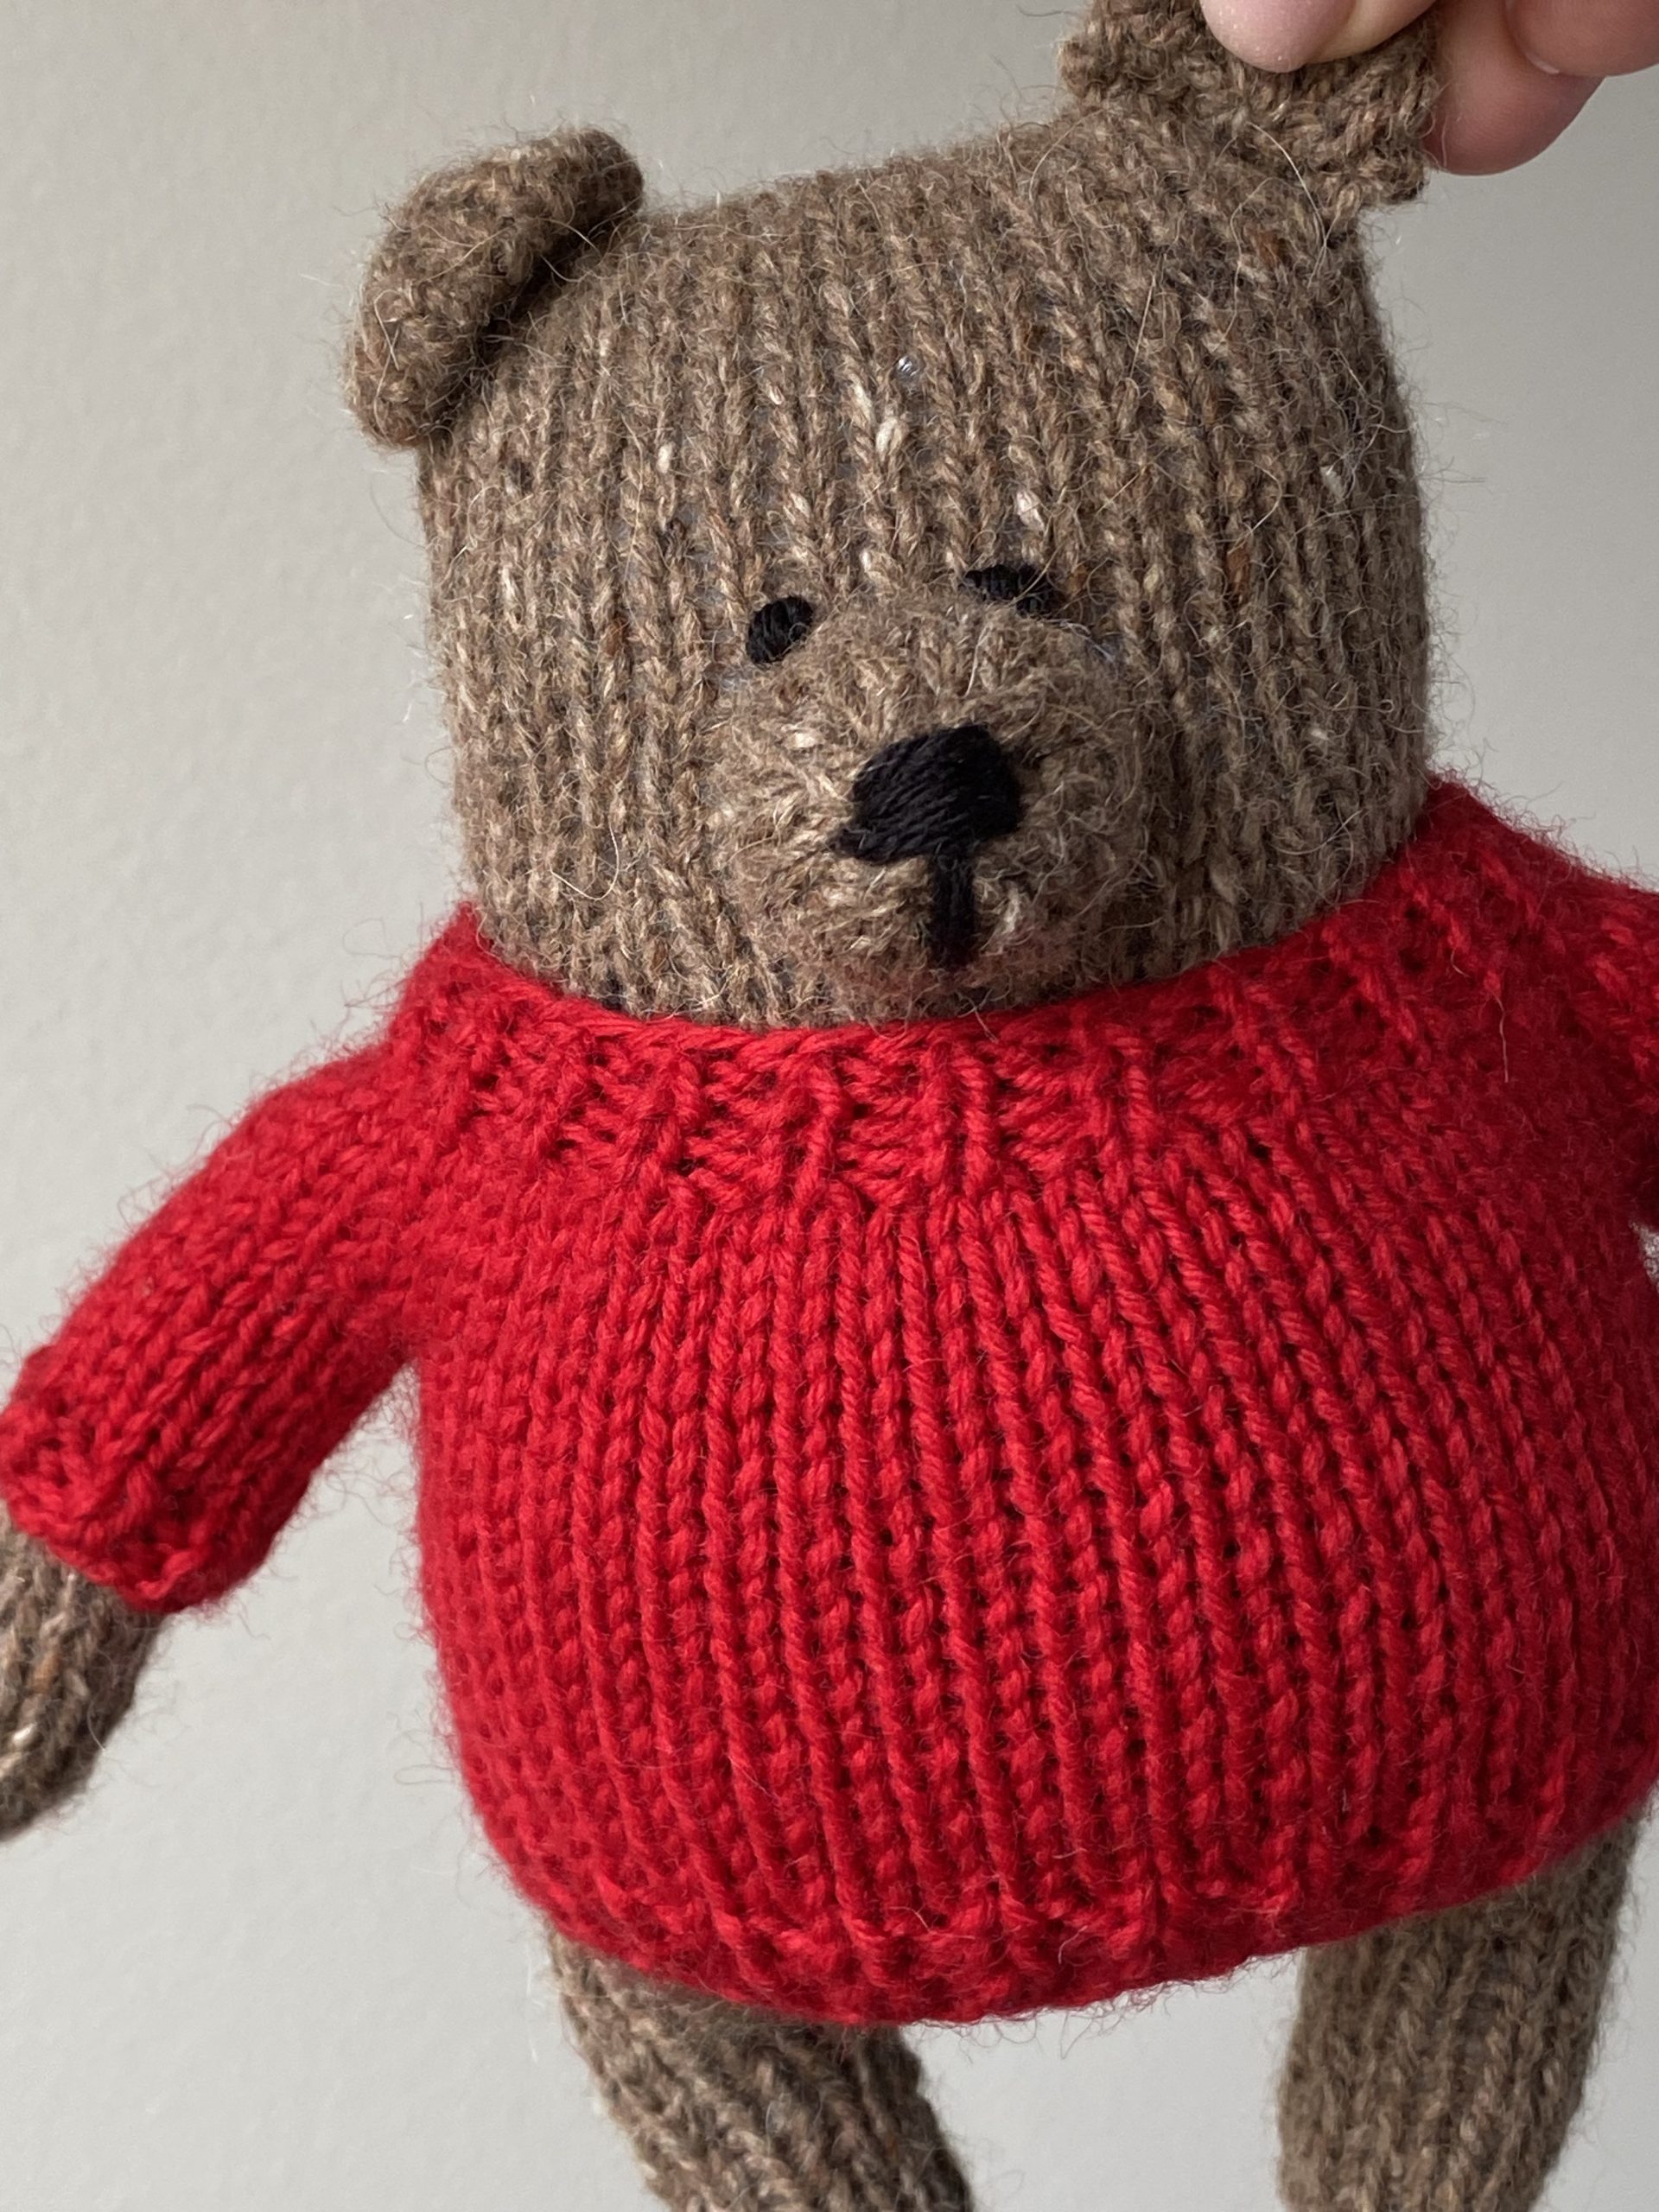
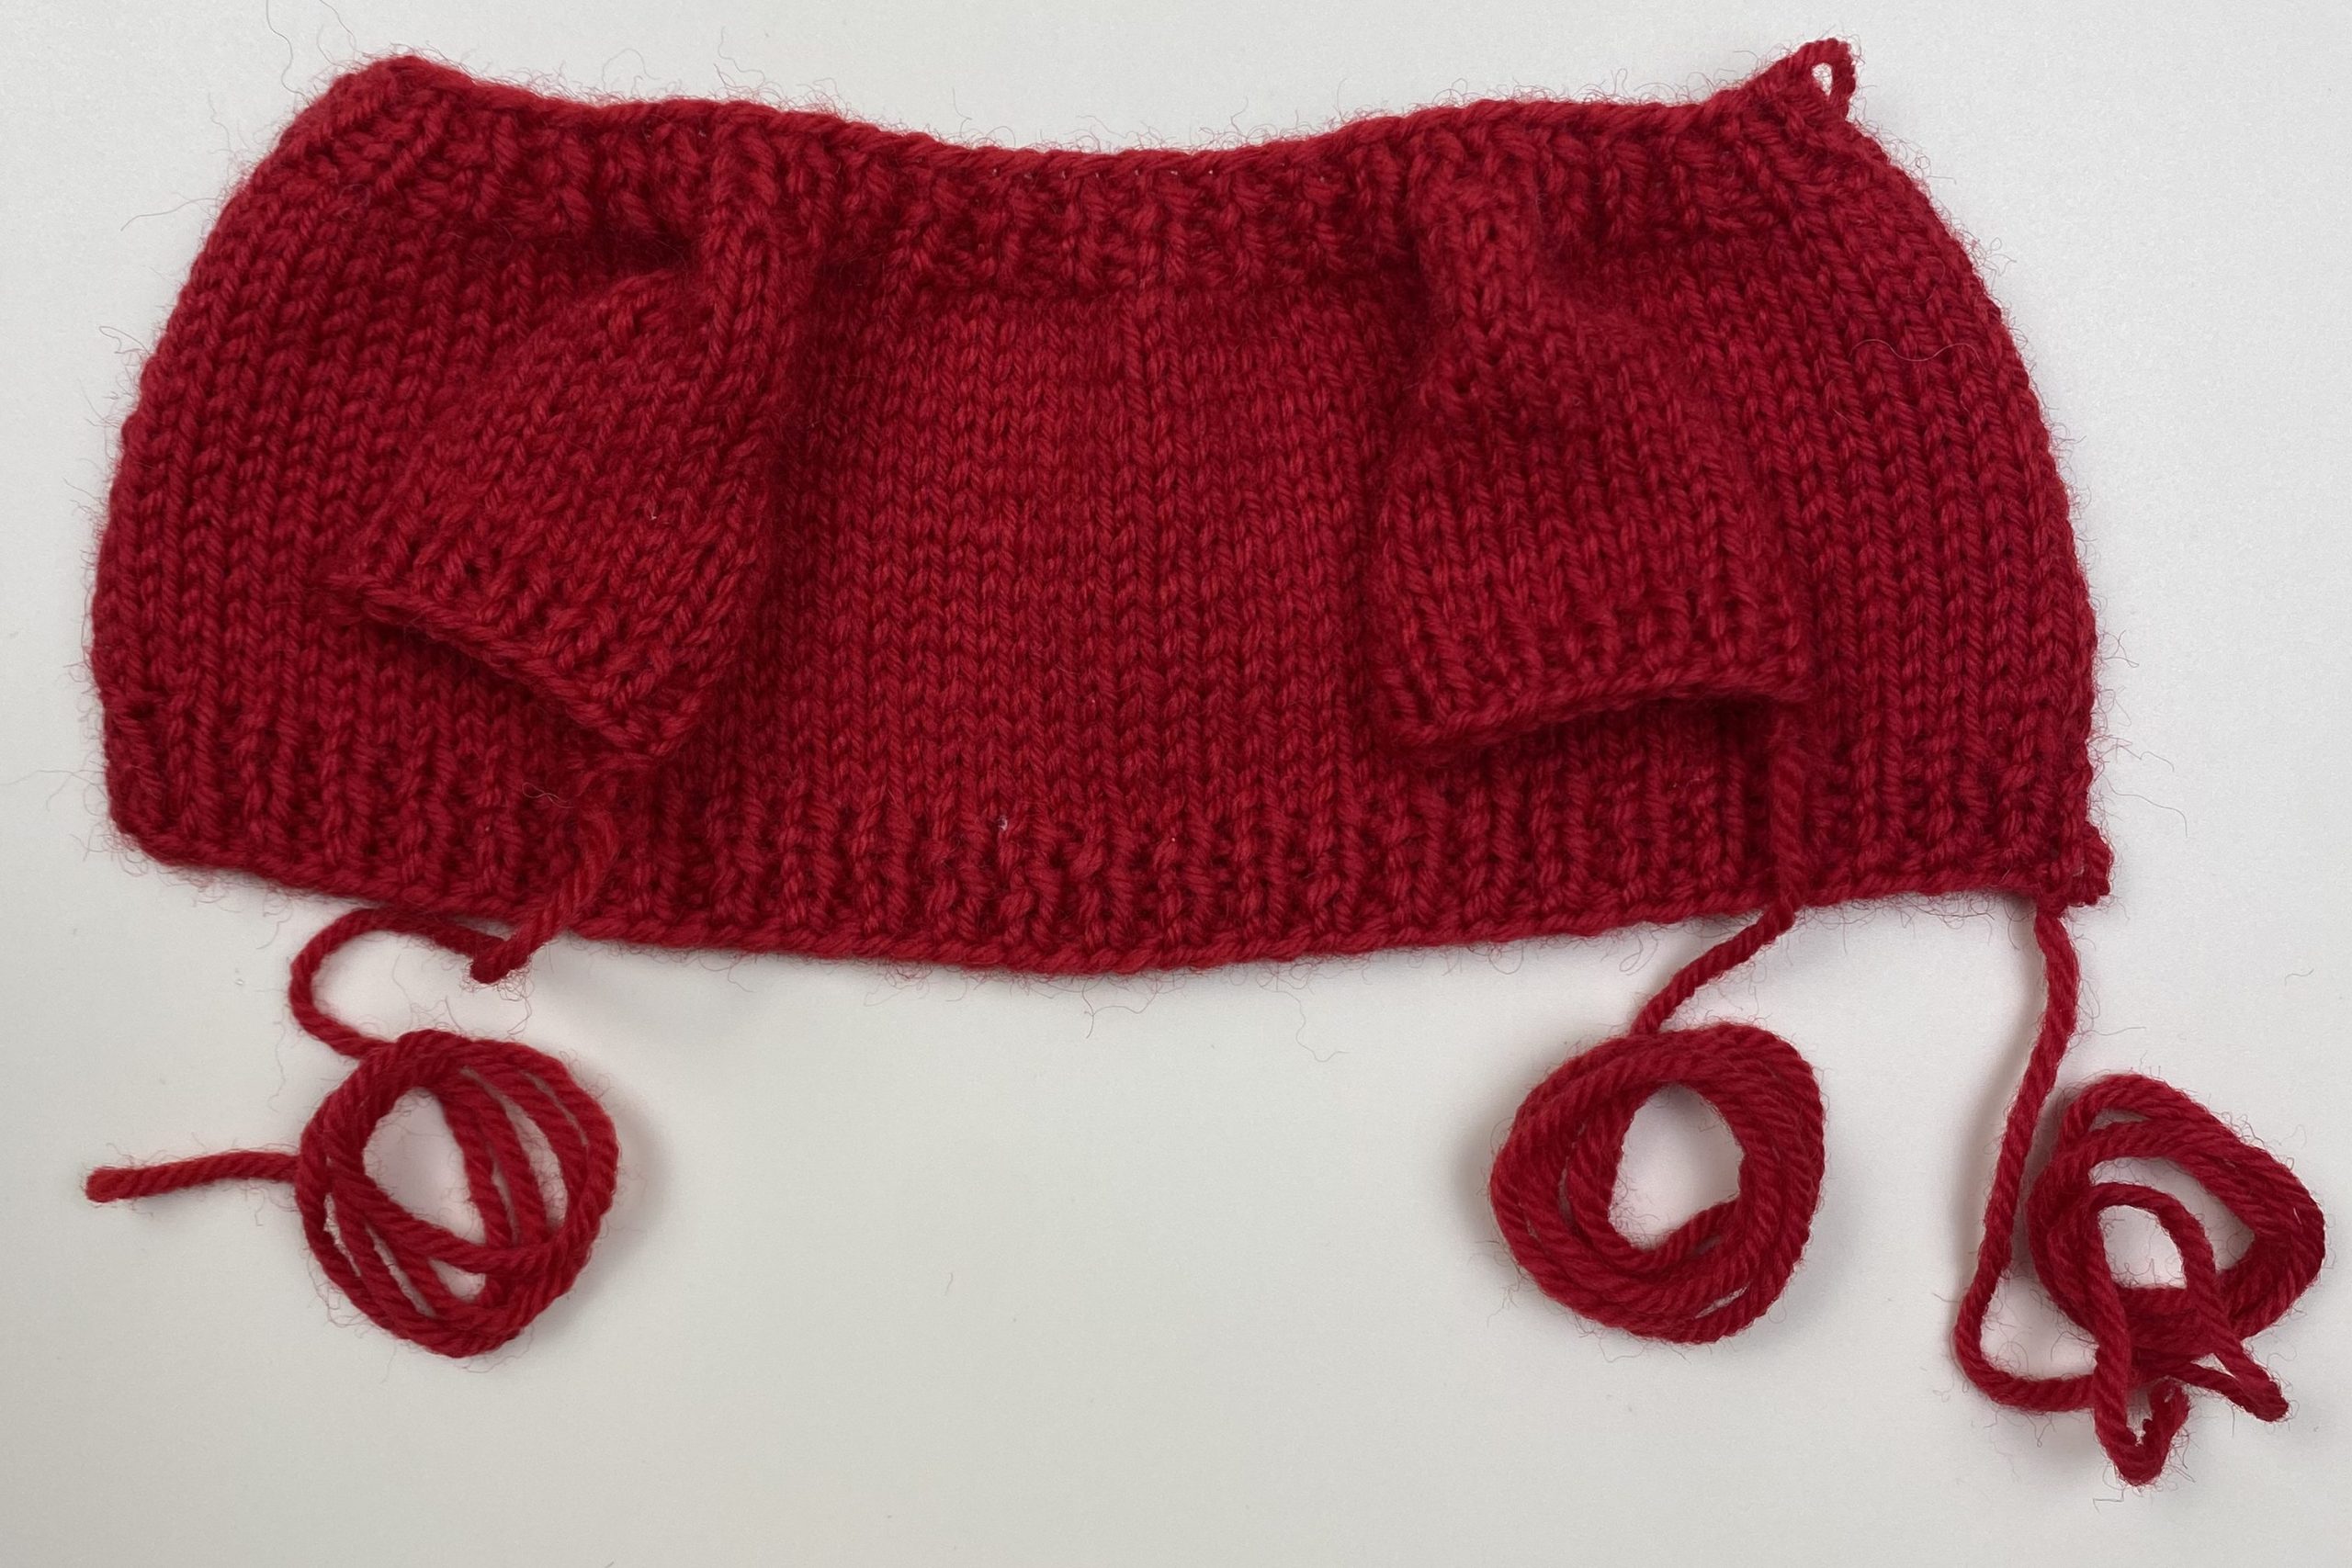
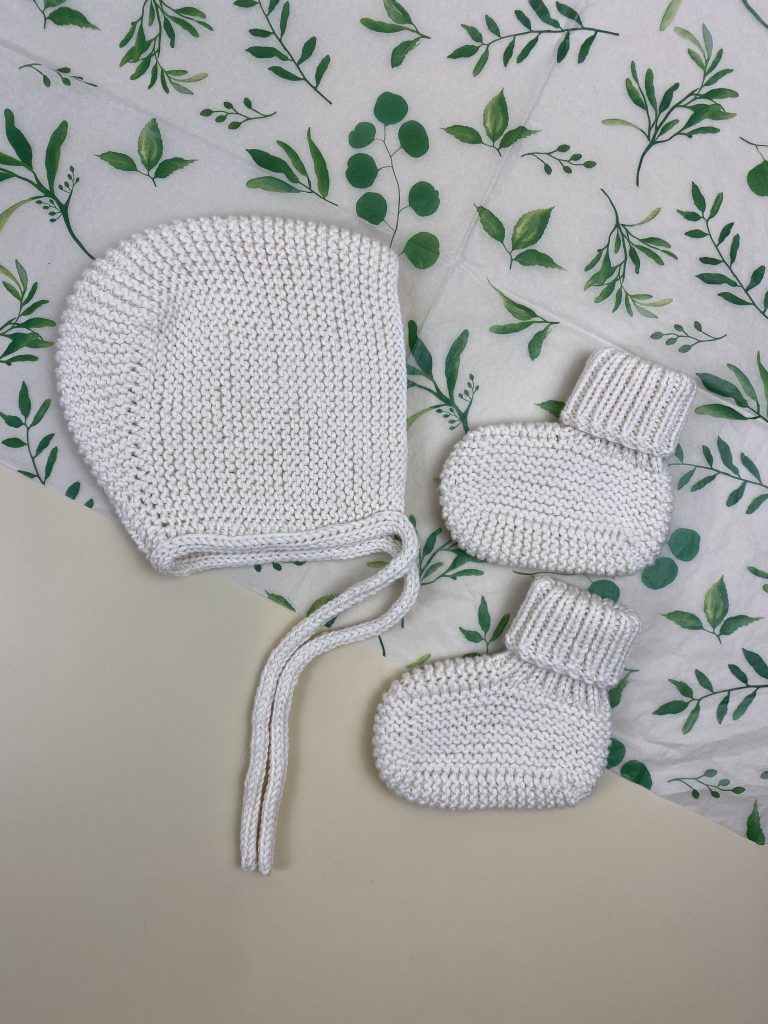
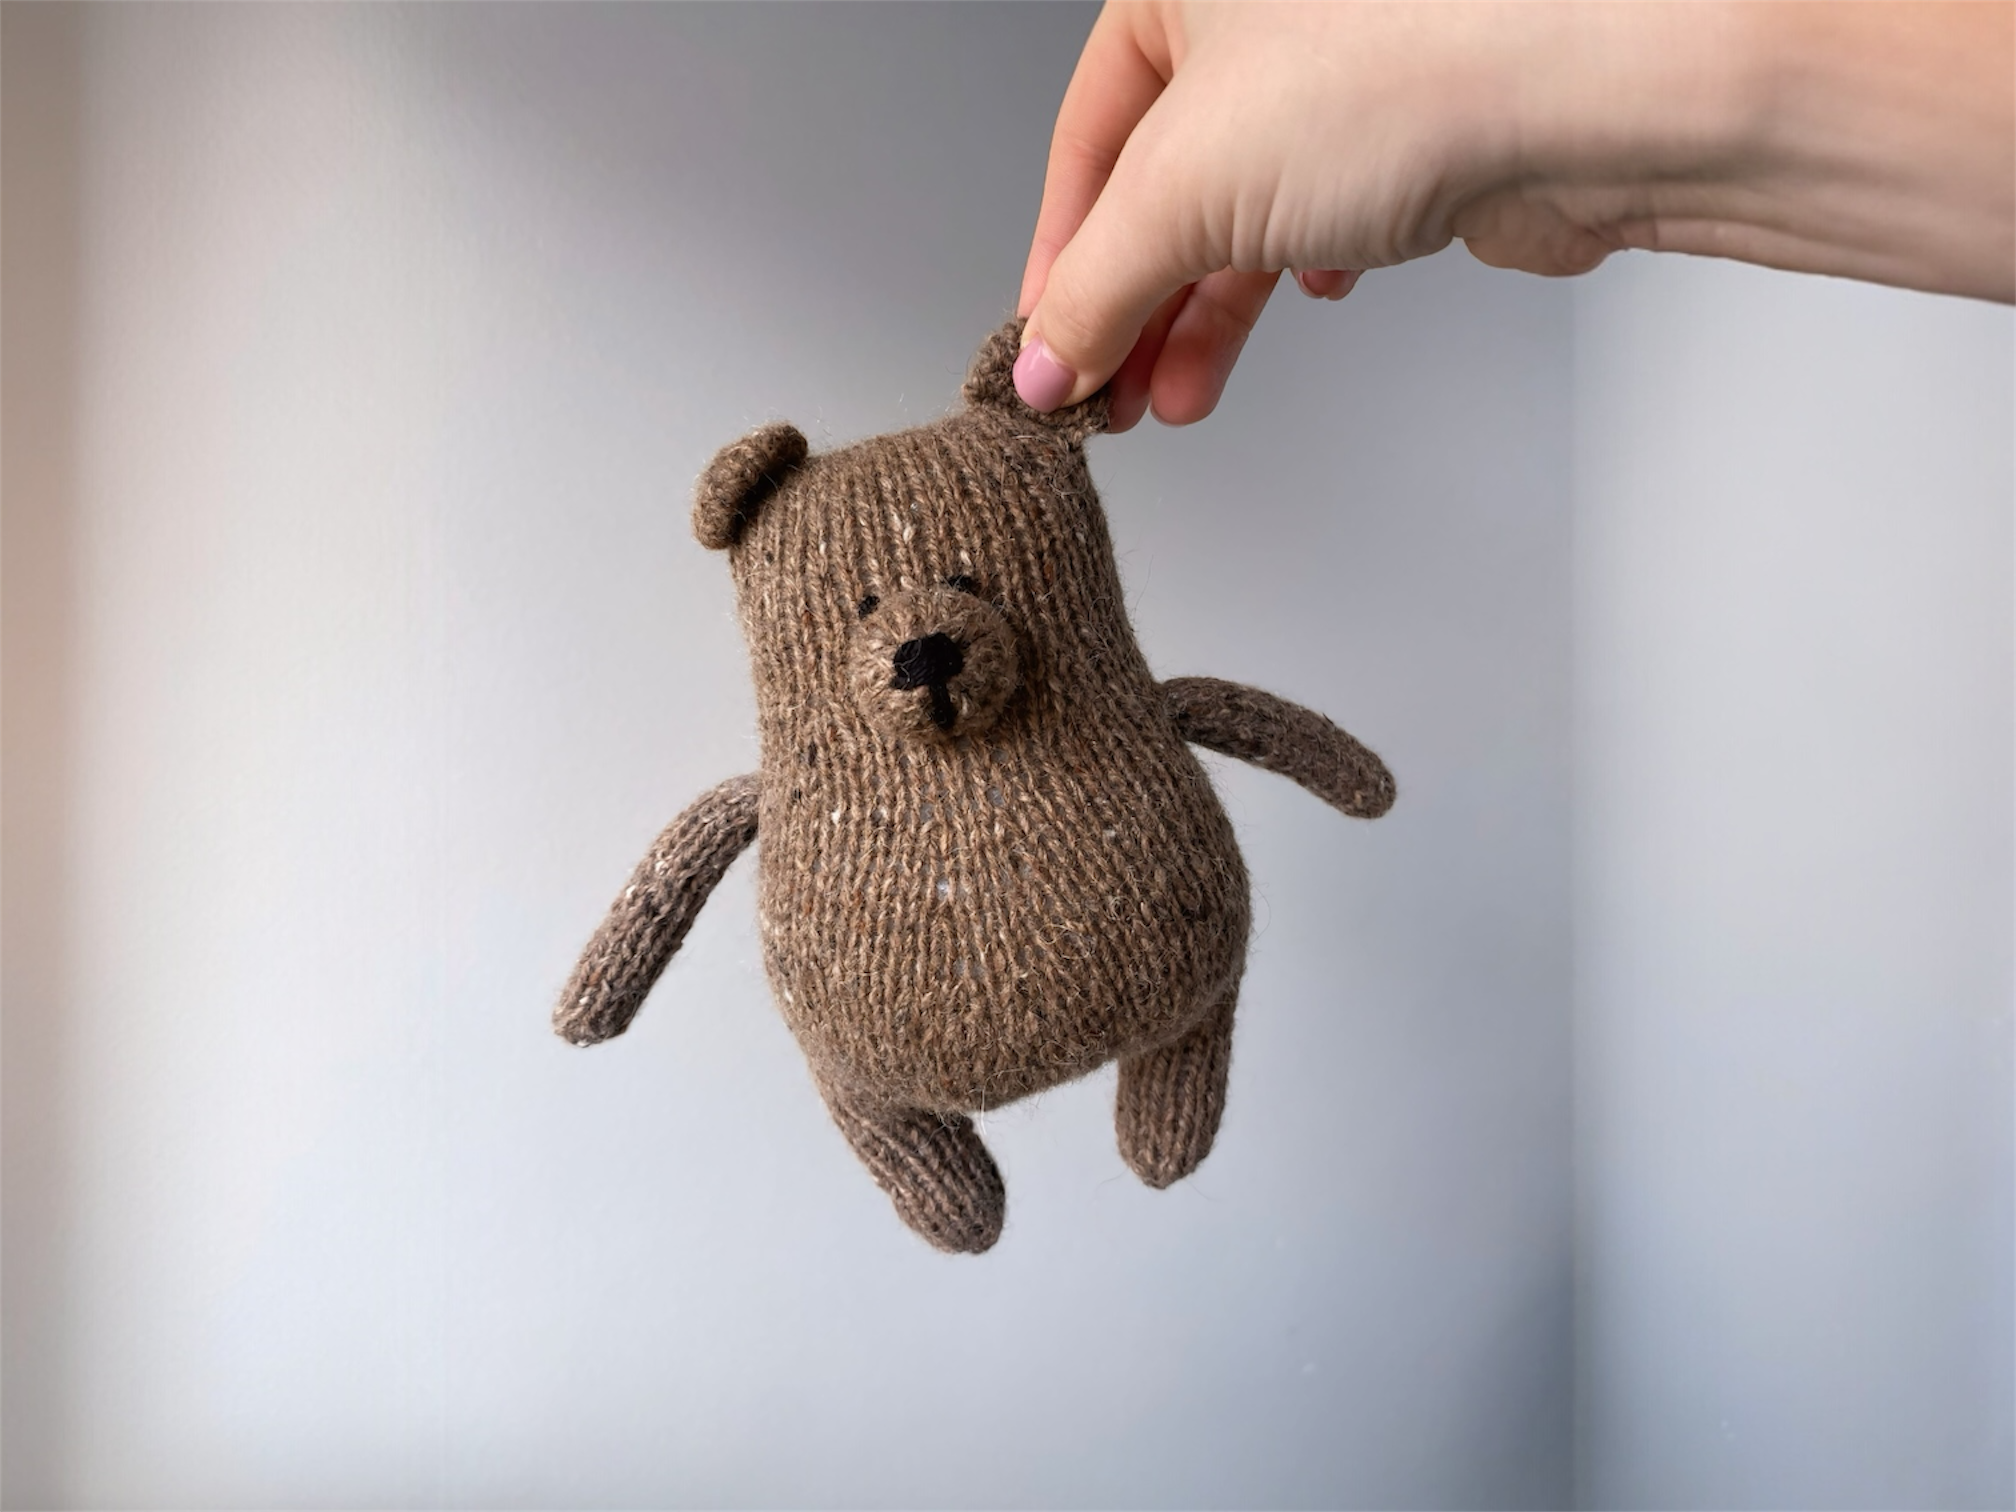
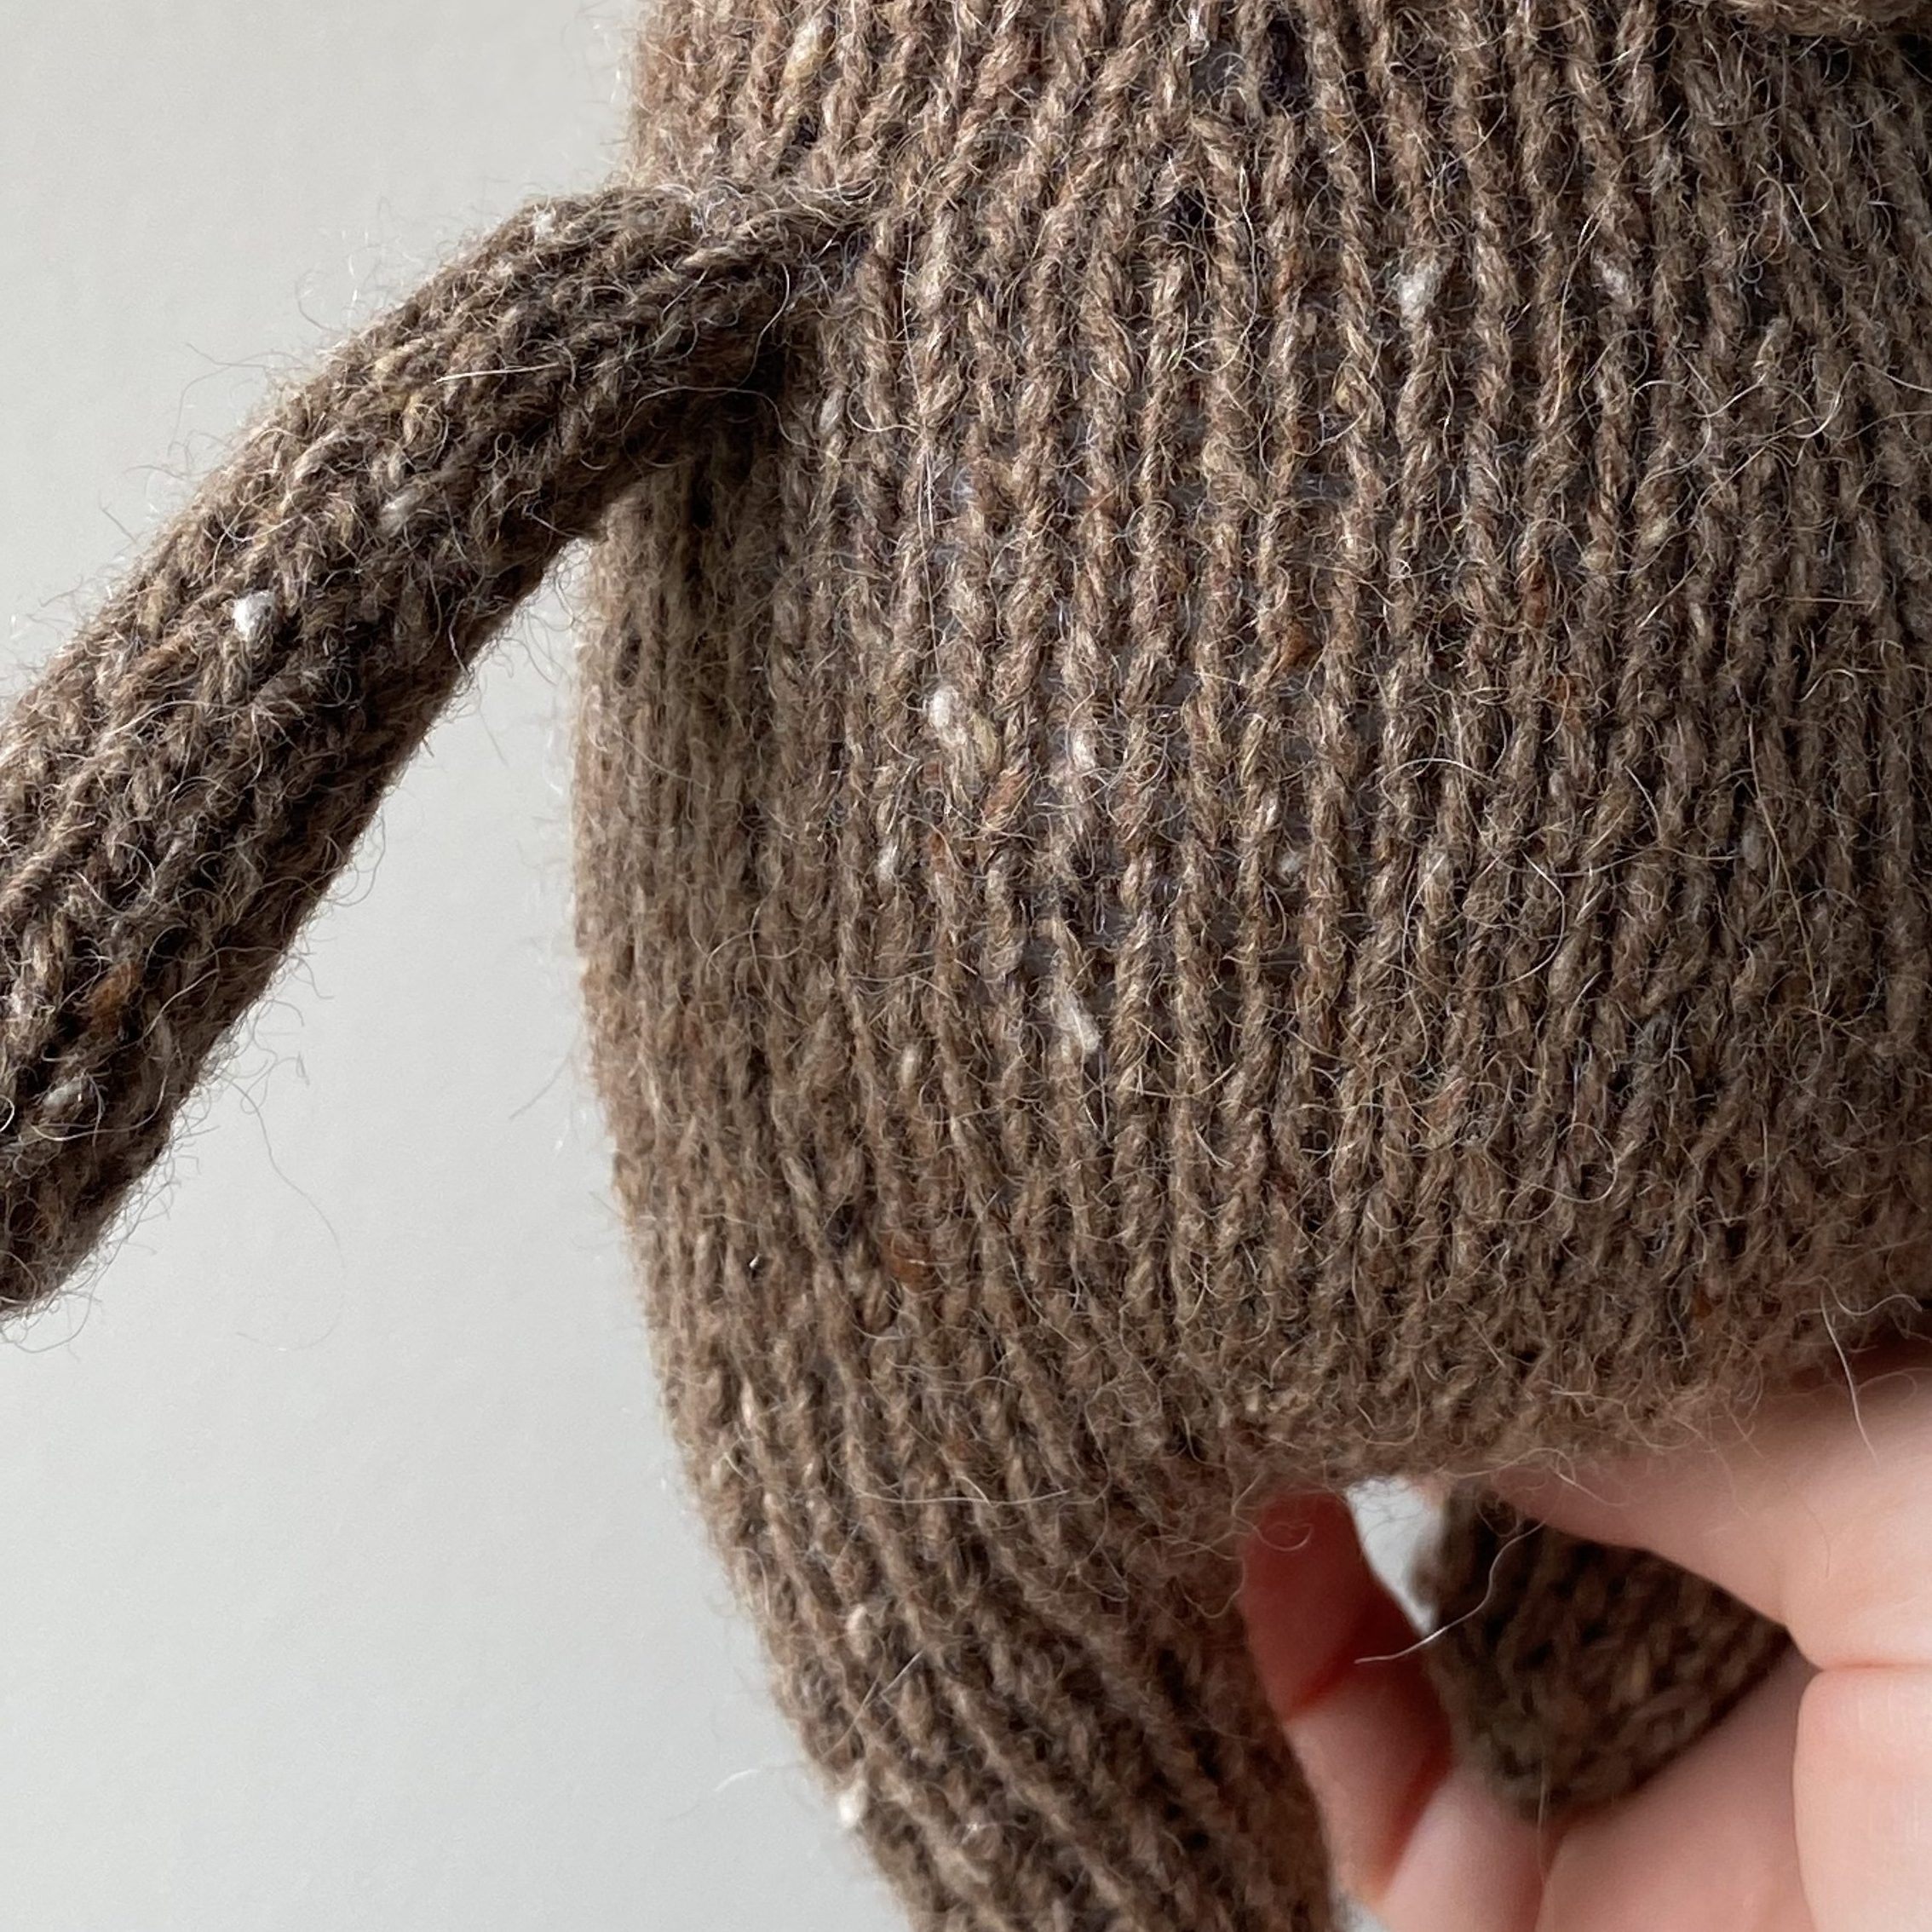
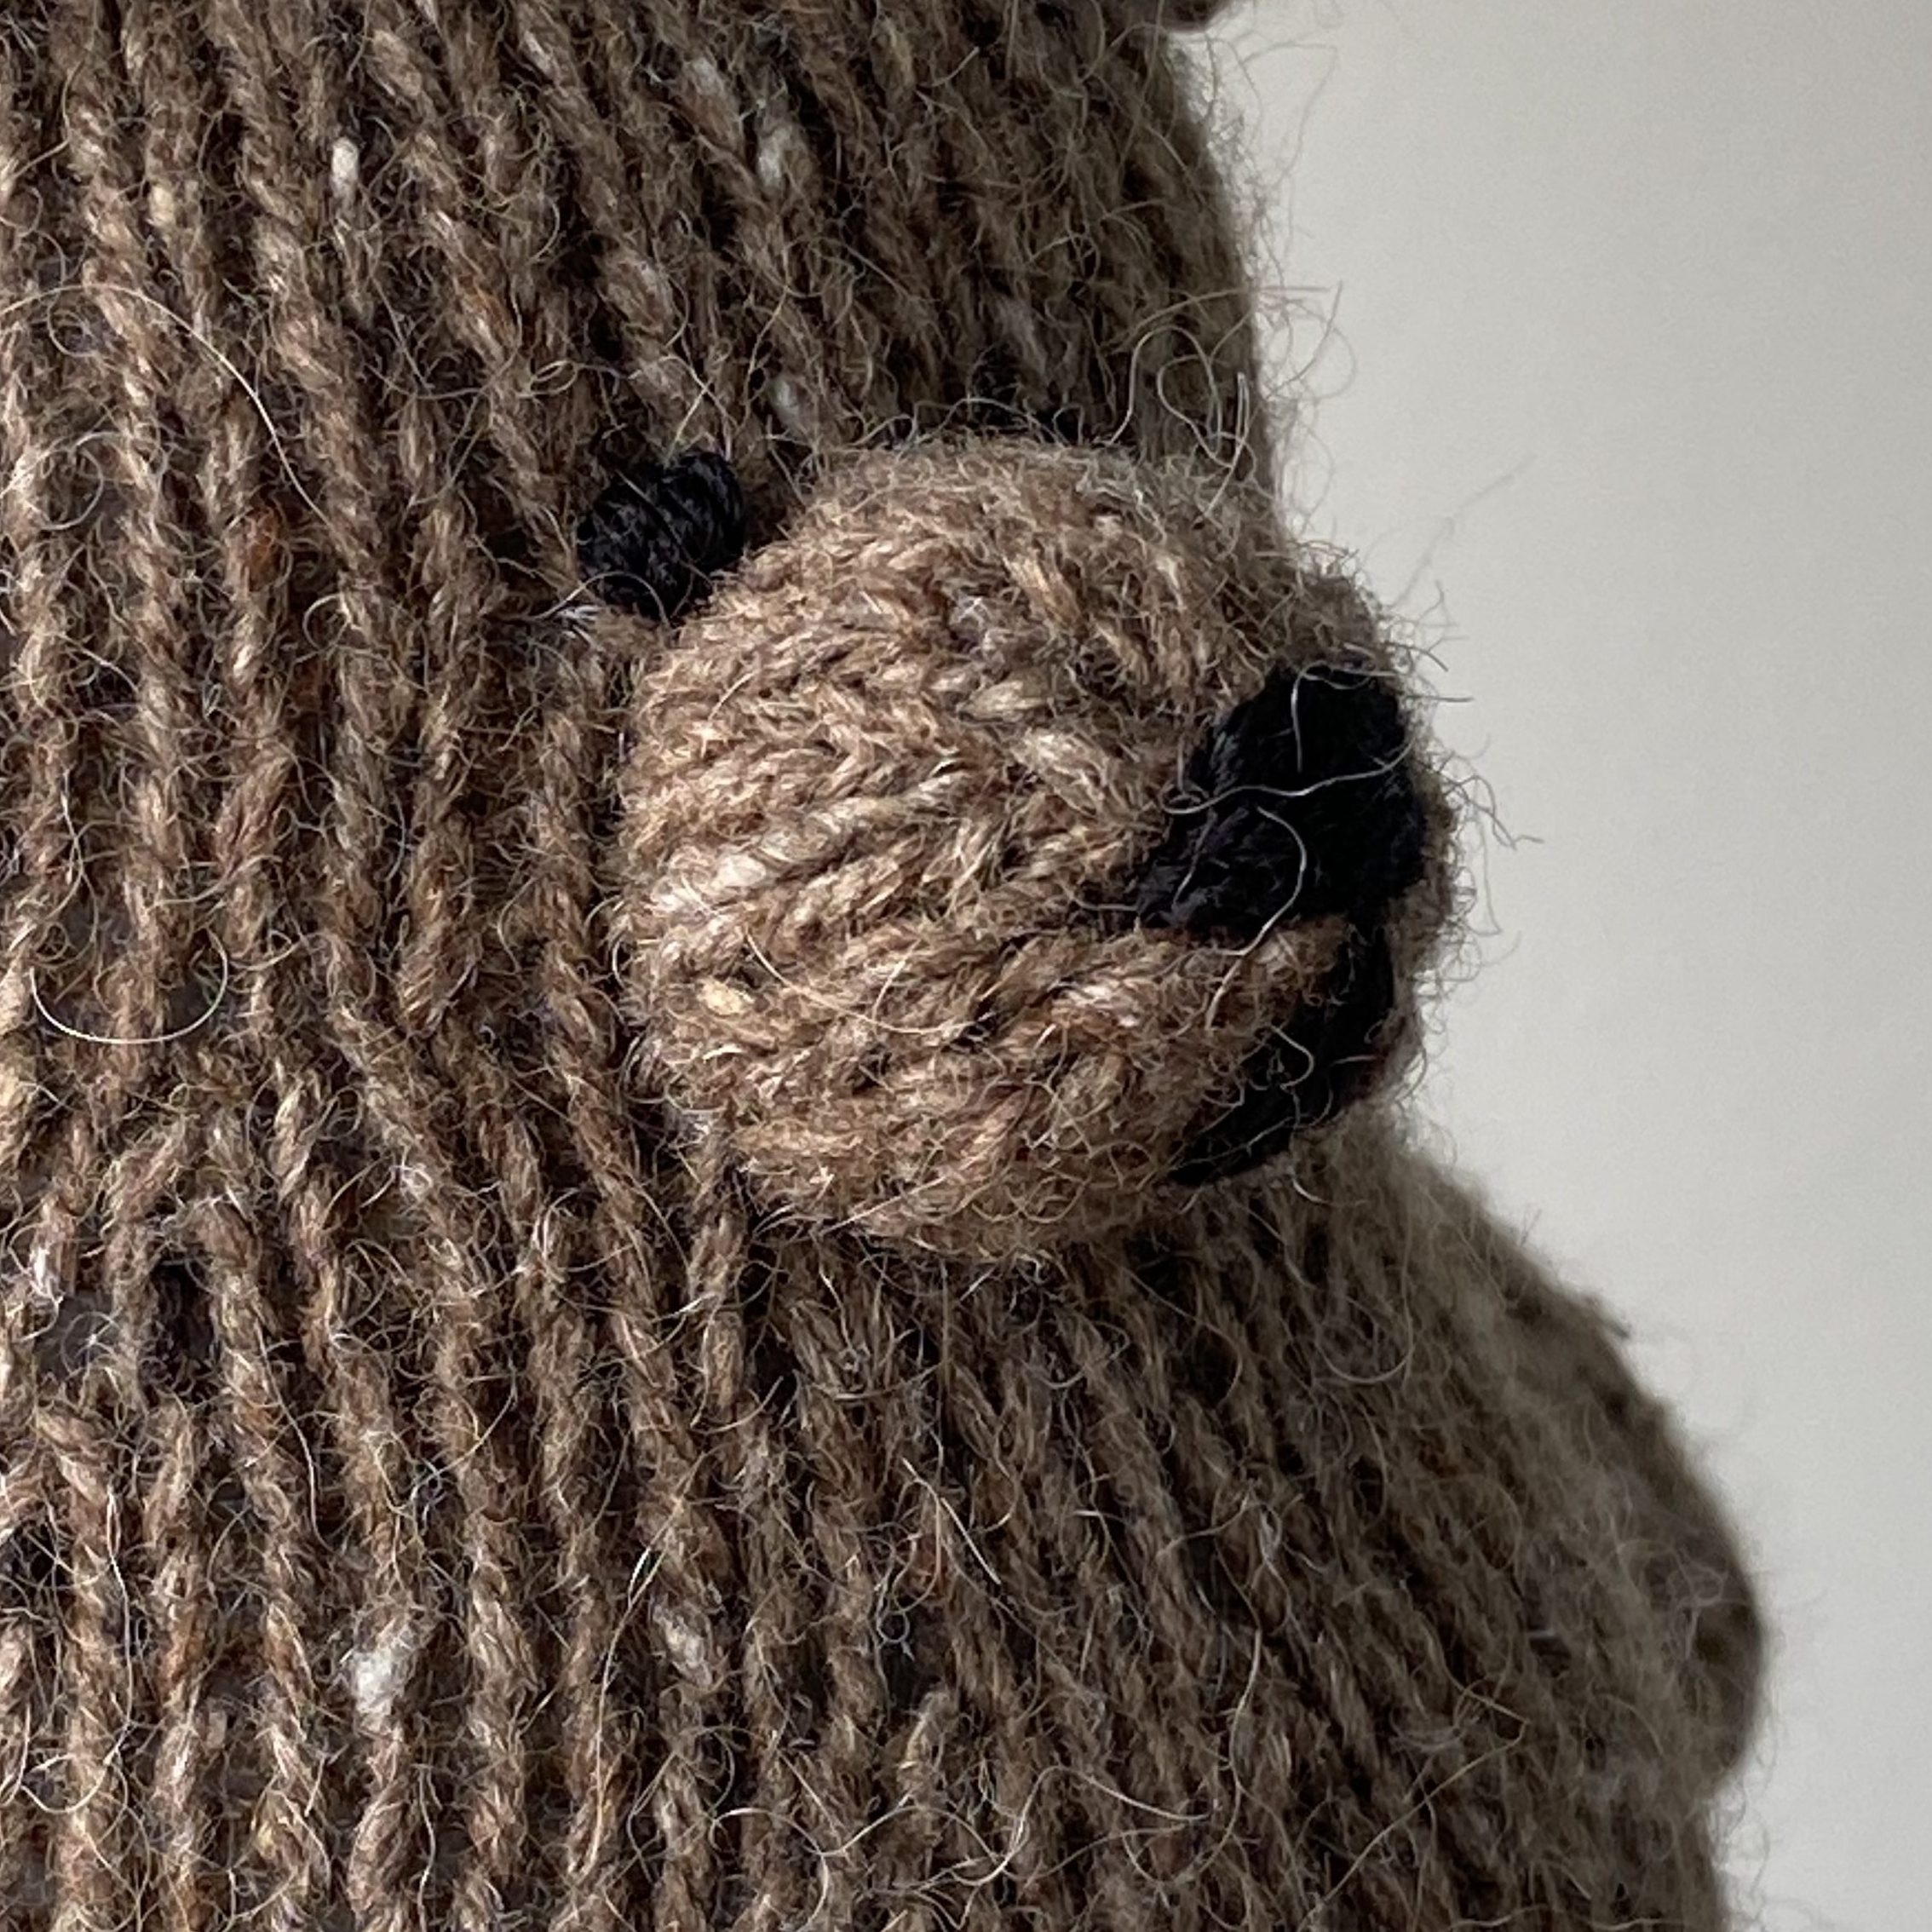
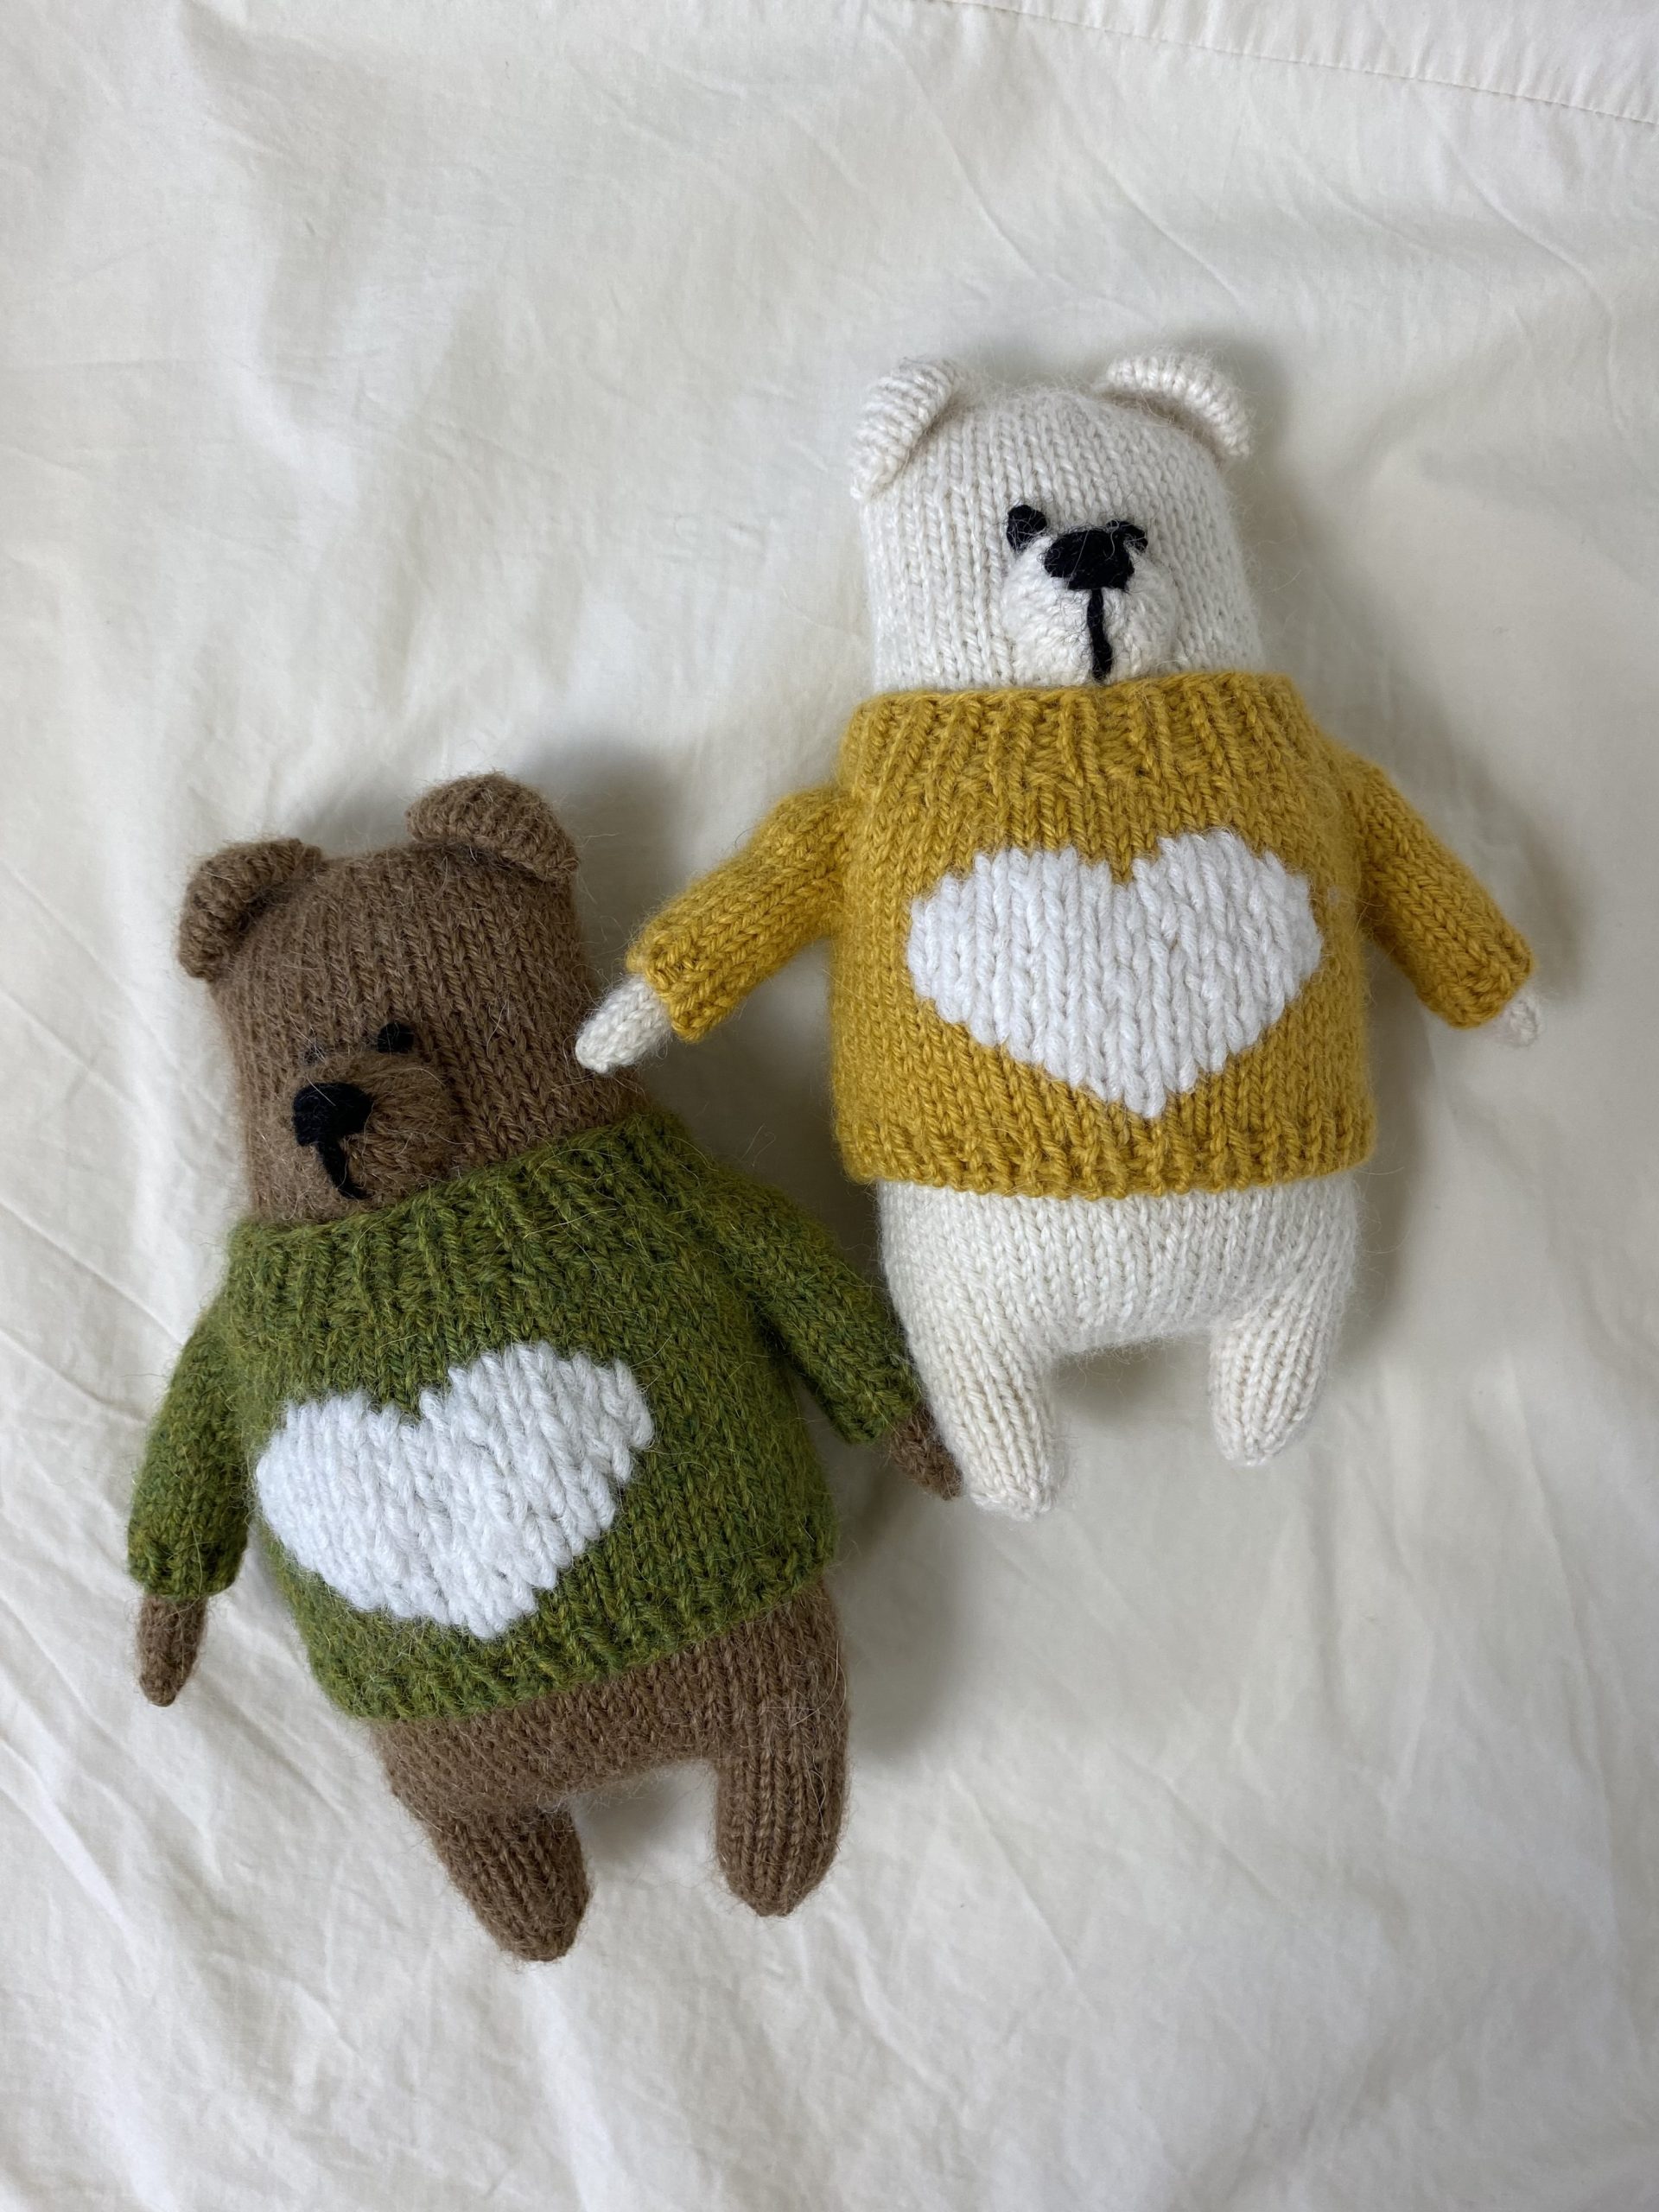
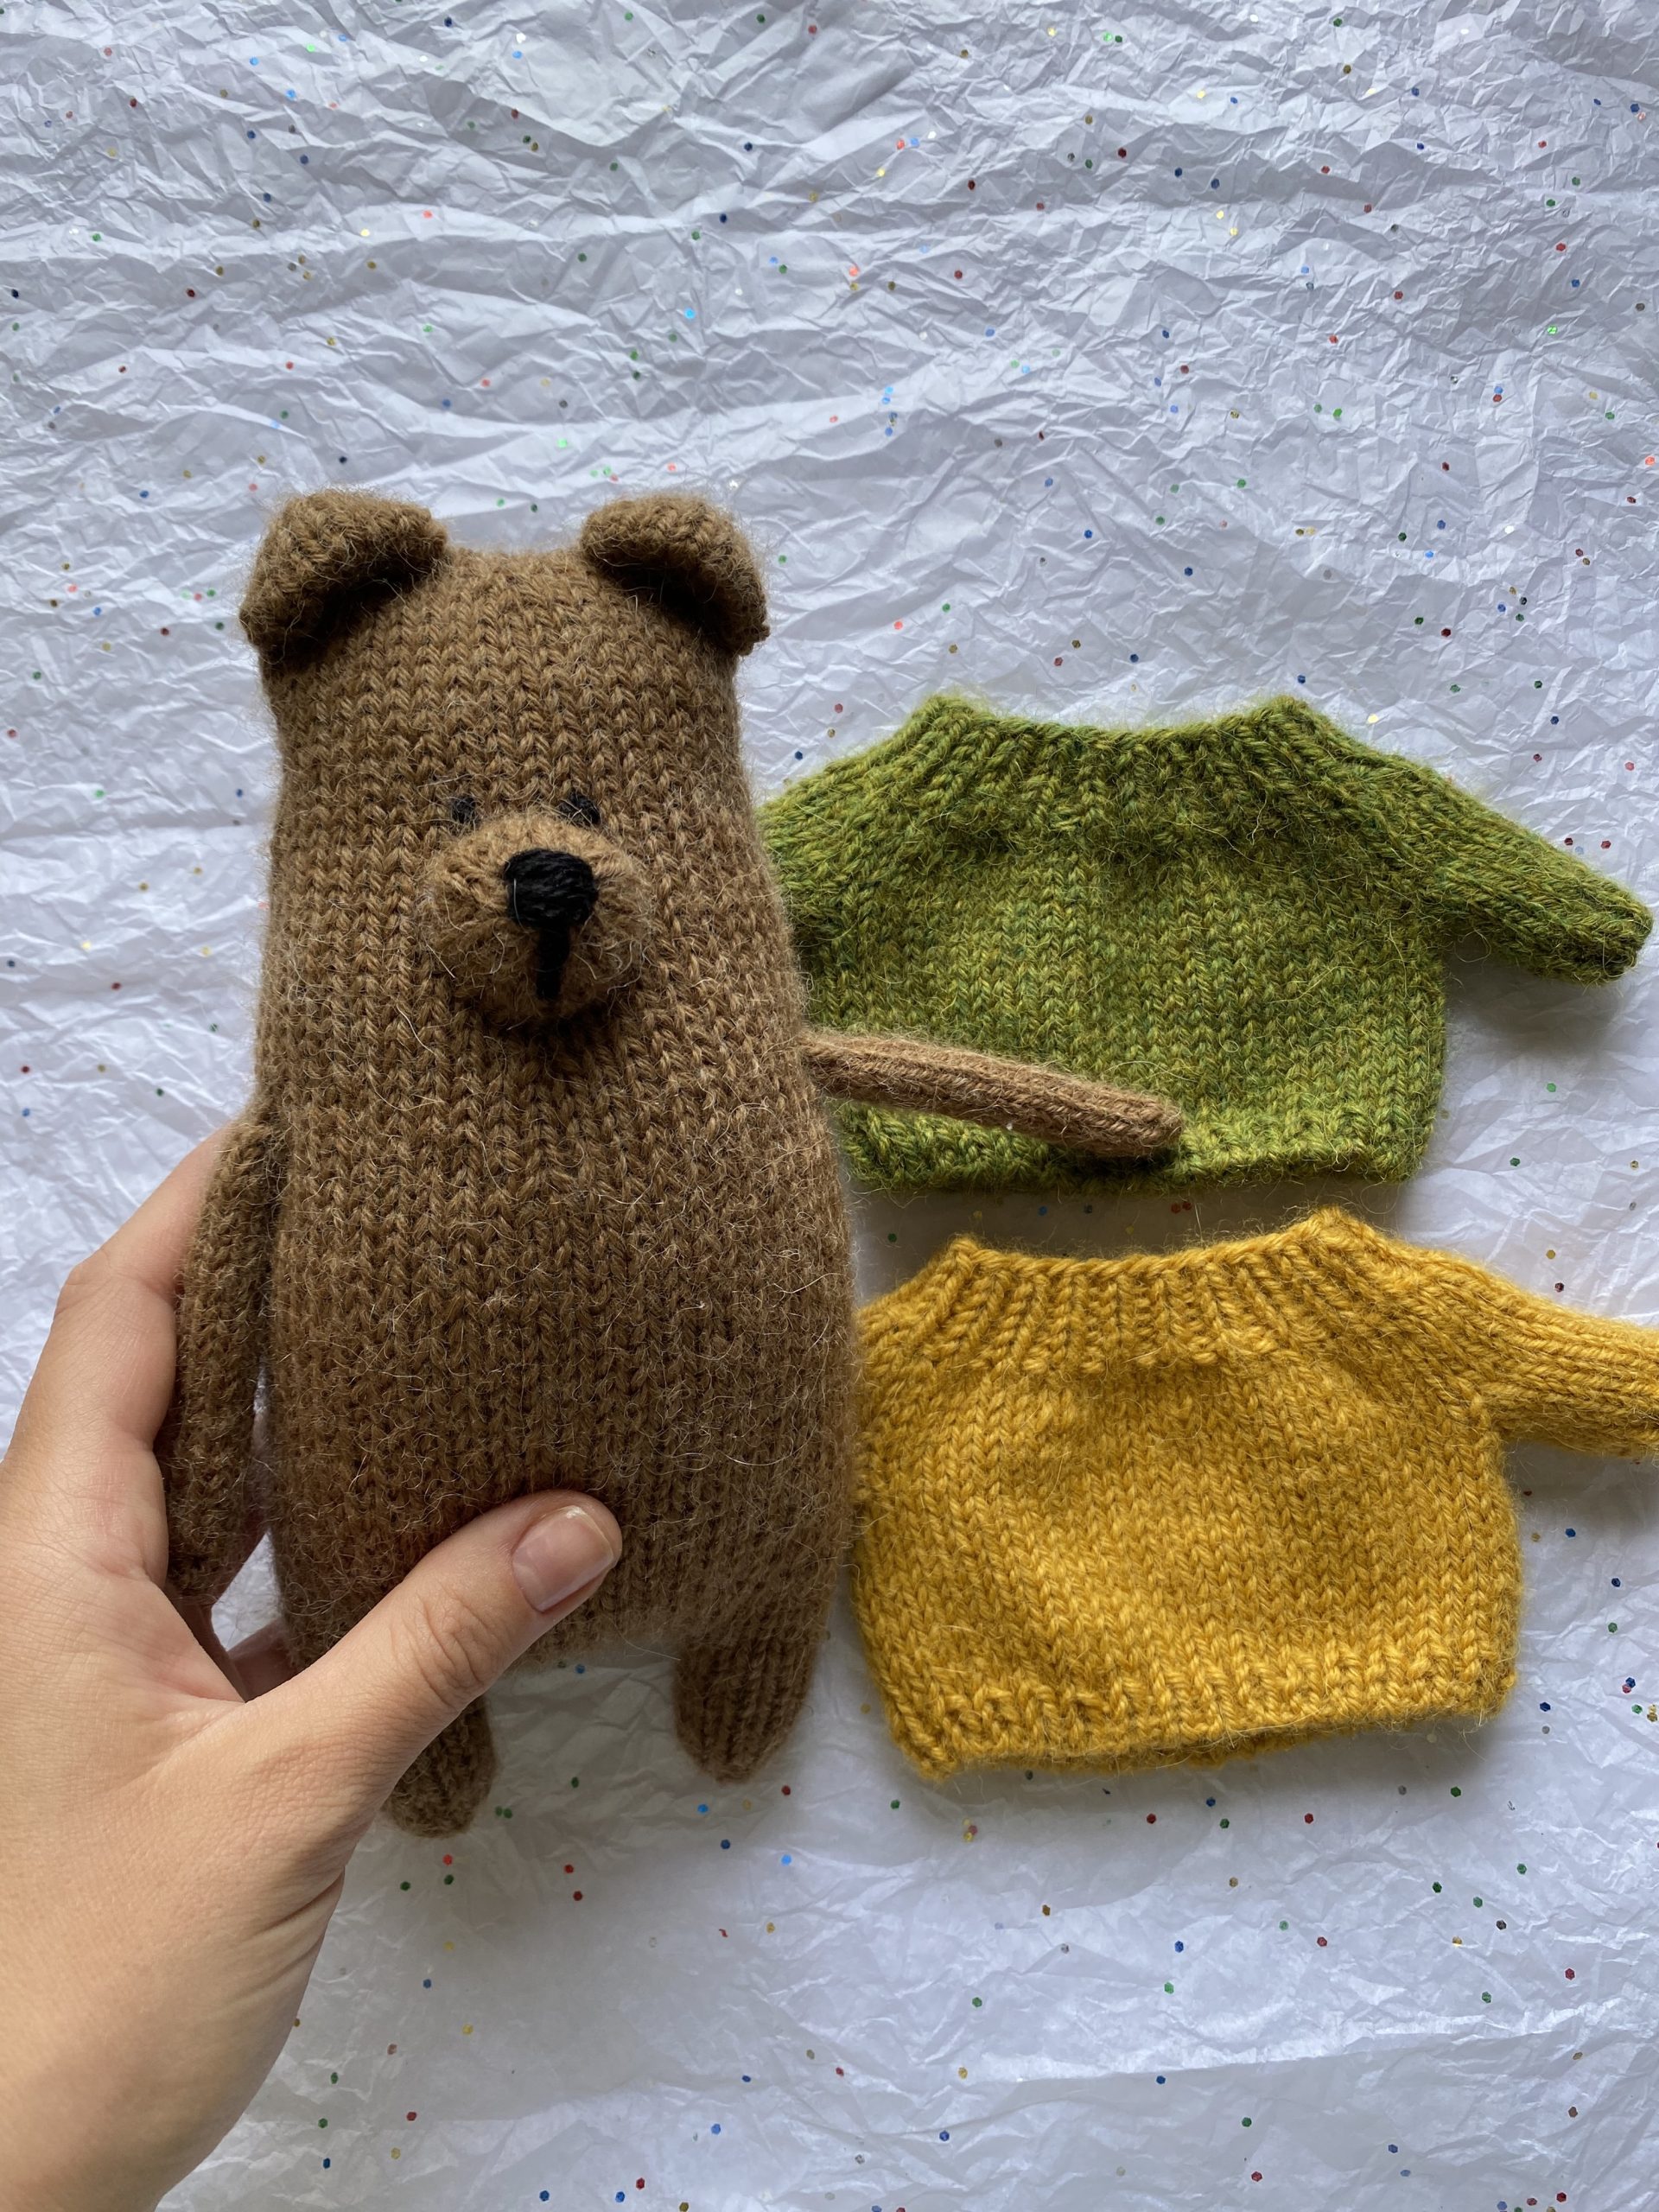
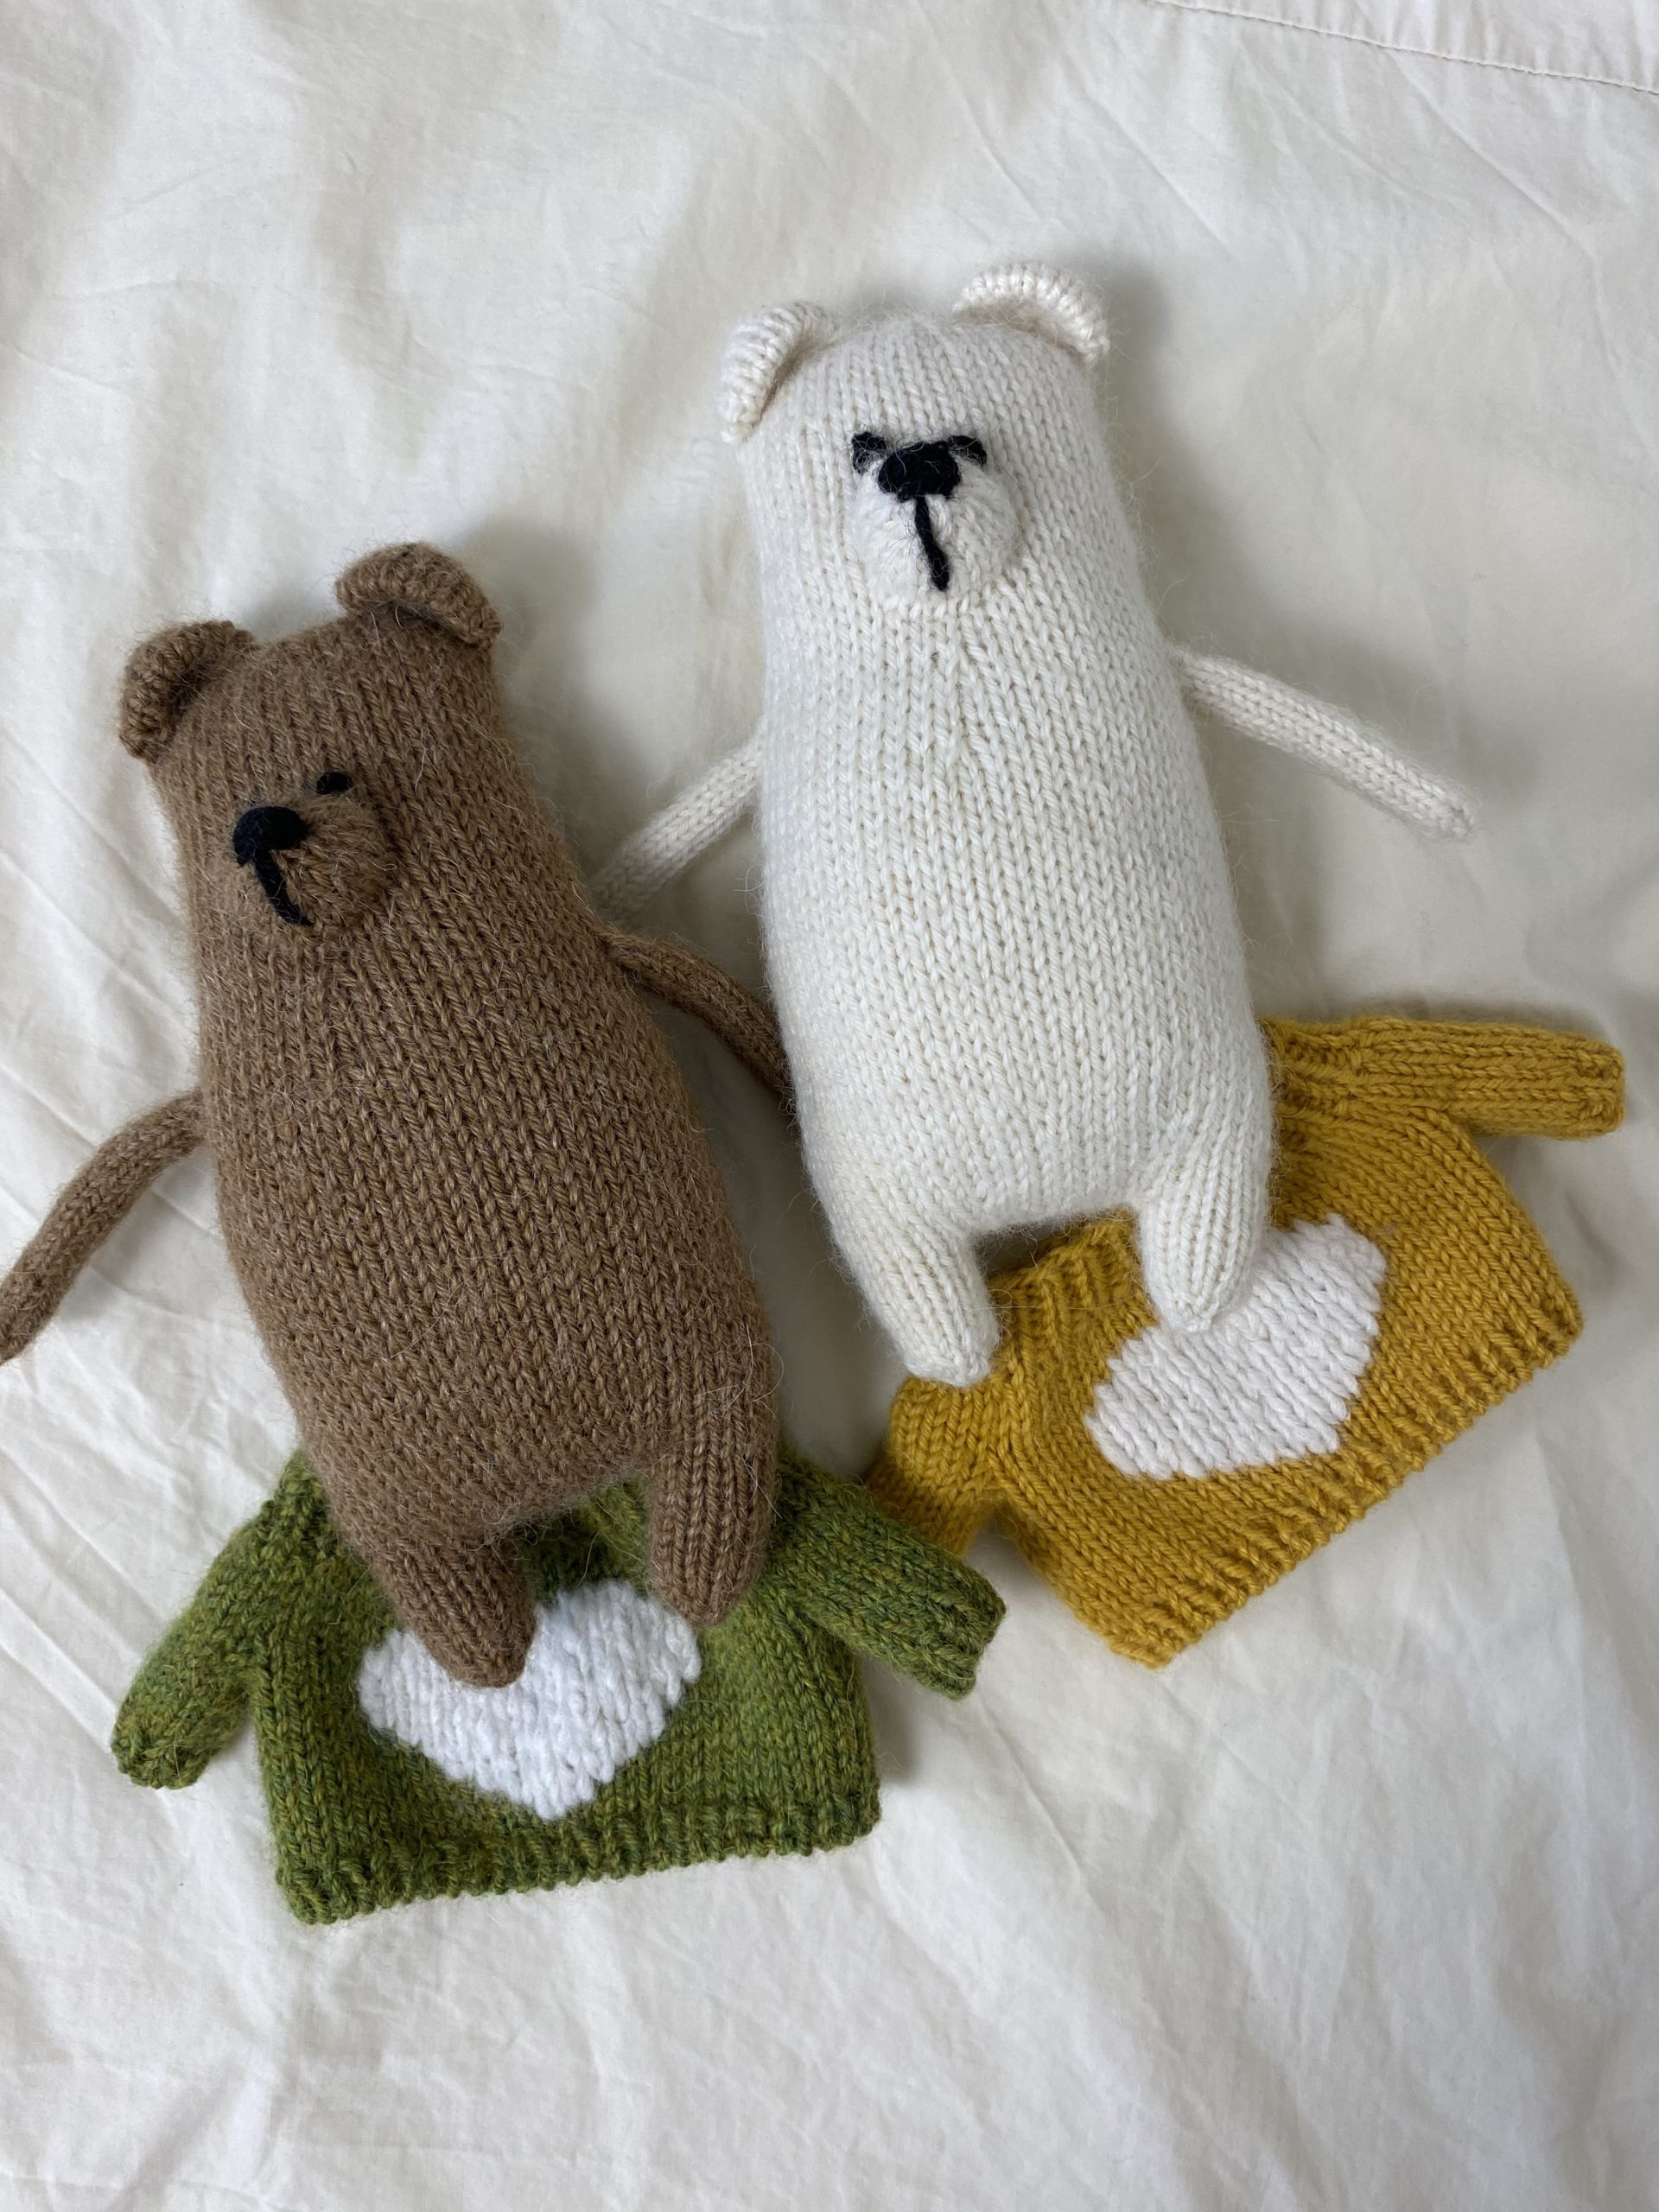
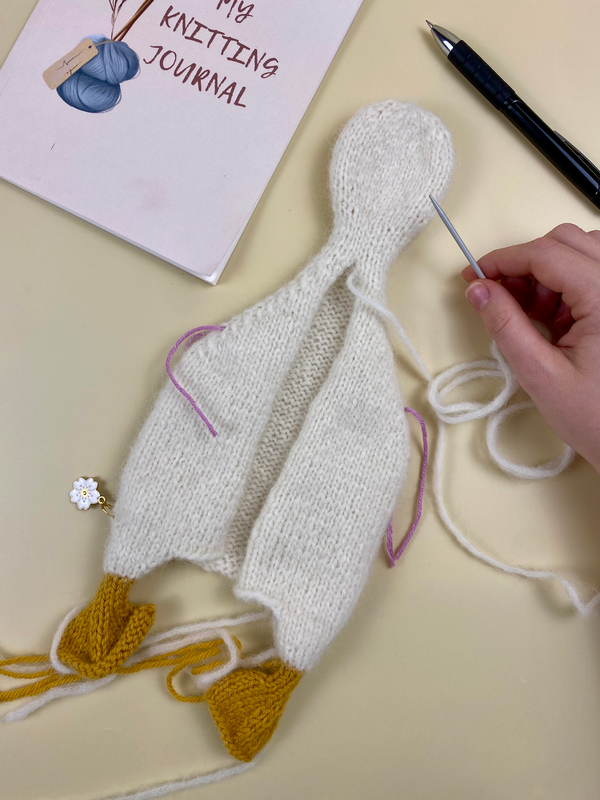
The sweater is worked flat in rows from the top down. The sleeves are also worked flat.
At the end, the sweater is seamed along the back, and the sleeves are seamed as well.
Cast on 48 stitches using your preferred cast-on method (I use the long-tail cast-on).
The knitting begins with a wrong side (WS) row on the WS.
Row1(WS):
p 1, [ p 1, k 1 ] x 23, p 1 – 48 sts
Row2(RS):
k 1, [ p 1, k 1 ] x 23, k 1 – 48 sts
Repeat rows 1 and 2 1 more time. The next row is 5.
Row 5 (WS):
p 1, [ p 1, k 1 ] x 23, p 1 – 48 sts
Row 6 (RS):
k 1, [ k 2, M1L ] x 23, k 1 – 71 sts
Rows7-11:
71 stitches in stockinette
Row 12 (RS):
k 14, place the next 10 stitches on a stitch holder or scrap yarn, cast on 2 new stitches, k 24, place the next 10 stitches on a stitch holder or scrap yarn, cast on 2 new stitches, k 13 – 55 stitches
Rows 13-25:
55 stitches in stockinette
Row 26 (RS):
k 1, ssk, p 1, [ k 1, p 1 ] x 25, k 1 – 54 sts
Row 27 (WS):
p 1, [ k 1, p 1 ] x 26, p 1 – 54 sts
Row 28 (RS):
k 1, [ k 1, p 1 ] x 26, k 1 – 54 sts
Row29(WS):
p 1, [ k 1, p 1 ] x 26, p 1 – 54 sts
Bind off 54 stitches using your preferred bind-off method.
Break the yarn, leaving a 30-35 cm tail.
Proceed to knitting the sleeves.
Sleeves
Place the 10 stitches for one sleeve onto the needles. Pick up and knit 3 stitches along the underarm cast-on edge of the body, knit 10 stitches, then pick up and knit 3 stitches along the underarm cast-on edge again.
Rows 2-10:
16 stitches in stockinette
Row11(RS):
k 1, [ k 1, p 1 ] x 7, k 1 – 16 sts
Row 12 (WS):
p 1, [ k 1, p 1 ] x 7, p 1 – 16 sts
Bind off 16 stitches using your preferred bind-off method.
Break the yarn, leaving a 20 cm tail.
Weave in the short tails inside the toy; leave the long tails for further seaming.
You should be left with 3 working yarn tails.
Sew the sweater along the back using mattress stitch.
Now move on to seaming the sleeves. Sew them using the mattress stitch.
The sweater is finished. All that’s left is to weave in the remaining ends and give it a wash. You can decorate the sweater however you like — for example, by adding some embroidery.
This pattern is for personal, non-commercial use only. The pattern may not be copied, resold or redistributed in any way. Share your work and tag me on Instagram/Youtube: maylily knitting Happy knitting!
Circular needles 3.5 mm / 40, 60 cm or double-pointed needles or the required needle size to obtain gauge, circular needles 3.0 mm / 40, 60 cm or double-pointed needles
Yarn:
50 g Drops Cotton Merino (50 g = 110 m 50% Wool, 50% Cotton)
Gauge:
23 sts x 47 rows = 10 x 10 cm in garter stitch on 3.5 mm needles after blocking
Notions: Stitch markers, stitch holder or scrap yarn, tapestry needle
Cast on 66 sts on 3.0 mm needles using your preferred method (I use long-tail cast on).
Rows 1–3:
Edge stitch, knit to end.
Change to 3.5 mm needles. Work in garter stitch (knit every row) until piece measures 12 cm from cast-on edge.
Divide sts into three equal sections of 22 sts each and place markers between sections.
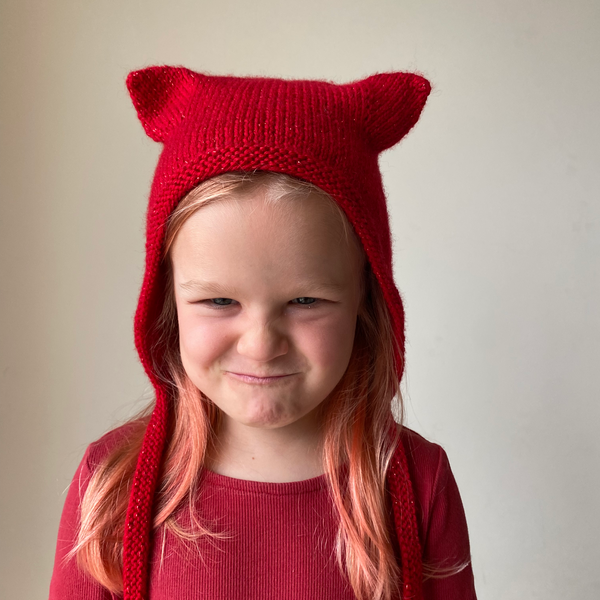
Short Row Shaping (Back of Head)
Work short rows on center and side sections to shape the back of the head. Always begin with the edge stitch.
Row1(RS):
edge st, k22 (side section), k21 (center section), SSP (1 center st and 1 side st), turn
Row2(WS):
edge st, k20, K2TOG (1 center st and 1 side st), turn
Row3(RS):
edge st, K2TOG, k16, SSK, SSP (1 center st and 1 side st), turn
Row4 (WS):
edge st, k18, K2TOG (1 center st and 1 side st), turn
Row5(RS):
edge st, k18, SSP (1 center st and 1 side st), turn
Row6 (WS):
edge st, k18, K2TOG (1 center st and 1 side st), turn
Row7 (RS):
edge st, K2TOG, k14, SSK, SSP (1 center st and 1 side st), turn
Row8(WS):
edge st, k16, K2TOG (1 center st and 1 side st), turn
Row9 (RS):
edge st, k16, SSP (1 center st and 1 side st), turn
Row10 (WS):
edge st, k16, K2TOG (1 center st and 1 side st), turn
Row11 (RS):
edge st, K2TOG, k12, SSK, SSP (1 center st and 1 side st), turn
Row12 (WS):
edge st, k14, K2TOG (1 center st and 1 side st), turn
Row13 (RS):
edge st, k14, SSP (1 center st and 1 side st), turn
Row14 (WS):
edge st, k14, K2TOG (1 center st and 1 side st), turn
Row15 (RS):
edge st, K2TOG, k10, SSK, SSP (1 center st and 1 side st), turn
Row16 (WS):
edge st, k12, K2TOG (1 center st and 1 side st), turn
Row17 (RS):
edge st, k12, SSP (1 center st and 1 side st), turn
Row18 (WS):
edge st, k12, K2TOG (1 center st and 1 side st), turn
Row19 (RS):
edge st, K2TOG, k8, SSK, SSP (1 center st and 1 side st), turn
Row20 (WS):
edge st, k10, K2TOG (1 center st and 1 side st), turn
Row21 (RS):
edge st, k10, SSP (1 center st and 1 side st), turn
Row22 (WS):
edge st, k10, K2TOG (1 center st and 1 side st), turn
Row23 (RS):
edge st, K2TOG, k6, SSK, SSP (1 center st and 1 side st), turn
Row24 (WS):
edge st, k8, K2TOG (1 center st and 1 side st), turn
Row25 (RS):
edge st, k8, SSP (1 center st and 1 side st), turn
Row26 (WS):
edge st, k8, K2TOG (1 center st and 1 side st), turn
Row27 (RS):
edge st, K2TOG, k4, SSK, SSP (1 center st and 1 side st), turn
Row28 (WS):
edge st, k6, K2TOG (1 center st and 1 side st), turn
Row29 (RS):
edge st, k6, SSP (1 center st and 1 side st), turn
Row30 (WS):
edge st, k6, K2TOG (1 center st and 1 side st), turn
Row31 (RS):
edge st, K2TOG, k2, SSK, SSP (1 center st and 1 side st), turn
Row32 (WS):
edge st, k4, K2TOG (1 center st and 1 side st), turn
Row33 (RS):
edge st, k4, SSP (1 center st and 1 side st), turn
Row34 (WS):
edge st, k4, K2TOG (1 center st and 1 side st), turn
Row35 (RS):
edge st, K2TOG, SSK, SSP (1 center st and 1 side st), turn
Row36 (WS):
edge st, k2, K2TOG (1 center st and 1 side st), turn
Row37 (RS):
edge st, k2, SSP (1 center st and 1 side st), turn
Row38 (WS):
edge st, k2, K2TOG (1 center st and 1 side st), turn
Row39 (RS):
edge st, k2, SSP (1 center st and 1 side st), turn
Row40 (WS):
edge st, k2, K2TOG (1 center st and 1 side st), turn
Row41 (RS):
edge st, k2, SSP (1 center st and 1 side st), turn
Row42 (WS):
edge st, k2, K2TOG (1 center st and 1 side st), turn
Row43 (RS):
edge st, k2, SSP (1 center st and 1 side st), turn
Row44 (WS):
edge st, k2, K2TOG (1 center st and 1 side st), turn
Place 4 sts on a holder or scrap yarn. Break yarn.
Hat shaping complete.
Ties
Cast on 4 sts on 3.5 mm needles using your preferred method. Slide sts to right edge of the needle.
Work I-cord: knit all stitches, slide sts to right edge, continue until I-cord measures 20–25 cm (8–10 in).
Attach tie to bonnet securely.
* Pick up 1 stitch. Slide the stitches to the right edge of the needle. Knit 3, ssk. *
Repeat from * to * to the end of the row. Now knit i-cord 20 to 25 cm long.
the height of the toy may vary depending on the yarn used and the number of knitting needles
Needles:
straight needles 3.5 mm (long enough to hold all stitches comfortably) or circular needles 3.5 mm with a long cable for flat knitting or use knitting needles 1-1.5 sizes smaller than recommended for yarn
Materials:
30 g yarn Drops Soft Tweed (50g/130m), black embroidery thread for eyes and nose or another yarn
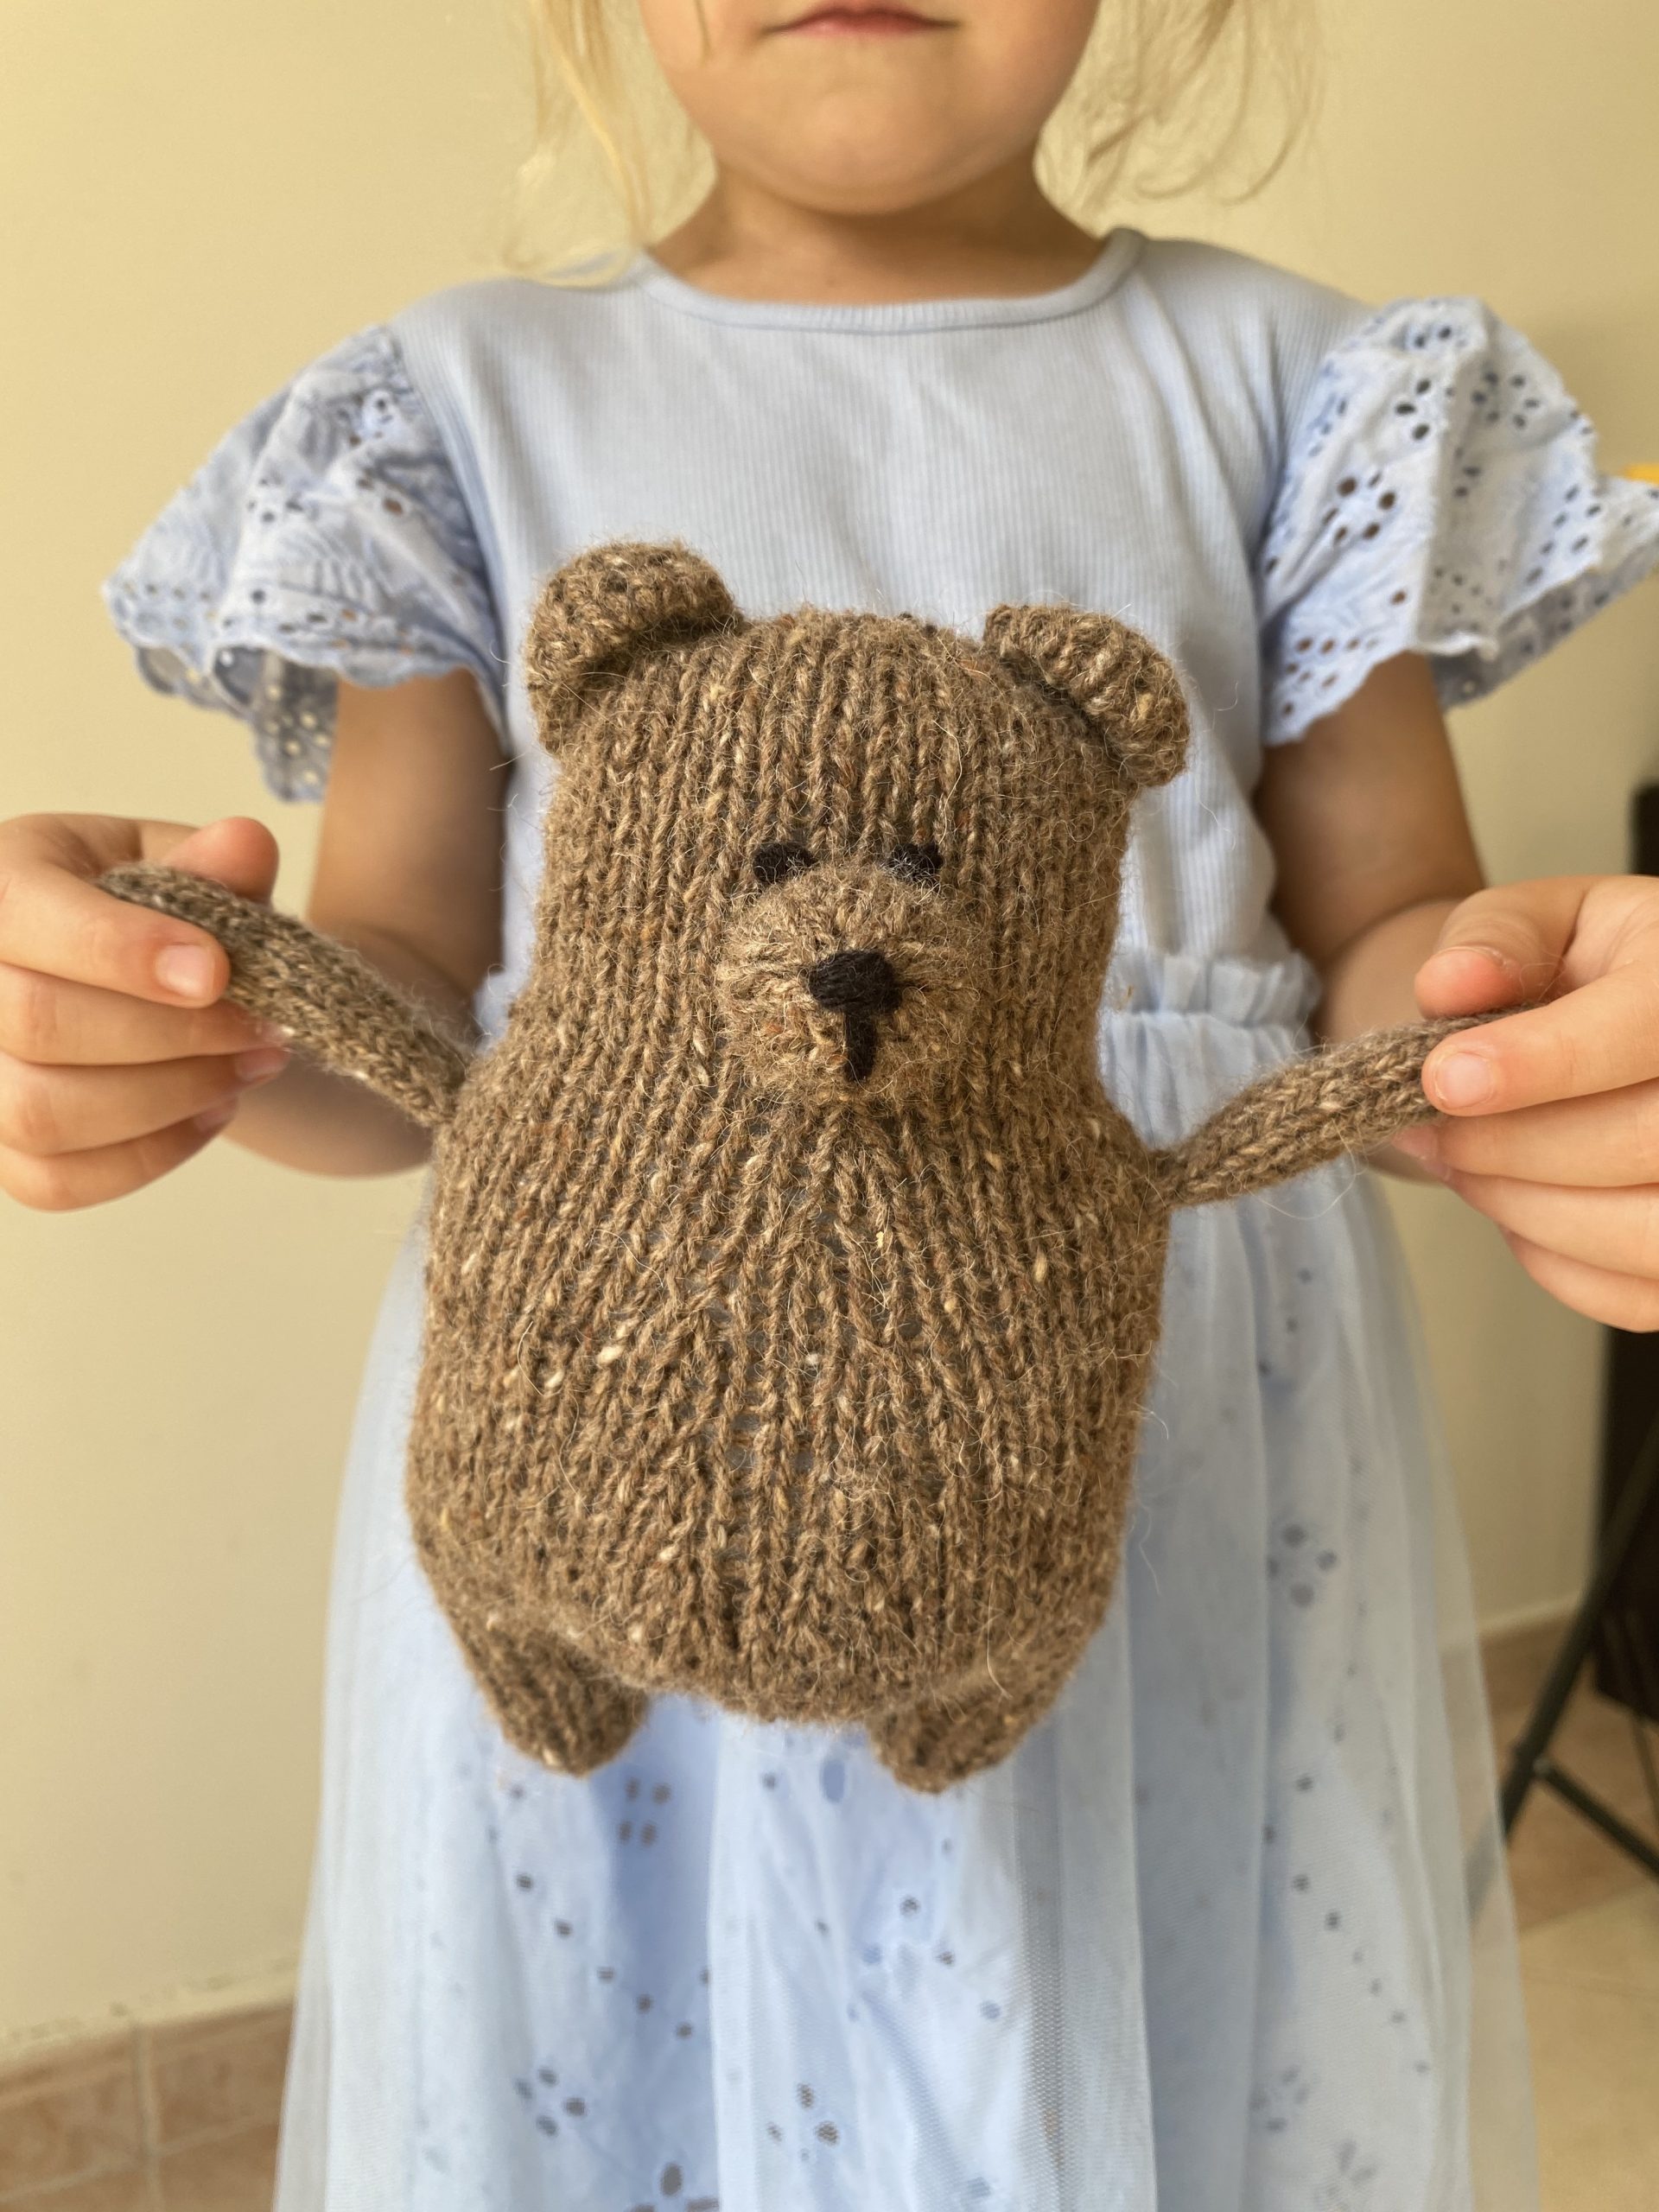
For example: 50g/130m Drops Soft Tweed on 3.50 mm needles produces a toy 17 cm high
The Little Teddy Bear is knitted flat in rows from the top down, in one piece from head to legs. The hands, nose and ears are worked separately and sewn on. Finishing includes seaming all parts with mattress stitch (or whipstitch where specified).
Cast on 32 stitches using your preferred cast-on method (I use the long-tail cast-on). The knitting begins with a wrong side (WS) row on the WS.
Row1(WS):
purl 32 sts The first and last stitches are worked according to the pattern – this applies to all rows throughout the project.
Row 2 (RS):
k 5, M1L, k 8, M1L, k 7, M1L, k 8, M1L, k 4 – 36 sts
Rows 3‑19:
36 sts in stockinette
Row20(RS):
k 5, M1L, k 9, M1L, k 8, M1L, k 9, M1L, k 5 – 40 sts
Rows 21‑23:
40 sts in stockinette
Row 24 (RS):
k 5, M1L, k 10, M1L, k 9, M1L, k 10, M1L, k 6 – 44 sts
Row 25 (WS):
purl 44 sts
Row 26 (RS):
k 44 sts Mark the 11th and 12th stitches, and the 32th and 33th stitches.
Row27(WS):
purl 44 sts
Row28(RS):
k 11, M1L, k 10, M1R, k 2, M1L, k 10, M1L, k 11- 48 sts
Rows 29-31:
48 sts in stockinette
Row 32 (RS):
k 23, M1R, k 2, M1L, k 23 – 50 sts
Rows 33-35:
50 sts in stockinette
Row 36 (RS):
k 24, M1R, k 2, M1L, k 24 – 52 sts
Row 37 (WS):
purl 52 sts
Row 38 (RS):
k 25, M1R, k 2, M1L, k 25 – 54 sts
Rows 39‑43:
54 sts in stockinette
Row 44 (RS):
k 4, ssk, k 12, k2tog, k 14, ssk, k 12, k2tog, k 4 – 50 sts
Rows 45‑47:
50 sts in stockinette
Row 48 (RS):
k 18, [ ssk, k 2 ] x 2, k2tog, k 2, k2tog, k 18 – 46 sts
Row49(WS):
purl 46 sts
Row 50 (RS):
k 17, [ ssk] x 3, [ k2tog ]x 3, k 17 – 40 sts
Row 51 (WS):
purl 40 sts
Row 52 (WS):
bind off 4 stitches, k 13 stitches, bind off 6 stitches, k 13 stitches, bind off 4 stitches
Cut the yarn, leaving a 30-35 cm tail. Next, continue with the legs.
Place the remaining 13 stitches on a holder, scrap yarn, or another needle. Join a new yarn. Start knitting from the right side.
Rows 1-10:
13 sts in stockinette
Row 11 (RS):
k 1, [ ssk, k 1] x 4 – 9 sts
Row 12 (WS):
purl 9 sts
Break the yarn, leaving a 10–15 cm tail. Thread the yarn through the remaining 9 stitches, pull tight to close, secure, and weave in the end. Repeat the process for the second leg.
Join a new yarn and work the second leg the same way as the first, starting from row 1. Break the yarn, leaving a 30-35 cm tail. Transfer 9 stitches onto the yarn using a yarn needle and pull tight.
Sewing along the back
Weave in the short tails inside the toy; leave the long tails for further seaming. You should be left with 2 working yarn tails. Sew the body along the back using mattress stitch.
Seaming the bottom
Now move on to seaming the bottom. Seam from one leg to the other.
Sew the leg with mattress stitch, sew the center section (between the legs) using whipstitch, then sew the second leg with mattress stitch.
Stuff the bear and move on to sewing the upper part with a new yarn.
Sewing the upper part
Find 2 central stitches along which increases were made. Mark the middle.
Count 7 stitches to the right and insert the needle into the seventh stitch. On the other side: Skip 1 stitch, and insert the needle into the next stitch. (Watch here this moment.)
Sew the upper section using whipstitch.
Leave in tails inside the toy.
Hands
Cast on 6 stitches using your preferred cast-on method, leaving a 25-30 cm tail (this will be used later to sew the hand). I use long tail cast-on method. The knitting begins with a wrong side (WS) row on the WS.
Row 1 (WS):
purl 6 sts
Row 2 (RS):
k 1, [ k 1, M1L ] x 4, k 1-10 sts
Rows 3‑21:
10 sts in stockinette
Transfer any 5 stitches to a separate needle. Fold the hand in half and k together the stitches from both needles and bind off.
Pull the lower end of the yarn through 6 stitches. Sew the hand using mattress stitch. Stuff the hand as sewing.
Knit the second hand the same way. Sew the hands to the marked stitches using whipstitch.
Ears
Cast on 8 stitches using your preferred cast-on method, leaving a yarn tail of about 15–20 cm. I use long tail cast-on method. The knitting begins with a wrong side (WS) row on the WS.
Rows1‑10:
8 sts in stockinette
You should get a square shape (adjust the number of rows if necessary). Break the yarn, leaving a 15–20 cm tail. Thread the yarn through the 8 stitches, pull tight, and secure.
Pull the yarn tail from the cast-on edge through the 8 stitches, pull tight, and secure.
Then tie the two yarn tails together — this will form a semicircle. Knit the second ear the same way.Sew them on using any method you prefer.
Nose
Cast on 20 stitches using your preferred cast-on method (I use the long-tail cast-on). The knitting begins with a wrong side (WS) row on the WS.
Rows 1-5:
20 sts in stockinette
Row6(RS):
k 1, [ k 1, k2tog, k2tog, k 1 ] x 3, k 1 – 14 sts
Row7(WS):
p 1, [ p2tog ] x 6, p 1 – 8 sts
Break the yarn, leaving a 20-25 cm tail. Pull the yarn through 8 stitches. Sew the nose using mattress stitch. Stuff the nose and sew to the head using whipstitch. Embroider the nose and eyes with black thread.
Abbreviations
k
knit
p
purl
stockinette
stockinette stitches are made when you knit on the right side and purl on the wrong side
k2tog
knit 2 together (right-leaning decrease);
ssk
slip, slip, knit (left-leaning decrease);
p2tog
purl 2 together (right-leaning decrease);
ssp
slip, slip, purl (left-leaning decrease);
M1L
make 1 left (increase leaning to the left);
M1R
make 1 right (increase leaning to the right);
st(s)
stitch(es)
RS
right side
WS
wrong side
edge st
slip the first stitch of the row purlwise with yarn in front
Cast on 46 + 1 stitch using your preferred cast‑on method.
Join to work in the round.
Rounds1‑6:
[k1, p1] × 23 – 46 sts
Round7:
(k2, M1L) × 23 – 69 sts
Rounds8‑12:
knit all 69 sts
Round 13: knit 4 sts, place next 8 sts on stitch holder (sleeve), cast on 2 new sts, knit 26 sts (front), place next 8 sts on stitch holder (sleeve), cast on 2 new sts, knit 24 sts (back)
Rounds14‑24:
Knit all 57 sts
Round25:
ssk, p1, [k1, p1] × 27 – 56 sts
Rounds26‑27:
[k1, p1] × 28 – 56 sts
Bind off 56 sts.
Sleeves (make 2)
Return 8 held sts to the needles.
Pick up and knit 6 sts at the underarm (14 sts total).
Place marker for beginning of round.
Rounds2‑10:
knit all 14 sts.
Rounds11‑13:
[k1, p1] × 7 – 14 sts
Bind off all sts.
Close small holes at underarm while weaving in ends.
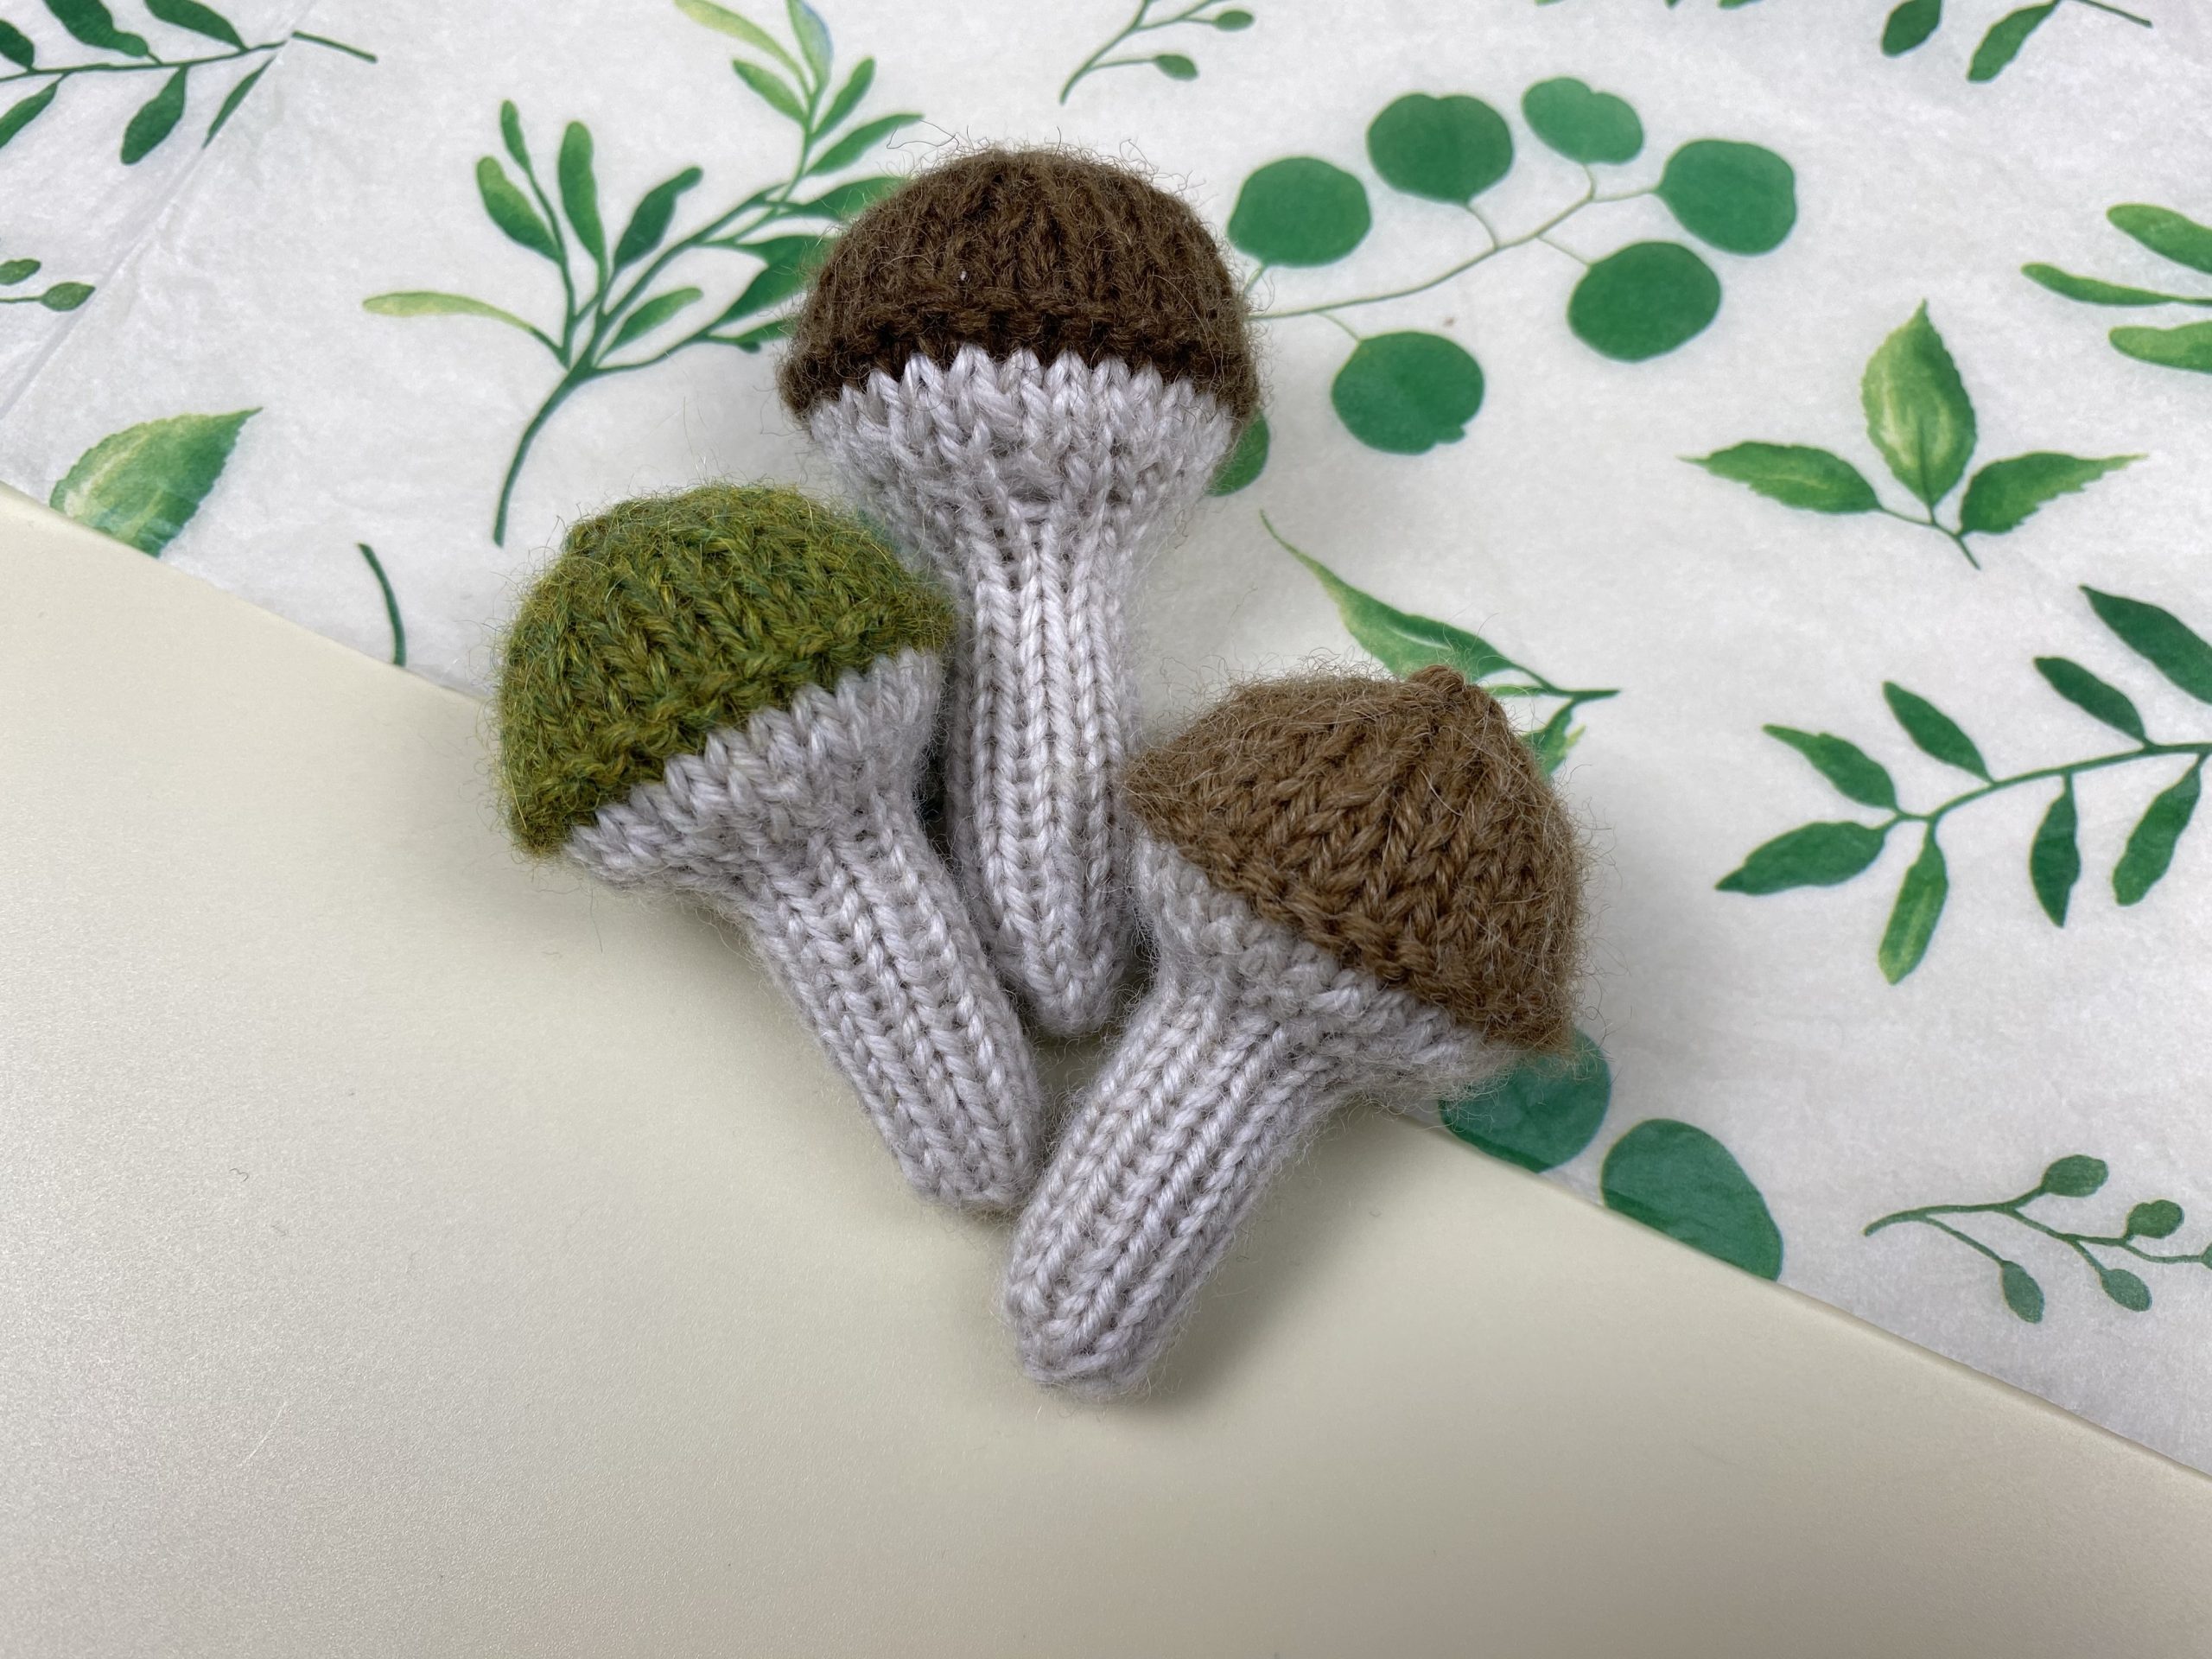
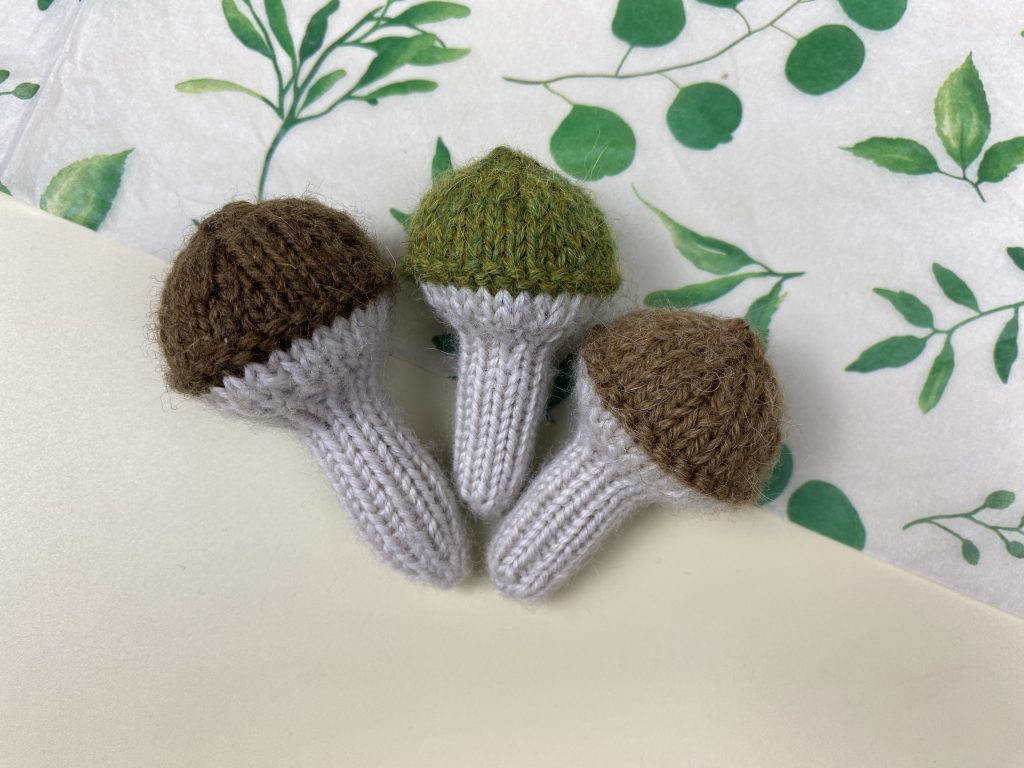
Autumn is the perfect time for cozy projects, and these little knitted mushrooms make a charming decoration or gift. Even beginners can follow this pattern, as it’s worked in simple rounds with easy increases and decreases.
Needles & Materials
Before you start, gather your supplies:
• Needles: 2.5–3 mm
• Yarn: leftover yarn in two colors
• Gauge: not essential
• Construction: knit in the round using Magic Loop
• Difficulty: Beginner-friendly
Abbreviations
Here are the abbreviations used in this pattern:
k
knit
p
purl
k2tog
knit 2 stitches together
M1L
make 1 left increase
sts
stitches
Stem
We’ll start with the stem, which is a simple cylinder shape.
Step 1:
Cast on 5 sts using any cast-on method. Join to work in the round.
Round 1:
k5
Round 2:
(k1, M1L) ×5 – 10 sts
Round 3–17:
k10
Finishing the stem:
Break yarn, pull tail through 5 remaining sts, tighten and weave in.
Stuff the stem lightly.
Cap Increases
Now we’ll start the cap, beginning with gradual increases to give it a rounded shape. Attach the cap color.
Attach cap color.
Round 18:
(k1, M1L) ×10 – 20 sts
Round 19:
k20
Round 20:
(k2, M1L) ×10 – 30 sts
Round 21:
k30
Round 22:
k30
Round 23:
p30
These rounds form the wide, round shape of the mushroom cap.
Cap Body
Maintain the width of the cap for a few rounds:
Round 24–26:
k30
This gives the cap a full, natural look before we begin decreasing.
Cap Decreases
To finish the cap, we’ll decrease stitches gradually to create a smooth top.
Round 27:
(k2tog, k3) ×6 – 24 sts
Round 28:
k24
Round 29:
(k1, k2tog, k1) ×6 – 18 sts
Round 30:
k18
Round 31:
(k2tog, k1) ×6 – 12 sts
Round 32:
(k2tog) ×6 – 6 sts
Break yarn, thread tail through 6 sts, tighten to close, weave in.
Stuff before closing
Your cozy autumn mushroom is now complete! You can make several in different colors and sizes to create a charming fall display. These mushrooms also make adorable handmade gifts or seasonal decorations.
Size: the height of the toy may vary depending on the yarn used and the number of knitting needles
Needles: use knitting needles 1-1.5 sizes smaller than recommended for yarn
Materials: 50 g yarn
For example
Drops Soft Tweed 50% Wool, 25% Alpaca, 25% Viscose 50g/130 m on 3.5 mm needles produces a toy 18 cm high.
Pattern + Video
Hands (Paws ? 😀) Cast on 4 sts on needles with your preferred cast-on method. I use long tail cast-on method. Join your work in the round.
Round 1:
knit 4 sts
Round 2:
[ k 1, M1L ] x 4
Round 3‑20:
knit 8 sts
Pull the lower end of the yarn through 4 stitches, pull and fasten the yarn, hide inside hand. Break the yarn, place the 8 sts on stitch holder or length of leftover yarn. Stuff the hand a little. Knit the second hand similarly to the first.
Legs
Left leg Cast on 6 sts on needles with your preferred cast-on method. I use long tail cast-on method. Join your work in the round.
Round 1:
knit 6 sts
Round 2:
[ k 1, M1L ] x 6
Round 3‑9:
knit 12 sts
Pull the lower end of the yarn through 6 stitches, pull and fasten the yarn, hide inside leg. Break the yarn 20 cm, place the 12 sts on stitch holder or length of leftover yarn.
Right leg Knit the right leg similarly to the left, but don’t break the yarn. Let’s move on to knitting the body.
Body
Round 1:
knit 6 sts right leg, cast on 6 sts, knit 12 sts left leg, cast on 6 sts, knit 6 sts right leg
Sew 12 sts between the legs with a Kitchener stitch with the thread 20 cm long.
Round 14:
k12, k2togL, k2, k2togR, k34
Round 15:
knit 50 sts
Round 16:
k11, k2togL, k2, k2togR, k33
Round 17-18:
knit 48 sts
Round 19:
k10, k2togL, k2, k2togR, k32
Round 20-22:
knit 46 sts
Round 23:
k2togR, k7, k2togL, k2, k2togR, k9, k2togR, k20
Round 24:
knit 42 sts
Round 25:
[ knit together 2 sts hand and 1 st body ] x 2, k17, [ knit together 2 sts hand and 1 st body ] x 4, k17, [ knit together 2 sts hand and 1 st body ] x 2
Round 26:
knit 42 sts
Stuff the bear.
Round 27:
[ k9, k2togR, k8, k2togR ] x 2
Round 28–30:
knit 38 sts
Round 31:
[ k8, k2togR, k7, k2togR ] x 2
Round 32–48:
knit 34 sts
Round 49:
[ k7, k2togR, k6, k2togR ] x 2
Round 50:
knit 30 sts
Stuff the bear. Break the yarn 20-25 cm. Sew 30 stitches with a Kitchener stitch. Fasten the yarn, hide inside.
Ears
Cast on 8 stitches on needles with your preferred cast-on method so that a 15-20 cm long thread remains.
Row 1:
edge stitch, purl 7
Row 2:
edge stitch, knit 7
Repeat rows 1 and 2 – 4 more times. You should get a square.
Break the yarn 15-20 cm. Place the 8 stitches on yarn. The ear is ready. Knit the second ear in the same ways. Sew on the ears.
Nose Cast on 18 stitches on needles with your preferred cast-on method so that a 15-20 cm long thread remains.
Row 1:
edge stitch, knit 17.
Join work in a round.
Rounds 2-4:
knit 18
Round 5:
[ k1, k2togR, k2togR, k1 ] x 3
Round 6
[ k2togR ] x 6
Break the yarn 10 cm, sew 6 stitches with a Kitchener stitch. Fasten the yarn, hide inside. Stuff the nose a little. Sew on the nose with a Kitchener stitch.
Embroider the bear’s eyes and nose.
Abbreviations
k
knit
K2togR
right-leaning decrease stitch; knit two stitches together
K2togRL
left-leaning decrease stitch; knit two stitches together
M1L
increase; make one left
M1R
increase; make one right
st(s)
stitch(es)
This pattern is for personal, non-commercial use only. Share your version of the on Instagram with #maylilyknitting
Hello, fellow knitters! Liubov here, from MayLilyKnitting. You know, for every one of us who loves to knit, the big question often comes down to: do I knit flat or do I dive into the wonderful world of circular knitting? It’s a choice that really shapes not just how we work, but also the final huggable friend or cozy garment we create. I’ve spent countless hours with my needles, bringing little creatures to life, and I’m so excited to share my experiences with both these approaches. So, grab your favorite yarn and let’s knit through the ins and outs, helping you master the art of general knitting and achieve seamless success in your own projects!
What Does It Mean to Knit Flat?
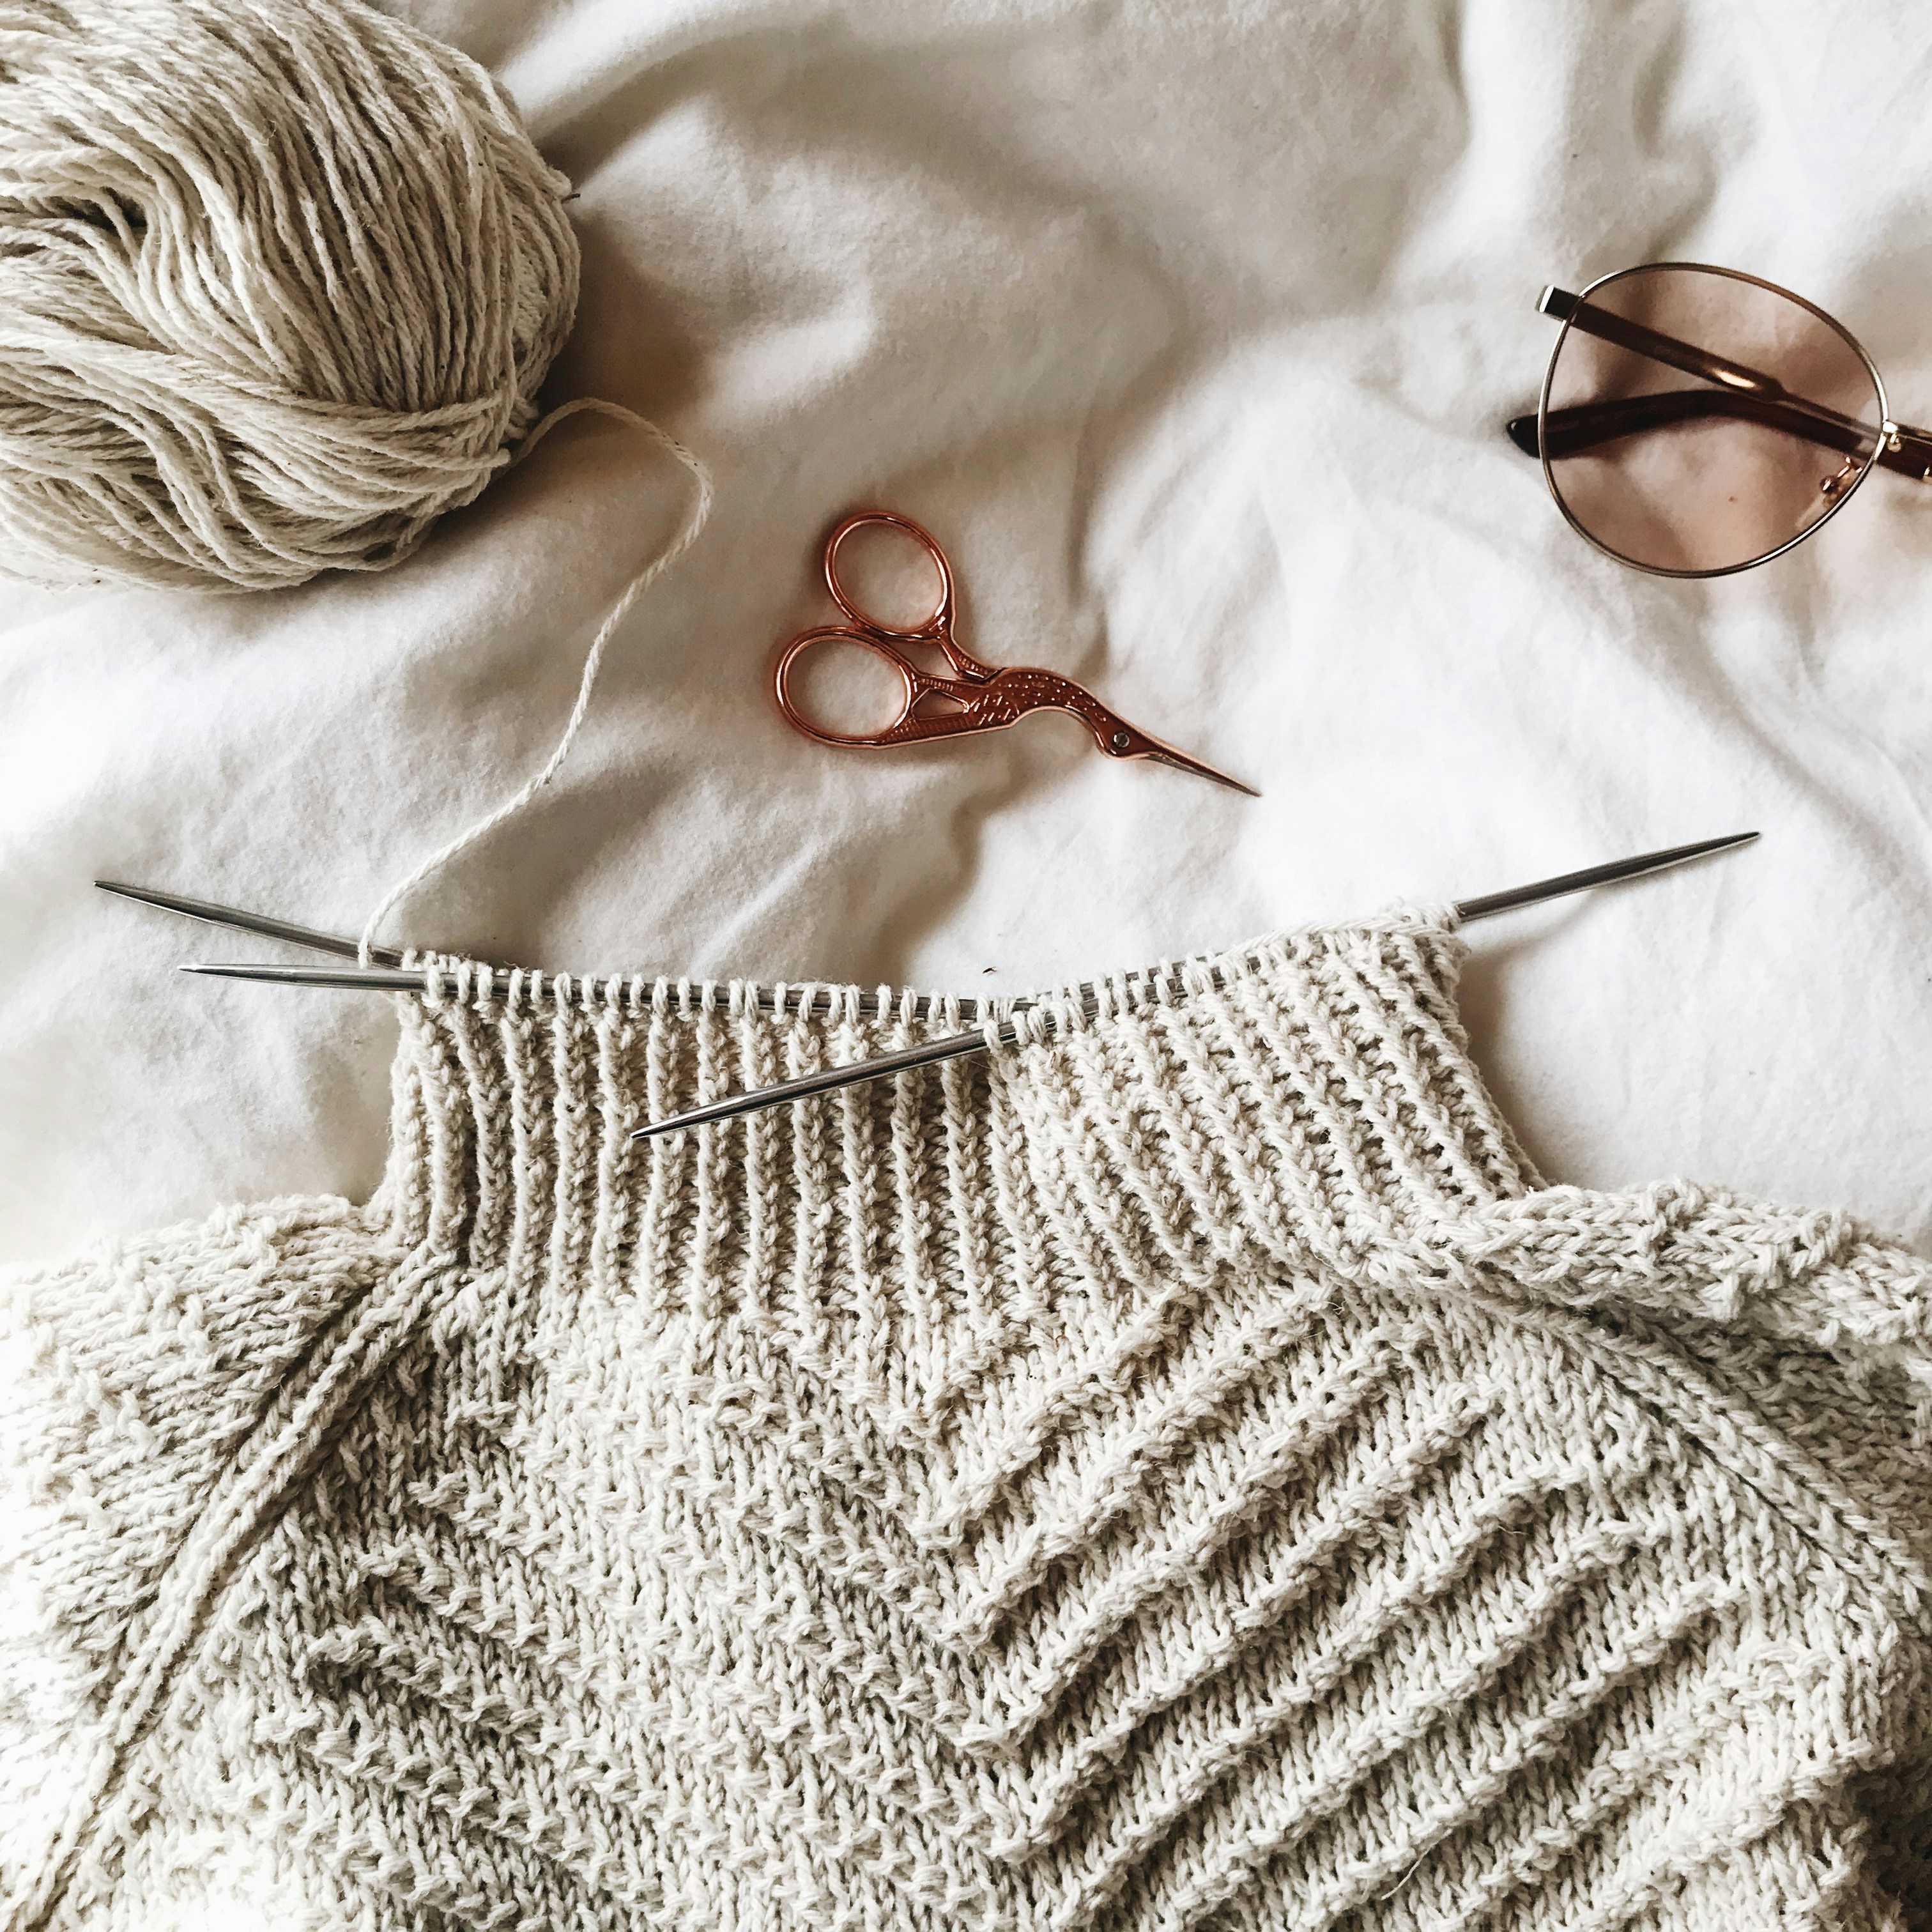
When I first learned to knit, like many of us have learned to knit, it was all about knit flat. This means you’re creating a piece of fabric by going back and forth in rows, usually on a trusty pair of straight knitting needles or single pointed needles. You work a row, then you turn your piece, and you work the next row. It’s like a conversation between your two needles! This method is fantastic for making flat items that will later be sewn together, like the front and back of a little sweater for a toy, or a cozy blanket.
Every time you knit your row, you’re either working on the “right side” of your project or the “wrong side,” depending on your stitch pattern. For example, to get that classic smooth stockinette fabric, you’d knit on one side and purl on the other. It’s a very straightforward way to knit, and it’s perfect for those projects where you don’t mind a little seam or two. Plus, managing a large number of stitches for a big shawl or afghan is often much more comfortable on straight needles.
What Does It Mean to Knit in the Round?
Oh, knitting in the round! This is where the magic of seamless creation truly happens. Instead of turning your work, you just keep going, spiraling around and around, creating a beautiful tubular piece of fabric. This means no seams! For me, when I’m knitting little toy bodies or heads, this is often my go-to. You use a circular needle or a set of double pointed needles (DPNs), and the project just grows from itself.
The best part about knitting in the round? You’re always working on the “right side” of your fabric. So, if you’re doing stockinette, it’s just knit stitches all the way around, every single time. This is super handy for items like hats, mittens, or the adorable little sweaters on my toys. It makes the process feel so continuous and flowy, and seeing that seamless fabric emerge truly brings a smile to my face. Plus, no seaming after you knit – what’s not to love about that? I’ve seen some incredible things made on a circular knitting machine, which really highlights the efficiency of this method!
Why Choose Single Pointed Needles for Your Projects?
For many of us, our knitting journey began with single pointed needles. They’re simple, familiar, and honestly, a joy to use for specific projects. When I need to knit a flat piece, like a toy’s ear or a specific appliqué, these are my trusty companions. They’re excellent for getting a feel for your yarn and your stitch, especially if you’re a new knitter or trying out a new stitch pattern.
Choosing single pointed knitting needles is perfect when you need separate pieces that will be assembled later. Think about a toy garment with a distinct front and back, or a small blanket. While you won’t knit seamless items like socks on them, they’re incredibly versatile. If I need a precise stitch count and perfect edges on a piece that needs to lay flat, I often prefer straight needles. They help me focus on the individual rows and ensure every stitch is just right before I even think about joining anything.
Is Seamless Knitting Always the Better Option?
Ah, the dream of seamless! It’s definitely tempting to think that no seam at all is always the best way to go, especially when you’re crafting a super cuddly toy or a comfy sweater. Seamless knitting, often done on a circular needle, truly does create a beautifully clean finish, which I adore for my toy bodies and heads. No bulky joins, just smooth fabric that’s lovely against the skin (or, in my toys’ case, lovely to squish!).
However, I’ve learned that “better” really depends on the project! Sometimes, a little seam can actually provide structure, especially in smaller, intricate pieces. For instance, sometimes I knit flat for a toy’s leg and then seam it up, because it gives a slightly firmer shape than if I tried to knit seamlessly in the round for such a tiny limb. Also, if you’re working a really complex lace or cable stitch pattern, it can actually be easier to manage when you’re alternating between the right and wrong side when knitting, as you do when you knit flat. So, while the thought of a completely seamless garment is wonderful, it’s all about finding the needle type that works best for what you’re trying to create and the unique qualities of your yarn.
When Should You Knit Flat vs. Circular?
This is where the fun decision-making comes in for every knitter! For me, the choice between whether to knit flat vs circular often comes down to the shape of the toy I’m making. If I’m creating a garment like a doll’s sweater with distinct front and back pieces, I’ll often knit flat. It gives me precise control over shaping the armholes and neckline. And for simple flat items like scarves, dishcloths, or even little blankets for toy beds, flat knitting is definitely the way to go. You can easily manage a large number of stitches on straight needles without tangling cables.
But if I’m making a tubular part of a toy – like the body of a little bear, a tiny hat, or a leg that needs to be perfectly round – circular knitting is my absolute favorite. It just makes sense! When you knit a hat or a small sweater body, eliminating that seam is a game-changer for a smooth, professional finish. Using a circular needle or DPNs means continuous knitting in the round, and honestly, it often feels quicker because you’re not constantly turning your work. So, it truly boils down to the final shape you envision and whether you want a seamless result or prefer the control of constructing separate pieces.
Knit Flat vs. Knitting in the Round for Toy Making: A Quick Comparison
To make it super easy to decide which method to use for your next adorable creation, here’s a little table comparing knit flat and circular knitting specifically for toy making, based on my own experience:
Feature
Knit Flat (using single pointed needles or straight needles)
Circular Knitting (using circular needle or DPNs)
Best For
Flat pieces (ears, snouts, clothing panels), intricate flat stitch patterns, traditional toy garments, smaller toy parts that need to be seamed.
Tubular shapes (toy bodies, arms, legs), seamless items like toy hats, anything where a seam would be bulky or visible.
Seams
Yes, requires seaming after you knit.
No seams (truly seamless!), making finishing quicker.
Working Side
Alternates between right and wrong side when knitting each row.
Always working on the right side of the fabric when knitting in the round.
Ease for Beginner
Often easier to learn basic knit and purl stitches.
Can be tricky to manage DPNs or the magic loop initially, but incredibly rewarding.
Toy Example
A flat-knit toy blanket, a toy’s flat ear or snout, a traditional sweater for a doll that’s seamed up the sides.
A seamless toy body, a tiny knitted hat for a teddy bear, seamless toy items like socks for a doll.
Comfort
Can be less comfortable on very large items due to bulk.
Generally more comfortable for continuous knitting, no bulk of seams on the project itself.
Can You Convert Flat Patterns to Circular Knitting?
Oh, absolutely! This is one of those little secrets that opens up a world of possibilities for an experienced knitter. You can often take a pattern that’s written to knit flat and adapt it for circular knitting. The main thing to remember is that when you’re working in the round, you’re always on the “right side” of your fabric. So, any row in the original pattern that tells you to purl on the “wrong side” to create a specific effect (like stockinette), you’d simply knit that row instead when knitting in the round.
It does get a little trickier with more complex stitch patterns, like intricate cables or lace, that are specifically designed with the back-and-forth flat knitting motion in mind. You also need to think about seam allowances – when you knit flat, patterns usually account for a bit extra for seaming, which you won’t need for a seamless project. But honestly, with a bit of practice and a good understanding of how stitches behave, converting patterns is incredibly rewarding. It means you can turn almost any knit flat garment pattern into a seamless one, which is just pure joy!
What Are the Best Needles for Circular Knitting?
When it comes to circular knitting, there’s a whole wonderful range of knitting needles to explore! The two main types are fixed circular needles and interchangeable circular needle sets. Fixed circular needles are great – they have a specific needle size permanently attached to a specific cable length. I have a few trusty fixed circulars that I always grab for my most common toy projects, especially if I know the exact size I need. They’re reliable and straightforward.
But if you’re looking for ultimate versatility, interchangeable circular needles are a dream! These sets allow you to screw different sized needle tips onto various lengths of cables. This means you can create endless combinations, making them an incredibly versatile knitting needle for anything from a tiny toy hat to a huge sweater. And then there are double pointed needles (or DPNs), those little sets of five needles that are perfect for very small circumferences, like toy fingers or the very top of a tiny hat before you switch to a circular needle. And let’s not forget the magic loop method, which uses one long circular needle to knit seamless items like socks and other small circular pieces – a personal favorite of many knitters, including myself!
How Does Yarn Choice Impact Your Knitting Method?
Oh, yarn! It’s not just about the color, right? The type of yarn you choose can really influence whether you’ll prefer straight knitting needles or circular ones, and how your project will turn out. For my toys, I often choose a smooth, sturdy yarn because it makes the stitches crisp and clear, whether I knit flat or in the round. A very fluffy yarn, on the other hand, might be more forgiving of a slight wobble in tension, and a small seam might even disappear into the fluff!
Also, consider the elasticity of your yarn. Some yarns, especially those with no give, can be a bit trickier to work with on DPNs because they might slip off easily. In those cases, the magic loop method with a circular needle might be a smoother experience. The weight of your yarn is important too; a bulky yarn will work up incredibly fast on either circular knitting needles or perhaps some nice straight single pointed ones, creating a cozy garment quickly. But for delicate projects with fine yarn, you might find one method offers more control over the drape and overall look of your knitted piece. Your yarn choice definitely guides your knitting style and the needle type you instinctively reach for.
What Are the Common Challenges of Each Knitting Style?
Okay, let’s be honest, every knitting method has its little quirks! When I knit flat, the biggest challenge can be the seam. Getting those seams perfectly invisible and neat so they don’t detract from your adorable toy or garment takes practice. Plus, constantly turning your work means you’re always flipping between the right side and the wrong side when knitting, which can sometimes be a bit confusing, especially with complicated stitch patterns. And let’s face it, managing a huge number of stitches for large items like a sweater back on straight needles can get a little cumbersome!
Circular knitting has its own unique puzzles. For tiny bits, working with DPNs can feel like wrestling with a handful of chopsticks, and sometimes you get those dreaded “ladders” between needles if your tension isn’t just right. The magic loop method, while amazing, has a bit of a learning curve too, especially getting that cable just right. And because you’re always working in the round, there’s no distinct end to a row to mark your place, which can make fixing mistakes a bit trickier. But trust me, with a little patience and a lot of happy knitting, these challenges become second nature. You’ll be whipping up seamless creations in no time!
Where Can You Find More Help and Community Support?
One of the most beautiful things about general knitting is the incredible community! We’ve all been at that point in our knitting journey where a stitch just isn’t making sense, or a pattern seems like hieroglyphs. Don’t ever feel shy about reaching out! If you’re struggling with whether to knit flat or in the round, or any other knitting conundrum, there are so many wonderful resources. The KnittingHelp forum community is absolutely brilliant – I’ve found so many answers there, whether it’s about a tricky circular needle technique or getting a perfect seam on a knit flat project.
Beyond forums, YouTube is a treasure trove of video tutorials that visually walk you through just about anything, from casting on with straight single pointed needles to mastering the magic loop to knit seamless items like socks. And don’t forget your local yarn store! They often have fantastic knitting groups where you can get hands-on help, share tips, and just enjoy some lovely company. Whether you prefer straight needles or those versatile circular ones, there’s always someone happy to share their passion and help you knit your next masterpiece.
Key Takeaways for Your Next Knitting Project:
Knit flat means back-and-forth knitting on straight needles, often requiring seams for assembly.
Circular knitting creates seamless, tubular fabric by continuously working in the round on a circular needle or DPNs.
Single pointed needles are wonderful for beginners and for flat components of a garment or toy.
Seamless results from circular knitting are fantastic for comfort and a clean finish, especially for items like hats or toy bodies.
Choose between knit flat and circular knitting based on your project’s desired shape, complexity, and personal preference.
Most knit flat patterns can be adapted for circular knitting, requiring adjustments for the “wrong side” rows.
Circular knitting needles are considered incredibly versatile; explore fixed circulars for specific projects or interchangeable circular sets for flexibility.
Your yarn choice impacts drape and stitch definition, influencing which knitting method might be best suited.
Both methods have learning curves: perfecting seams in flat knitting, or managing DPNs and magic loop in circular knitting.
The general knitting community, including resources like the KnittingHelp forum community, is an amazing place for support and inspiration!
Hi there! I’m Liuba, the heart and hands behind MayLilyKnitting.com. I design soft toy patterns and live in a world full of yarn, stitches, and imagination.
Today, I’m diving into one of the most common and fascinating questions I get: “Should I learn to knit or crochet?”
This post explores the real-world differences between knitting and crochet, from tools to textures. Whether you’re a beginner or just curious about trying something new, I’ll help you decide which craft to try—or maybe inspire you to love both!
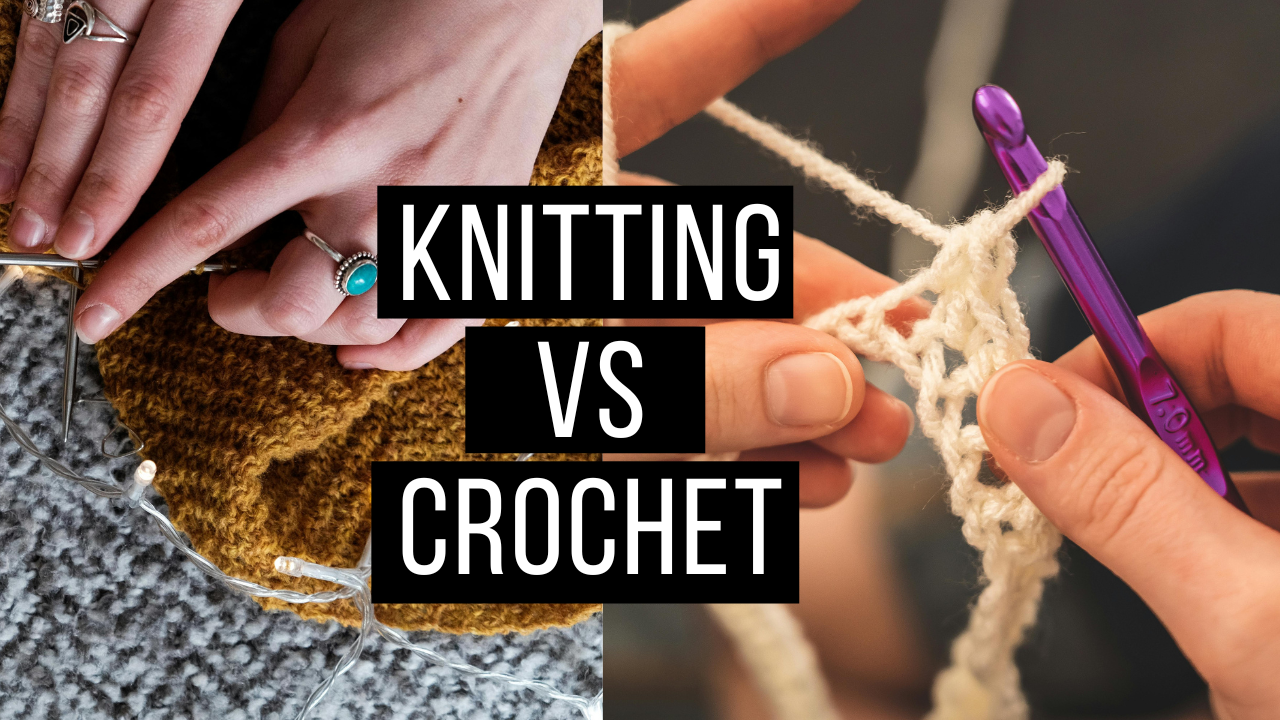
1. Knitting vs Crochet: What’s the Difference Between Knit and Crochet?
The core difference between knitting and crochet lies in tools and technique. Knitting uses two needles, holding many active stitches, while crochet uses a hook and one loop at a time.
Visually, knitted fabric is smooth and stretchy, ideal for sweaters and shawls. Crochet creates a firmer, more textured surface—perfect for crochet projects like toys and baskets.
2. Knit or Crochet for Beginners: Which Craft Is Easier to Learn?
If you’re a beginner, you might wonder whether to learn how to knit or dive into basic crochet.
Many people find crochet easier at first. With only one active loop and a single crochet hook, it’s easier to keep mistakes under control. Others find knitting easier once they get the rhythm of knit one, purl one.
I always say: choose the right craft for how your brain works. Some love the freedom of crochet, while others enjoy the structure of knitting.
3. Knitting Basics vs Crochet Basics: Tools and Techniques Explained
Knitting requires two knitting needles—or even double-pointed needles for knitting in the round. Crochet only needs a crochet hook and yarn.
With knitting, you manage several stitches at once, while crochet focuses on one loop. If you’re intimidated by multitasking, crochet might feel more manageable.
Whichever path you choose, the most important thing is to get comfortable with your tools and choose the right yarn.
4. Yarn Use in Crochet vs Knit: Which Craft Uses More Yarn?
Here’s something surprising for many new crafters: crochet uses more yarn than knitting. That’s because each crochet stitch wraps around the yarn in a bigger loop.
If you’re working on a large item, this can make a big difference in your ball of yarn budget. But more yarn also means more texture, which is why crochet is great for toys.
Meanwhile, knitting uses less yarn and creates thinner, stretchier fabric—great for garments like a scarf or sweater.
5. Stitch Differences Between Crochet and Knitting
The difference between knit and crochet stitches isn’t just in tools, but in look and feel.
Knitting stitches are smooth and uniform—great for fine fabrics and lace. In crochet, you have more variety: single crochet, double crochet, tunisian crochet, and more.
The variety in stitch patterns makes crochet super flexible and expressive. It’s one reason I gravitate to it when I design my toy patterns.
6. Crochet vs Knit: Which Craft Is Faster?
When it comes to speed, crochet is faster than knitting for most people. You build up rows more quickly, and it’s simpler to freeform.
If you’re crafting on a deadline, like for holiday gifts or a market table, crochet is often your best friend.
But don’t worry—knitting is a beautiful, soothing pace. You may prefer knitting for meditative evenings or finely detailed projects.
7. Knit and Crochet Project Types: What’s Best for What?
When choosing between knit and crochet, consider what you want to make.
Knitting is perfect for soft, drapey items like sweaters or delicate shawls.
Crochet shines in structural work—think baskets, bags, and of course, plush toys.
Knitting projects often look polished and airy, while crochet projects have bold texture and shape. I use both regularly!
8. Crochet vs Knit: Which One Has More Patterns?
There are thousands of crochet patterns and knitting patterns out there.
You’ll find endless inspiration for either craft. But one cool fact: crochet is easier to experiment with and freestyle. I often improvise while designing toys, which feels like a mini adventure each time.
If you want to find knitting or crochet patterns, there are countless books, blogs, and Ravelry threads to explore.
9. What Makes Crochet Easier When It Comes to Fixing Mistakes?
Here’s a secret most knitters won’t tell you: crochet is easier when it comes to ripping back mistakes.
In knitting, dropping a stitch can unravel several rows. In crochet, you only need to pull back one loop at a time.
For beginners, this can be a lifesaver. If you’re worried it’s hard to learn, don’t be—both crafts have learning curves, but crochet one might feel less scary at first.
10. Knitting vs Crochet: Which Craft Should You Choose?
Still not sure? You don’t have to decide today! Here’s a quick cheat sheet to help you:
Choose crochet if: you want fast projects, sculpted shapes, and variety in stitches.
Choose knitting if: you love soft fabrics, wearable projects, and elegant texture.
Personally, I love and use both crafts. Some days I’m in a knitting mood, others I just want to love crochet and let the hook fly.
🧵 Final FAQ: Common Questions About Knitting vs Crochet
What’s the difference between crochet and knitting? The difference is that knitting uses two needles and many loops; crochet uses one hook and a single loop.
Is it easier to learn to crochet or knit? Most beginners find crochet easier to pick up.
Does crochet use more yarn? Yes—crochet uses more yarn than knitting.
Is knitting faster than crochet? No—crochet is faster than knitting, generally speaking.
What kind of yarn should I use? Always choose the right yarn for your project—light weight yarn for fine work, thicker for bulk and texture.
Is knitting harder to fix than crochet? Yes, knitting is harder to fix dropped stitches. Crochet allows easier frogging.
Do I need different tools? Yes! Knitting requires two needles, while crochet uses one crochet hook.
Can I mix both crafts? Absolutely! Add crochet edging to knitted fabric, or vice versa.
Are there knitting and crochet patterns for toys? Yes! I design both knitting and crochet patterns for toys, and each has its own charm.
What if I like both? Wonderful! You don’t have to choose. Learn both, and find out the differences by doing.
✨ Key Takeaways from Liuba
Knitting vs crochet boils down to tools, technique, and texture.
Crochet is easier for beginners and often faster.
Knitting creates elegant, wearable fabric and uses less yarn.
You can make amazing things with either craft—from sweaters to soft toys!
Don’t be afraid to try both—you might just love crochet and like knitting.
💛 Thanks for spending time with me. Whether you’re picking up a crochet hook or two needles, I hope you find a craft that makes your heart sing.
With love and yarn, Liuba
Manage Consent
To provide the best experiences, we use technologies like cookies to store and/or access device information. Consenting to these technologies will allow us to process data such as browsing behavior or unique IDs on this site. Not consenting or withdrawing consent, may adversely affect certain features and functions.
Functional
Always active
The technical storage or access is strictly necessary for the legitimate purpose of enabling the use of a specific service explicitly requested by the subscriber or user, or for the sole purpose of carrying out the transmission of a communication over an electronic communications network.
Preferences
The technical storage or access is necessary for the legitimate purpose of storing preferences that are not requested by the subscriber or user.
Statistics
The technical storage or access that is used exclusively for statistical purposes.The technical storage or access that is used exclusively for anonymous statistical purposes. Without a subpoena, voluntary compliance on the part of your Internet Service Provider, or additional records from a third party, information stored or retrieved for this purpose alone cannot usually be used to identify you.
Marketing
The technical storage or access is required to create user profiles to send advertising, or to track the user on a website or across several websites for similar marketing purposes.