maylily

  • Choosing the Right Yarn for Knitted Toys: A Knitter’s Guide to Safe and Durable Toy Creations

    Choosing the Right Yarn for Knitted Toys: A Knitter’s Guide to Safe and Durable Toy Creations

    When it comes to creating charming, cuddly, and long-lasting toys, choosing the right yarn is just as important as the knitting pattern itself. Whether you’re crafting a teddy bear for a toddler or a decorative woodland fox for a nursery shelf, selecting the right yarn for knitting toys can significantly impact the final result. This article walks you through everything you need to know about how to choose the best yarn for your knitted toys—so they’re soft, safe, and built to last. If you’ve ever wondered which yarn is best for toys, or how needle choices affect durability, this guide is for you.


    What Makes a Yarn Right for Knitting Toys?

    The yarn you use for knitted toys needs to strike the right balance between softness, durability, and structure. Toys endure wear and tear, especially when loved by little ones, so the yarn must hold up. Choosing the right yarn for knitting means looking at yarn weight, fiber type, and how the finished fabric behaves when stuffed.

    Look for yarns that are machine washable, hypoallergenic, and resistant to pilling. The intended use of the toy—whether decorative or meant for a child—also determines which yarn is best. I often look for yarns that offer a balance of these qualities, especially those labeled as safe and durable.

    Is Cotton Yarn a Good Choice for Knitted Toys?

    Cotton yarn is a strong contender due to its crisp stitch definition and hypoallergenic properties. I find that cotton—especially mercerized cotton—has a lovely matte finish that makes features stand out.

    However, cotton lacks the elasticity of wool, making it slightly harder to work with. Still, for toys that need a firm shape, cotton yarn can be a reliable option. I sometimes combine cotton and acrylic yarns for a good balance of durability and affordability.

    Why I Prefer Wool for Toys

    Wool is my favorite fiber for creating cozy and lovable toys. It has the stretch and warmth I like, especially in superwash wool, which is machine-washable and holds up to wear and tear.

    While wool isn’t always the most durable on its own, I usually use a blend. Most of my knitted toys are made from a mix of wool, alpaca, and poliacril. This blend gives me the softness I love and the strength I need. The yarn is also easy to care for and can withstand repeated handling and play.

    Should You Use Acrylic Yarn for Knitting Toys?

    Although I don’t prefer acrylic yarn personally, it’s worth mentioning. It’s budget-friendly, machine washable, and comes in a wide range of colors, which is great for testing a knitting pattern.

    That said, acrylic doesn’t breathe well and tends to pill, which is why I use it sparingly. I always prioritize fibers like wool or blends when making keepsake toys. Still, acrylic yarn can be useful for crafting toys that are going to see rough use or get tossed in the washer and dryer often.

    What Is the Best Yarn Weight for Knitted Toys?

    For most knitted toys, I recommend DK or worsted weight yarn. These types offer the right thickness to hide stuffing and maintain a firm shape. I also find they are perfect for knitting toys with clear, defined lines.

    When I want more intricate detail, I might go with sport weight or fingering weight yarn. I always knit with smaller needles than the skein suggests to create a tight fabric that locks in the filling.

    Are Wool Blends the Best Choice?

    Yes, wool blends are often the best choice for toy making. Combining wool with synthetic fibers like nylon, or natural fibers like bamboo or alpaca, creates yarns that are soft, durable, and machine-washable.

    Blends like merino yarn or superwash wool blend offer incredibly soft textures while still being able to withstand frequent washing. These yarns are ideal for toys that get lots of hugs.

    Is Bamboo or Alpaca Yarn a Good Option?

    I occasionally work with bamboo or alpaca yarn for their unique textures. Bamboo is lightweight and breathable, while alpaca adds richness and warmth. These fibers like wool make beautiful toys when blended.

    However, I rarely use them alone due to durability concerns. When used in a blend with nylon or wool, they can still be part of a durable and safe project.

    What About Synthetic Fibers and Blends?

    Synthetic fibers like acrylic and nylon boost the durability and washability of yarns. Many of my go-to yarns for little ones’ toys are blends with some synthetic content, especially when I need the piece to withstand lots of play.

    Look for blends that include 15–25% synthetic fibers, especially if the toy will be washed often. This ensures it remains intact and beautiful.

    How Does Needle Choice Affect the Final Toy?

    I always use smaller needles than the label recommends when knitting toys. This helps make a dense fabric that keeps the stuffing inside and holds its shape.

    Circular needles or DPNs are great for shaping limbs and small details. They allow me to work in the round, which gives a clean, seamless finish.

    What Yarn Is Easy to Care For?

    Toys should be easy to care for, especially when they’re gifts for kids. That’s why I go for machine-washable yarns. My top picks include superwash wool, cotton, and cotton and acrylic yarns.

    I also look for Oeko-Tex certified yarns whenever possible, as they are tested for safety and help me make safe and durable toys.

    How to Choose the Best Yarn Based on Intended Use

    Ask yourself what the toy will be used for. Is it for daily cuddling or just to sit on a shelf? For frequent use, pick durable blends that include nylon or cotton. For decorative toys, try soft yarn like merino yarn or alpaca yarn.

    Avoid crochet-specific yarns—these are often too loose for toy knitting. Always think about washability, durability, and whether the yarn is hypoallergenic.


    Key Takeaways: Choosing the Right Yarn for Knitted Toys

    • Use cotton or wool blends for most knitted toys—they offer the best mix of softness and durability.
    • Avoid acrylic yarn for heirloom pieces, but it’s okay for prototypes or rough-use toys.
    • Choose DK or worsted weight yarn for most toys.
    • Use smaller needles to get a tight fabric that holds stuffing well.
    • Look for machine-washable and hypoallergenic yarns.
    • Consider blended fibers for the best performance.
    • Yarns with Oeko-Tex certification are great for kids.
    • The intended use of the toy should guide your material choice.
    • Don’t forget to experiment with different yarns to find what feels right for your knitting style.
    • This post contains affiliate links to support the blog.
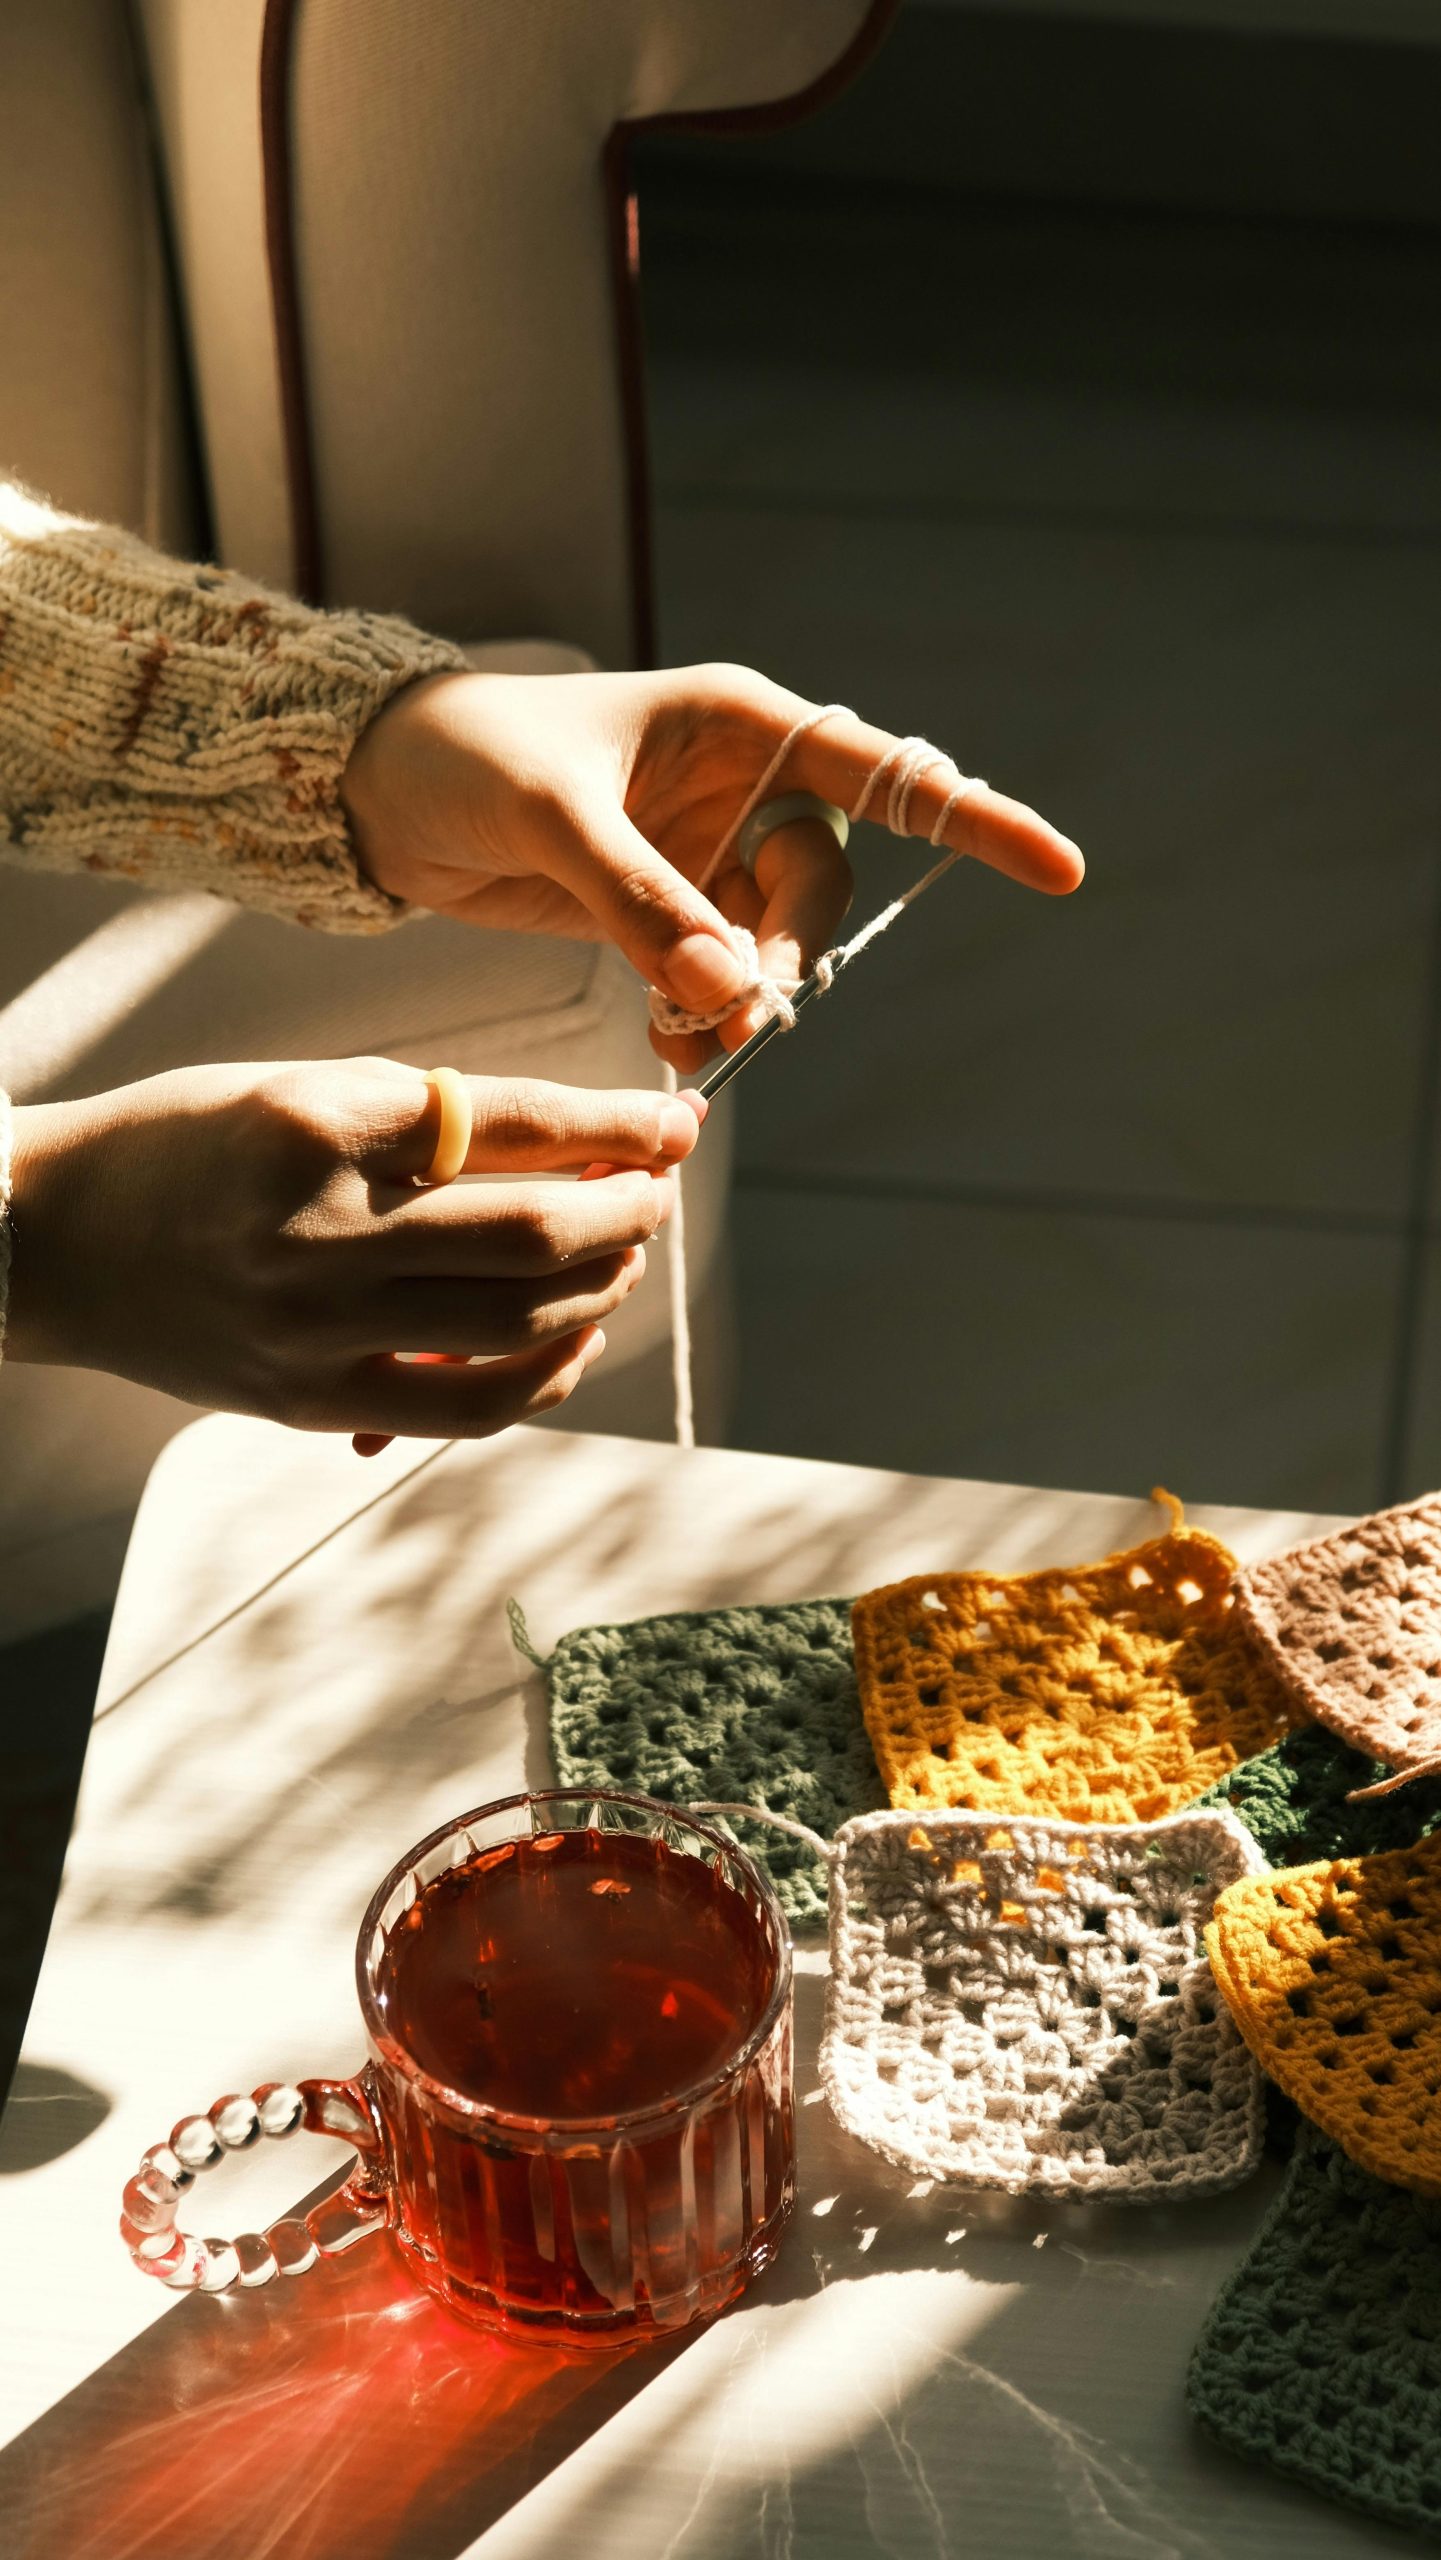
  • 10 Easy Knitting Projects for Beginners: Fun Patterns to Get Started

    10 Easy Knitting Projects for Beginners: Fun Patterns to Get Started

    Starting to knit is an exciting journey, but choosing the right beginner knitting project can feel overwhelming. If you’re new to knitting and looking for easy knitting ideas, you’ve come to the right place! The key is to start with simple knit projects that help you practice basic techniques while creating something fun and useful.

    Here are 10 easy knitting projects for beginners perfect for those who want to learn how to knit and build confidence.

    1. Cozy Knit Scarves – A Perfect Beginner Knitting Project

    A scarf is a classic first project for any beginner knitter because it’s straightforward and repetitive. You can start with a garter stitch knitting pattern (knit every row) to get comfortable with your knitting needles and yarn tension. Once you feel confident, you can experiment with stockinette stitch, purl stitch, or even a simple stitch pattern to add texture.

    2. Simple Dishcloths – A Small Knitting Project for Beginners

    A dishcloth is a fantastic beginner knitting project that lets you practice different stitches without committing to a large piece. You can start with a garter stitch square, then try knit and purl combinations to explore textures. Dishcloths also help you get used to handling different types of yarn and testing needle size to find what works best for you.

    3. Easy Headbands – A Fun Beginner Knitting Project

    A knitted headband is a stylish and practical accessory that works up quickly. You can knit a simple strip in garter or stockinette stitch, then seam the edges together. This is a great way to practice tension control and experiment with different yarn thicknesses.

    4. Chunky Infinity Scarf – A Cozy Beginner Knitting Project

    If you love cozy accessories, a chunky infinity scarf is a fantastic beginner-friendly knitting project. Using chunky yarn and larger knitting needles allows you to finish the scarf quickly. This project is great for trying knit stitch and getting comfortable with handling heavier yarn.

    5. Basic Knit Coasters – An Easy-to-Knit Beginner Project

    Coasters are small, quick-to-knit projects that help you master different stitches. You can make them in garter stitch, stockinette, or experiment with a stitch pattern like ribbing. Coasters are also a great way to use up leftover yarn from other knit projects.

    6. Beginner-Friendly Pillow Cover – A Great Knitting Project for Beginners

    A simple pillow cover is just two knit squares sewn together. You can start with garter stitch for an easy texture, then try a stockinette stitch front for contrast. This project for beginners helps you learn how to maintain even stitches while creating a cozy home accessory.

    7. Soft Baby Blanket – A Beginner Knitting Project for Confidence

    A small baby blanket is an excellent project to practice long, even rows of stitches. You can knit a simple rectangle in garter stitch or add color blocks with different yarn shades. Since blankets don’t require precise sizing, they’re a stress-free way to build skills.

    8. Wrist Warmers or Fingerless Gloves – A Simple Beginner Knitting Project

    A great step up from flat projects, wrist warmers or fingerless gloves can be made by knitting a rectangle and sewing up the sides, leaving space for the thumb. This is a simple way to get used to shaping without needing to knit in the round.

    9. Decorative Bunting or Garlands – A Fun and Easy Knitting Project

    Knitted bunting is a fun and creative project. You can knit small triangles, hearts, or circles and string them together for a charming decoration. This is a playful way to practice shaping and experiment with different yarn textures.

    10. Easy Plush Toys – A Creative Beginner Knitting Project

    If you’re interested in trying toy knitting, start with a simple shape like a square or rectangle. By folding and sewing, you can create adorable plush figures. This project is a fun introduction to toy-making and gives you the chance to explore stuffing techniques.

    Knitting doesn’t have to be complicated to be enjoyable! These 10 easy knitting projects for beginners are perfect for building confidence while making useful and beautiful items. Whether you choose a scarf, dishcloth, or baby blanket, each project helps you practice essential skills like knit stitch, purl stitch, and working with different types of yarn.

    Which project will you knit first? Happy knitting! 🧶✨

  • Toy Knitting Pattern: A Beginner’s Guide to Creating Handmade Cuddly Friends!

    Toy Knitting Pattern: A Beginner’s Guide to Creating Handmade Cuddly Friends!

    There’s something magical about knitting a toy. Unlike scarves or sweaters, knitted toys seem to come to life in your hands! Whether you’re making a cuddly bunny for a little one, a quirky cat for yourself, or a tiny bear as a thoughtful gift, toy knitting patterns add a bit of joy (and a touch of nostalgia) to your craft.

    I still remember the first toy I ever knitted—a lopsided bunny with one ear slightly longer than the other. But guess what? That imperfect bunny became my niece’s favorite bedtime buddy! So, if you’re wondering whether you should try knitting toys, my answer is YES! And don’t stress about perfection—handmade means unique, and that’s the charm. 💖

    How Is Knitting Toys Different from Crocheting Toys?

    Many people wonder whether they should knit or crochet their toys. While both techniques create adorable handmade figures, there are some key differences:

    🧶 Knitted Toys:

    • Have a softer, more fabric-like texture.
    • Tend to have more stretch and flexibility.
    • Often require sewing pieces together after knitting flat sections.

    🪡 Crocheted Toys (Amigurumi):

    • Are usually worked in the round, resulting in a firmer shape.
    • Use denser stitches, making the toy sturdier.
    • Require fewer seams since they’re often made in one continuous piece.

    If you love a classic, softer look, knitting is a fantastic choice. If you prefer a more structured toy, crochet might be the way to go!

    What Skills Do You Need to Knit Toys?

    The great news? You don’t need to be an expert knitter to start making toys! Here are the basic skills that will help:

    Casting on and binding off – The foundation of all knitting projects.

    Knit and purl stitches – Most toy patterns use simple stitch combinations.

    Increasing and decreasing stitches – Helps shape your toy.

    Sewing seams – Many knitted toys are made in pieces and stitched together.

    Stuffing and shaping – Gives your toy its character and personality!

    Even if you’re a beginner, toy knitting is a fun and forgiving way to practice these skills.

    What Materials Do You Need?

    Knitting toys doesn’t require a lot of fancy materials. Here’s what you’ll typically need:

    • Yarn: Soft, medium-weight yarn (cotton or acrylic blends work well for durability).
    • Knitting Needles: Usually 3mm – 4mm needles (check your pattern).
    • Stuffing: Polyester fiberfill or wool stuffing.
    • Tapestry Needle: For sewing up seams and details.
    • Safety Eyes or Embroidery Thread: To give your toy its adorable expression.

    How to Choose the Right Toy Knitting Pattern

    There are so many toy knitting patterns out there, so how do you choose the right one? Here are some things to consider:

    Skill Level: If you’re new to toy knitting, start with a simple pattern that uses flat knitting and basic shaping.

    Size: Do you want a pocket-sized friend or a big, huggable plushie?

    Seaming: Some patterns require a lot of sewing, while others minimize seams.

    Customization: Look for patterns where you can tweak colors, accessories, or details!

    Common Questions from Beginners

    How do I read a toy knitting pattern?

    Toy knitting patterns usually include abbreviations like K (knit), P (purl), Inc (increase), and Dec (decrease). If you’re new, choose a pattern with clear, step-by-step instructions.

    What do common abbreviations in toy knitting patterns mean?

    • KFB – Knit front and back (increase)
    • SSK – Slip, slip, knit (decrease)
    • M1 – Make one (increase)
    • BO – Bind off (finish stitches)

    What does “gauge” mean, and is it important for toy knitting?

    Gauge refers to how many stitches per inch you get with a certain yarn and needle size. For toys, gauge isn’t as critical as for garments, but keeping stitches tight prevents stuffing from showing through.

    Can I use any type of yarn for toy knitting?

    It’s best to use soft, durable yarns like cotton or acrylic. Avoid very fluffy or textured yarns if you’re a beginner, as they can make sewing and shaping tricky.

    What is the best stuffing to use for a soft, cuddly toy?

    Polyester fiberfill is the most common choice—it’s lightweight, washable, and holds shape well. Wool stuffing is another great natural alternative.

    How do I choose between safety eyes and embroidered facial features?

    Safety eyes are easy to attach and give a professional look, but for babies and young children, embroidered eyes are safer since they can’t be pulled off.

    Should I knit toys flat or in the round? Which method is easier?

    Knitting flat is usually easier for beginners since it only involves two needles. Knitting in the round (with double-pointed needles or circulars) eliminates the need for sewing seams but can be trickier to manage.

    How do I sew toy pieces together neatly?

    Use mattress stitch or whip stitch to join pieces smoothly. Stuff the toy as you sew, ensuring even distribution.

    How do I make sure my toy is stuffed evenly without lumps?

    Add stuffing in small amounts and distribute it evenly. Use a knitting needle or chopstick to push stuffing into tight corners.

    How can I modify a pattern to change the size of my toy?

    Use thicker yarn and larger needles for a bigger toy or finer yarn and smaller needles for a mini version.

    How do I fix mistakes like dropped stitches in toy knitting?

    If you notice a mistake early, carefully unravel back to the error. If the mistake is minor and doesn’t affect shaping, you can often hide it within the stuffing or seams.

    What’s the best way to shape the toy’s face for a cute expression?

    Facial features make a huge difference! Position eyes slightly closer together for a cuter look, and use a simple embroidered smile or nose to add charm.

    Why Knit Toys?

    Knitting toys is not just fun—it’s rewarding! You get to create something adorable, personal, and full of love. Plus, they make perfect handmade gifts for kids and adults alike.

    And let’s not forget the therapeutic benefits—knitting has been shown to reduce stress and increase relaxation. What better way to unwind than by creating a new cuddly friend? 🧶✨

    If you’ve never tried knitting toys before, now is the perfect time to start! With a few simple skills, some patience, and a touch of creativity, you’ll be able to bring your own handmade characters to life.

    So, what toy are you going to knit first? Maybe a cute bunny, a sleepy cat, or a tiny elephant? Whatever it is, just enjoy the process—because every stitch brings your little creation to life. 💕

    Happy knitting! 🧶✨

  • Basic Cap Pattern

    Basic Cap Pattern

    Knitting for newborns is always a joy 🧶✨. This Basic Cap Pattern is a simple, quick project perfect for beginners. It’s warm, soft, and a great way to welcome a little one into the world 🍼💛. I hope you enjoy making it!

    Size:newborn (head size 36 cm)
    Gauge:20 sts x 28 rows = 10 x 10 cm in stockinette stitch on 4.5 mm needles after blocking
    Needles:Circular needles: 4.5 mm / 40, 60 cm or the required needle size to obtain gauge
    Materials:25 g Angora 70 (50 g = 350 m) 2-stranded or another yarn with the correct gauge

    Pattern

    Cast on 49 sts on 4.5 mm / 60 cm circular needles with your preferred cast-on method. I use a Bulgarian cast on. Knit in flat rows.

    The first row is a WS row. Purl across 1 row. The next row is a RS row.

    Row 1:edge st, knit 1 st, purl 45 st, SL1 PW, p1.
    Row 2:edge st, knit 46 st, SL1 PW, p1.

    Repeat rows 1 and 2 – 13 more times.

    Row 29:edge st, knit 1 st, purl 45 st, SL1 PW, p1.
    Row 30:edge st, knit 48 st.

    Join your work in the round.

    Transfer the last stitch on the lefthand side needle to the righthand side needle, pull the stitch on the right needle over the stitch on the left needle, return the stitch on the left needle and pull on the thread. This is your round beginning.

    The next row 31 is a round row. There are now 48 sts on the needle.

    Row 31:knit 48.
    Row 32:knit 3 sts, * K2togR, knit 6 sts * repeat 4 times, K2togR, knit 3 sts.
    Row 33:knit 42.
    Row 34:knit 3 sts, * K2togR, knit 5 sts * repeat 4 times, K2togR, knit 2 sts.
    Row 35:knit 3 sts, * K2togR, knit 4 sts * repeat 4 times, K2togR, knit 1 sts.
    Row 36:knit 3 sts, * K2togR, knit 3 sts * repeat 4 times, K2togR.
    Row 37:knit 3 sts, * K2togR, knit 2 sts * repeat 4 times, K2togR.
    Row 38:knit 2 sts, * K2togR, knit 1 sts * repeat 4 times, K2togR.

    Crown shaping

    1. Return the last stitch you worked (which is K2togR) on the left needle. Itis stitch A.
    2. In turn pull the stitches to the left from stitch A to it and pull over it.
    3. Once you are left with stitch А only, pull on it and break yarn leaving a 10 cm tail. Draw the yarn tail through stitch A and pull tight. Weave in the tail.

    Weave in all yarn tails and do the blocking in accordance with your yarn label recommendations. Dry on a horizontal surface. There are 3 ways to make ties on my YouTube.

    kknit
    K2togRright-leaning decrease stitch; knit two stitches together
    K2togRLleft-leaning decrease stitch; knit two stitches together
    ppurl
    SL1 PWslip 1, working thread in front of your work
    RSright side of your work
    WSwrong side of your work
    st(s)stitch(es)
    edge stedge stitch; slip the first stitch of a row, working thread
    behind your work

    Like this pattern?

    Consider buying me a coffee

    This pattern is for personal, non-commercial use only. The pattern may not be copied, resold or redistributed in any way.
    Share your work and tag me on Instagram/Youtube: maylily knitting
    Happy knitting!

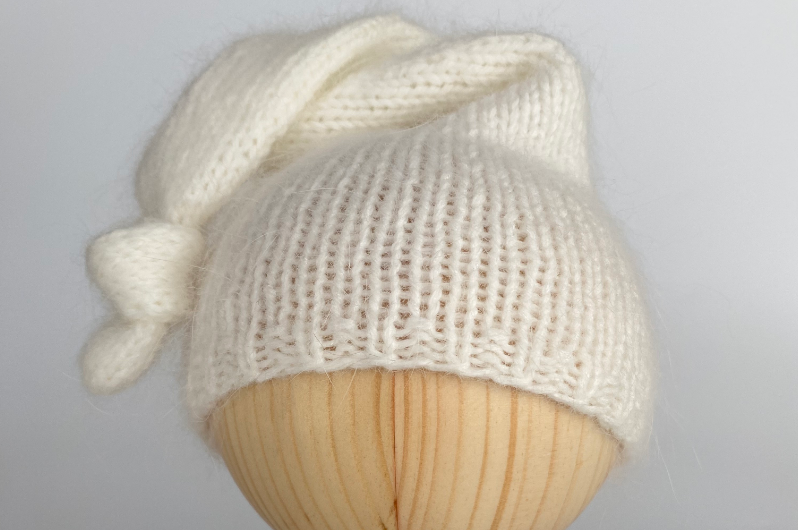
  • Node Hat Pattern

    Node Hat Pattern

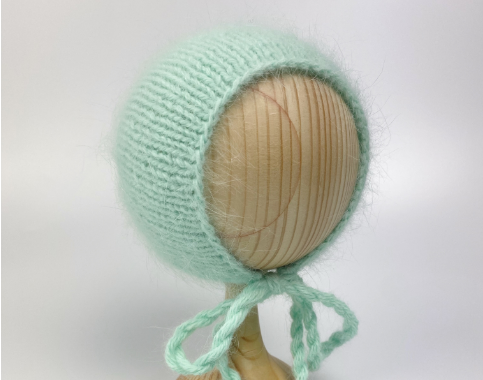
    Looking for a sweet and simple knitting project? The Node Hat is perfect for newborns (about 36 cm head circumference) and makes an adorable, cozy accessory. You’ll only need about 25g of Angora 70 (or a similar yarn that matches gauge), plus 4.5 mm circular or DPN needles.

    The best part? It’s a quick, satisfying knit with a cute little knot at the top—perfect for keeping your little one warm and stylish.
    Grab your needles and let’s knit something special! 🧶💕

    Size:newborn (head size 36 cm)
    Gauge:20 sts x 28 rows = 10 x 10 cm in stockinette stitch on 4.5 mm needles after blocking
    Needles:Circular needles: 4.5 mm / 18 cm or double pointed needles or the required needle size to obtain gauge
    Materials:25 g Angora 70 (50 g = 350 m) 2-stranded or another yarn with the correct gauge

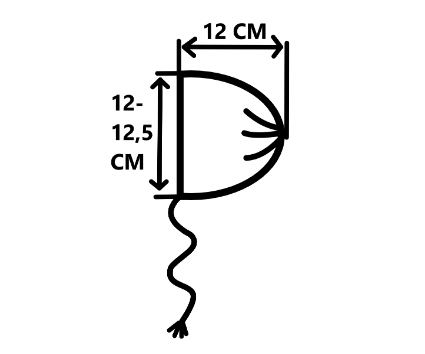
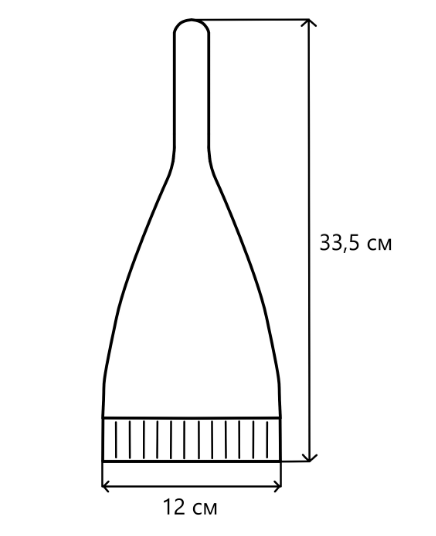
    Total length

    Pattern

    Cast on 49 sts on 4.5 mm circular needles with your preferred cast-on method. I use long tail cast-on method.

    Join your work in the round.

    Transfer the last stitch on the lefthand side needle to the righthand side needle, pull the stitch on the right needle over the stitch on the left needle, return the stitch on the left needle and pull on the thread. This is your round beginning. Place marker at the beginning of the round.

    There are now 48 sts on the needle.

    Round 1:[ knit 1 st, purl 1 st ] x 24
    Round 2:[ knit 1 st, purl 1 st ] x 24
    Round 3:[ knit 1 st, purl 1 st ] x 24
    Round 4 – 33:knit 48 sts
    Round 34:[ knit 2 together right, knit 6 ] repeat 6 times
    Round 35 – 39:knit 42 sts
    Round 40:[ knit 2 together right, knit 5 ] repeat 6 times
    Round 41 – 45:knit 36 sts
    Round 46:[ knit 2 together right, knit 4]  repeat 6 times
    Round 47 – 51:knit 30
    Round 52:[ knit 2 together right, knit 3 ] repeat 6 times
    Round 53 – 57:knit 24
    Round 58:[ knit 2 together right, knit 2 ] repeat 6 times
    Round 59 – 63:knit 18
    Round 64:[ knit 2 together right, knit 1 ] repeat 6 times
    Round 65 – 94:knit 12

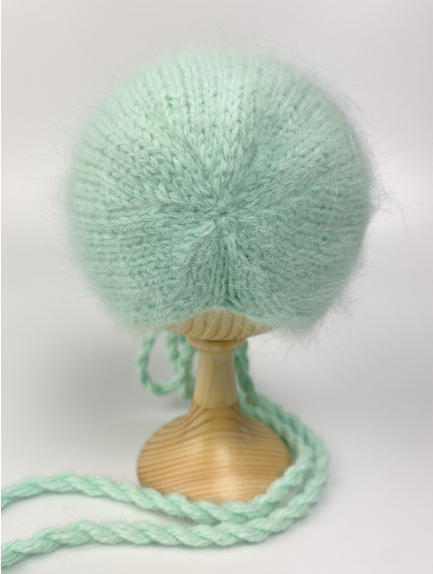
    Cut the thread. Transfer stitches to the thread using a needle. Weave in all yarn tails and do the blocking in accordance with your yarn label recommendations. Dry on a horizontal surface. Make a node.

    Abbreviations

    K2togright-leaning decrease stitch; knit two stitches together
    st(s)stitch(es)

    Like this pattern?

    Consider buying me a coffee

    This pattern is for personal, non-commercial use only. The pattern may not be copied, resold or redistributed in any way.
    Share your work and tag me on Instagram/Youtube: maylily knitting
    Happy knitting!

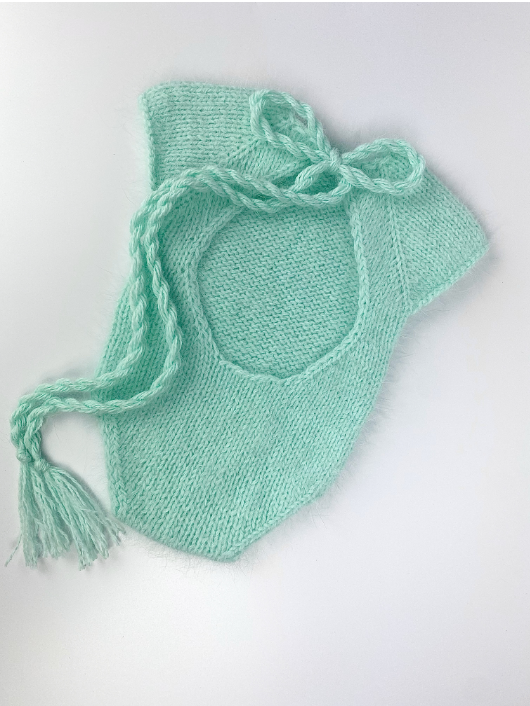
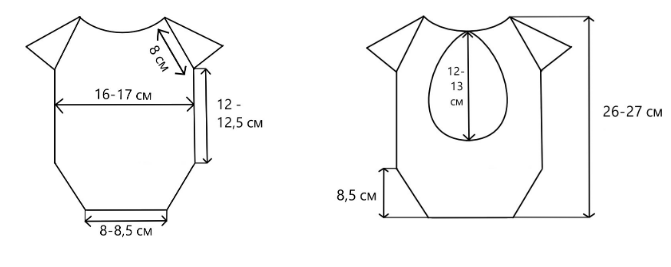
  • Newborn Body with an Open Back Pattern

    Newborn Body with an Open Back Pattern

    I’m so excited to share this Newborn Body with an Open Back Pattern with you!
    I know how special it is to create something soft and cozy for little ones. This design keeps babies snug and adorable. I hope you enjoy making it as much as I did—let’s create something beautiful together! 🧶✨

    Sizenewborn
    Gauge20 sts x 28 rows = 10 x 10 cm [4 x 4 inches] in stockinette stitch on 4.5 mm [US 7] needles after blocking
    NeedlesCircular needles: 4.5 mm [US 7] / 40, 60 cm [16, 24
    inches] or the required needle size to obtain gauge
    Materials50 g Angora 70 (50 g = 350 m [383 yds]) 2-stranded or another yarn with the correct gauge

    The Bodysuit Droplet is worked in stockinette stitch from the top down.

    About raglan increases

    The raglan increases are worked on either side of a central raglan stitch, so the increase to the right of the central raglan stitch will slant right (M1R), and the increase to the left will slant left (M1L). The raglan stitch is worked in stockinette stitch, as a regular stitch. These increases are worked as follows:

    M1R:Insert left needle under the strand between the stitches from back to front, then knit this strand through the front loop, as you would normally.
    M1L:Insert left needle under the strand between the stitches from front to back, then knit this strand through the back loop (twisted).

    Cast on 40 sts on 4.5 mm [US 7] / 60 cm [24 inches] circular needles with your preferred cast-on method. I use a Bulgarian cast on. Knit in flat rows.

    The first row is a WS row. Purl across 1 row. The next row is a RS row.

    Divide the work into sleeves, front and back by placing the following markers on either side of each of the 4 raglan sts as follows.

    Row 1:edge st, knit 1 st, purl 5 sts (right back), place marker, p1 (raglan st), place marker, purl 6 sts (right sleeve), place marker, p1 (raglan st), place marker, purl 10 sts (front), place marker, p1 (raglan st), place marker, purl 6 sts (left sleeve), place marker, p1 (raglan st), place marker, purl 5 sts (left back), SL1 PW, p1.
    Row 2:edge st, knit 1 st, K2togL, knit 3 sts, M1R, k1 (raglan st), M1L, knit 6 sts, M1R, k1 (raglan st), M1L, knit 10 sts, M1R, k1 (raglan st), M1L, knit 6 sts, M1R, k1 (raglan st), M1L, knit 3 sts, K2togR, SL1 PW, p1.
    Row 3:edge st, knit 1 st, purl all sts, SL1 PW, p1.

    Repeat rows 2 and 3 11 more times. There are now 112 sts on the needle. The next row 26 is a RS row.

    Distribution of stitches: 7 sts (right back), 1 raglan st, 30 sts (right sleeve), 1 raglan st, 34 sts (front), 1 raglan st, 30 sts (left sleeve), 1 raglan st, 7 sts (left back)).

    Row 26:edge st, knit 5 sts, K2togR,bind off 30 sts of the sleeve purl-wise, purl 2 together, pull over right st on left, knit 32 sts, K2togR, bind off 30 sts of the sleeve purl-wise, purl 2 together, pull over right st on left, knit 4 sts, SL1 PW, p1.

    There are now 48 sts on the needle.

    Row 27:edge st, knit 1 st, purl 44 sts, SL1 PW, p1.
    Row 28:edge st, knit 45 sts, SL1 PW, p1.
    Row 29:edge st, knit 1 st, purl 44 sts, SL1 PW, p1.
    Row 30:edge st, knit 45 sts, SL1 PW, p1.
    Row 31:edge st, knit 1 st, purl 44 sts, SL1 PW, p1.
    Row 32:edge st, knit 2 sts, M1L, knit 42 sts, M1R, knit 1 st SL1 PW, p1.
    Row 33:edge st, knit 1 st, purl all sts, SL1 PW, p1.


    Repeat rows 32 and 33 – 4 more times. There are now 58 sts on the needle. The next row 42 is a RS row.


    Row 42:
    edge st, knit 2 sts, M1L, knit 52 sts, M1R, knit 3 sts, cast on 8 new sts at the end of the row, join to work in the round. The round now begins here. Place a marker for the beginning of the round. There are now 68 sts on the needle.

    The next row 43 is a round row.

    Row 43:knit 68 sts

    Work round 43 a total of 17 times.

    Row 60:knit 13 sts, bind off 2 sts knit-wise, knit 1 st K2togL, knit 22 sts, K2togR, SL1 PW, p1, bind off 2 sts knit-wise, knit 1 st, K2togL, knit 2 6 sts, K2togR, SL1 PW, p1.


    Now work the front and back separately in rows. Turn your work and continue knitting the back section in flat rows.

    Back

    There are now 32 sts on the needle.

    Row 1:edge st, knit 1 st, purl 28 sts, SL1 PW, p1.
    Row 2:edge st, knit 1 st, K2togL, knit 24 sts, K2togR, SL1 PW, p1.

    Repeat rows 1 and 2 – 6 more times. There are now 18 sts on the needle. The next row 15 is a WS row.

    Row 15:edge st, knit 1 st, purl 14 sts, SL1 PW, p1.
    Row 16:edge st, knit 1 st, K2togL, knit 10 sts, K2togR, knit 2 sts.

    There are now 16 sts on the needle. Break the yarn 30 cm and let the sts rest, while the front is worked.

    Front

    There are now 28 sts on the needle.

    Join yarn and begin from the purl-side row.

    Row 1:knit 2 sts, purl 24 sts, SL1 PW, p1.
    Row 2:edge st, knit 24 sts, SL1 PW, p1.
    Row 3:edge st, knit 1 st, purl 24 sts, SL1 PW, p1.
    Row 4:edge st, knit 1 st, K2togL, knit 20 sts, K2togR, SL1 PW, p1.
    Row 5:edge st, knit 1 st, purl 22 sts, SL1 PW, p1.
    Row 6:edge st, knit 23 sts, SL1 PW, p1.
    Row 7:edge st, knit 1 st, purl 22 sts, SL1 PW, p1.
    Row 8:edge st, knit 1 st, K2togL, knit 18 sts, K2togR, SL1 PW, p1.
    Row 9:edge st, knit 1 st, purl 20 sts, SL1 PW, p1.

    Repeat rows 8 and 9 – 4 more times. There are now 18 sts on the needle. The next row 16 is a RS row.

    Row 16:edge st, knit 1 st, K2togL, knit 10 sts, K2togR, knit 2 sts.

    There are now 16 sts on the needle. Break the yarn 10 cm. Sew the front and back with a Kitchener stitch with a thread 30 cm long.

    Weave in all yarn tails and do the blocking in accordance with your yarn label recommendations. Dry on a horizontal surface. There are 3 ways to make ties on my Youtube.

    Abbreviations

    kknit
    K2togRright-leaning decrease stitch; knit two stitches together
    K2togRLleft-leaning decrease stitch; knit two stitches together
    M1Lincrease; make one left (see increases)
    M1Rincrease; make one right (see increases)
    ppurl
    SL1 PWslip 1, working thread in front of your work
    RSright side of your work
    WSwrong side of your work
    st(s)stitch(es)
    edge stedge stitch; slip the first stitch of a row, working thread behind your work

    Like this pattern?

    Consider buying me a coffee

    This pattern is for personal, non-commercial use only. The pattern may not be copied, resold or redistributed in any way.
    Share your work and tag me on Instagram/Youtube: maylily knitting
    Happy knitting!

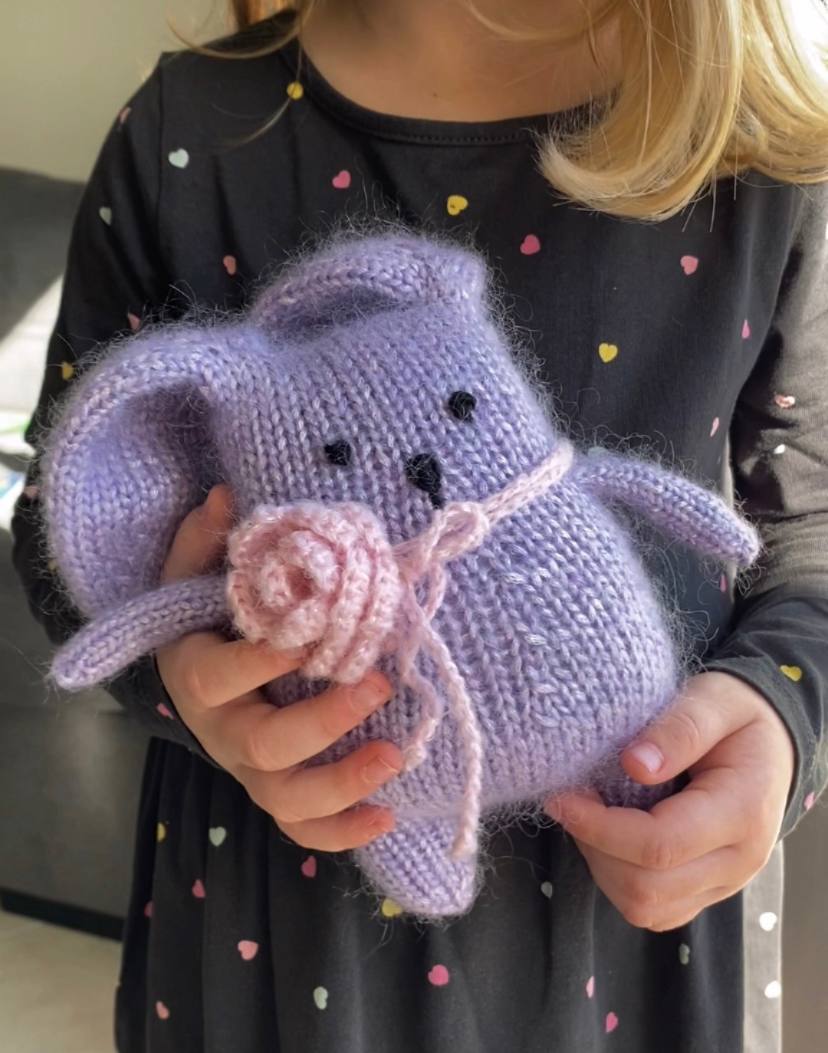
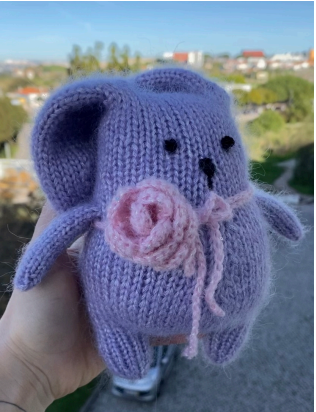
  • Rosie Bunny Toy Knitting Pattern

    Rosie Bunny Toy Knitting Pattern

    Size: the height of the toy may vary depending on the yarn used and the number of knitting needles

    Needles: use knitting needles 1-1.5 sizes smaller than recommended for yarn

    Materials: 50 g yarn

    For example

    50g/125m of merino wool + 25g/160m angora on 4.00 mm needles produces a toy 16 cm high without ears and 26 cm with ears.

    50g/110m Pearly Haze Hobbi + 25g/210m Kid-Silk Drops on 4.00 mm needles produces a toy 17 cm high without ears and 28 cm with ears.

    Pattern + Video

    Hands (Paws ? 😀)
    Cast on 4 sts on needles with your preferred cast-on method. I use long tail cast-on method. Join your work in the round.

    Round 1: knit 4 sts
    Round 2: [ k 1, M1R ] x 4
    Round 3-20: knit 8 sts

    Pull the lower end of the yarn through 4 stitches, pull and fasten the yarn, hide inside hand.
    Break the yarn, place the 8 sts on stitch holder or length of leftover yarn.
    Stuff the hand a little.
    Knit the second hand similarly to the first.

    Legs
    Left leg
    Cast on 6 sts on needles with your preferred cast-on method. I use long tail cast-on method. Join your work in the round.

    Round 1: knit 6 sts
    Round 2: [ k 1, M1R ] x 6
    Round 3-9: knit 12 sts

    Pull the lower end of the yarn through 6 stitches, pull and fasten the yarn, hide inside leg.
    Break the yarn 20 cm, place the 12 sts on stitch holder or length of leftover yarn.

    Right leg
    Knit the right leg similarly to the left, but don’t break the yarn.
    Let’s move on to knitting the body.

    Body

    Round 1: knit 6 sts right leg, cast on 6 sts, knit 12 sts left leg, cast on 6 sts, knit 6 sts right leg
    Round 2: knit 36 sts
    Round 3: k6, M1R, k1, M1R, k1, M1R, k2, M1L, k1, M1L, k1, M1L, k12, M1R, k6, M1L, k6

    Round 4: knit 44 sts
    Round 5: k9, M1R, k2, M1R, k2, M1L, k2, M1L, k29
    Round 6-7: knit 48 sts
    Round 8: k6, M1R, k16, M1L, k12, M1R, k8, M1L, k6
    Round 9-13: knit 52 sts

    Sew 12 sts between the legs with a Kitchener stitch with the thread 20 cm long.

    Round 14: k12, k2togL, k2, k2togR, k34
    Round 15
    : knit 50 sts
    Round 16: k11, k2togL, k2, k2togR, k33
    Round 17-18: knit 48 sts
    Round 19: k10, k2togL, k2, k2togR, k32
    Round 20-22: knit 46 sts
    Round 23: k2togR, k7, k2togL, k2, k2togR, k9, k2togR, k20
    Round 24: knit 42 sts
    Round 25: [ knit together 2 sts hand and 1 st body ] x 2, k17, [ knit together 2 sts hand and 1 st body ] x 4, k17, [ knit together 2 sts hand and 1 st body ] x 2
    Round 26: knit 42 sts

    Stuff the bunny.

    Round 27: [ k9, k2togR, k8, k2togR ] x 2
    Round 28-30: knit 38 sts
    Round 31: [ k8, k2togR, k7, k2togR ] x 2
    Round 32-45: knit 34 sts

    Stuff the bunny.

    Ears

    Right ear

    Round 1: knit 5 sts, place the 24 sts on stitch holder or length of leftover yarn, knit 5 sts

    Round 2: [ k2, M1R, k1, M1L, k2 ] x 2
    Round 3: knit 14 sts
    Round 4: [ k3, M1R, k1, M1L, k3 ] x 2
    Round 5: knit 18 sts
    Round 6: [ k4, M1R, k1, M1L, k4 ] x 2
    Round 7: knit 22 sts
    Round 8: [ k5, M1R, k1, M1L, k5 ] x 2
    Round 9-23: knit 26 sts
    Round 24: [ k4, k2togL, k1, k2togR, k4 ] x 2
    Round 25: knit 22 sts
    Round 26: [ k3, k2togL, k1, k2togR, k3 ] x 2
    Round 27: knit 18 sts
    Round 28: [ k2, k2togL, k1, k2togR, k2 ] x 2
    Round 29: knit 14 sts
    Round 30: [ k1, k2togL, k1, k2togR, k1 ] x 2
    Round 31: knit 10 sts
    Round 32: [ k2togL, k1, k2togR ] x 2

    Break the yarn, transfer stitches to the thread using a needle, pull and fasten the yarn, hide inside ear.


    Left ear

    Join yarn, leaving the end 20 cm long.

    Round 1: place the 7 sts on stitch holder or length of leftover yarn, knit 10 sts, place the 7 sts on stitch holder or length of leftover yarn.

    Knit the left ear similarly to the right.

    Put 14 sts on the needles and sew stitches with a Kitchener stitch with the thread 20 cm long.

    Embroider the bunny’s eyes and nose.

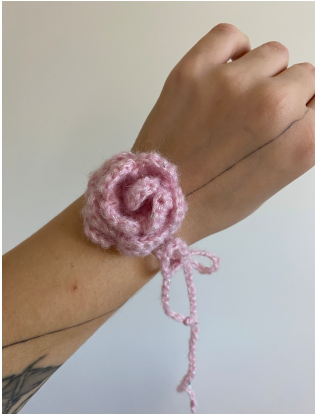
    How to crochet a flower

    Abbreviations

    kknit
    K2togRright-leaning decrease stitch; knit two stitches together
    K2togRLleft-leaning decrease stitch; knit two stitches together
    M1Lincrease; make one left
    M1Rincrease; make one right
    st(s)stitch(es)

    This pattern is for personal, non-commercial use only. The pattern may not be copied, resold or redistributed in any way. Share your version of the Rosie Bunny on Instagram with #rosiebunnyml #maylilyprops

    Happy knitting!

    Like this pattern?

    Consider buying me a coffee

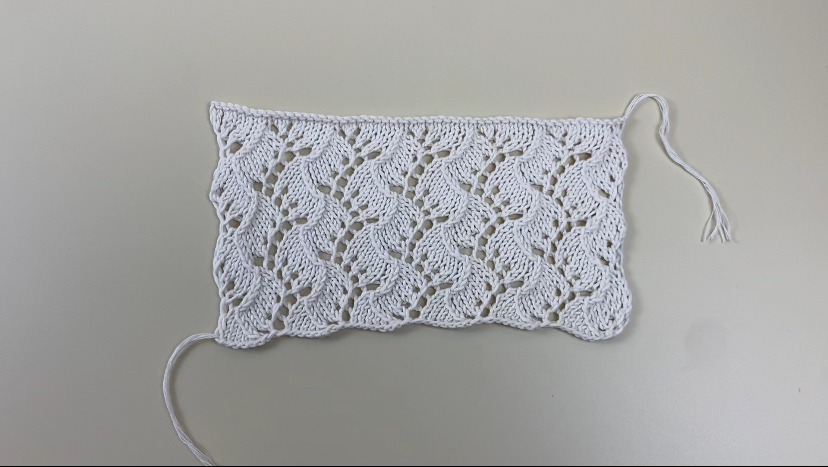
  • Traveling Vine Stitch

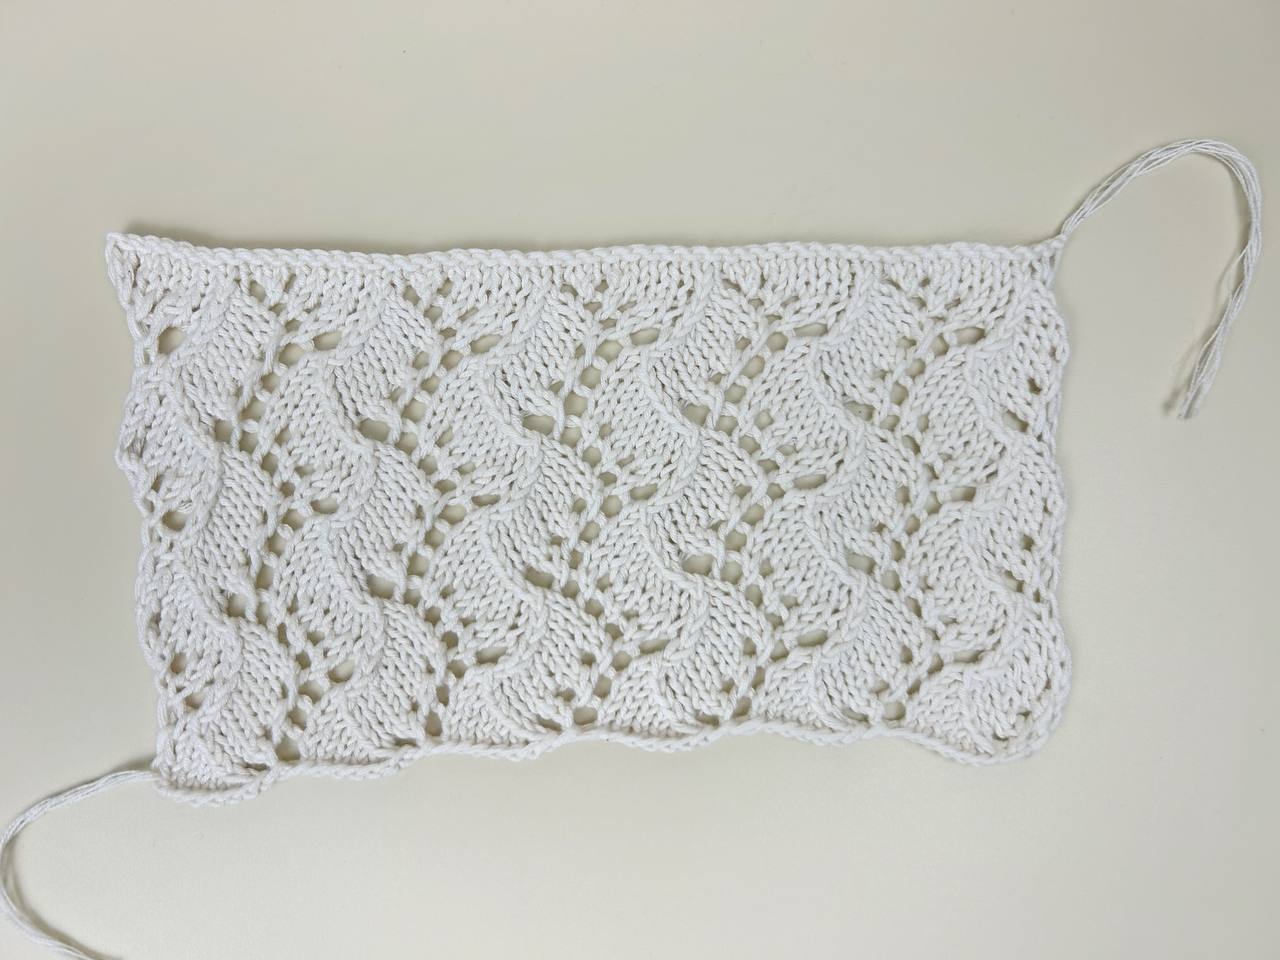
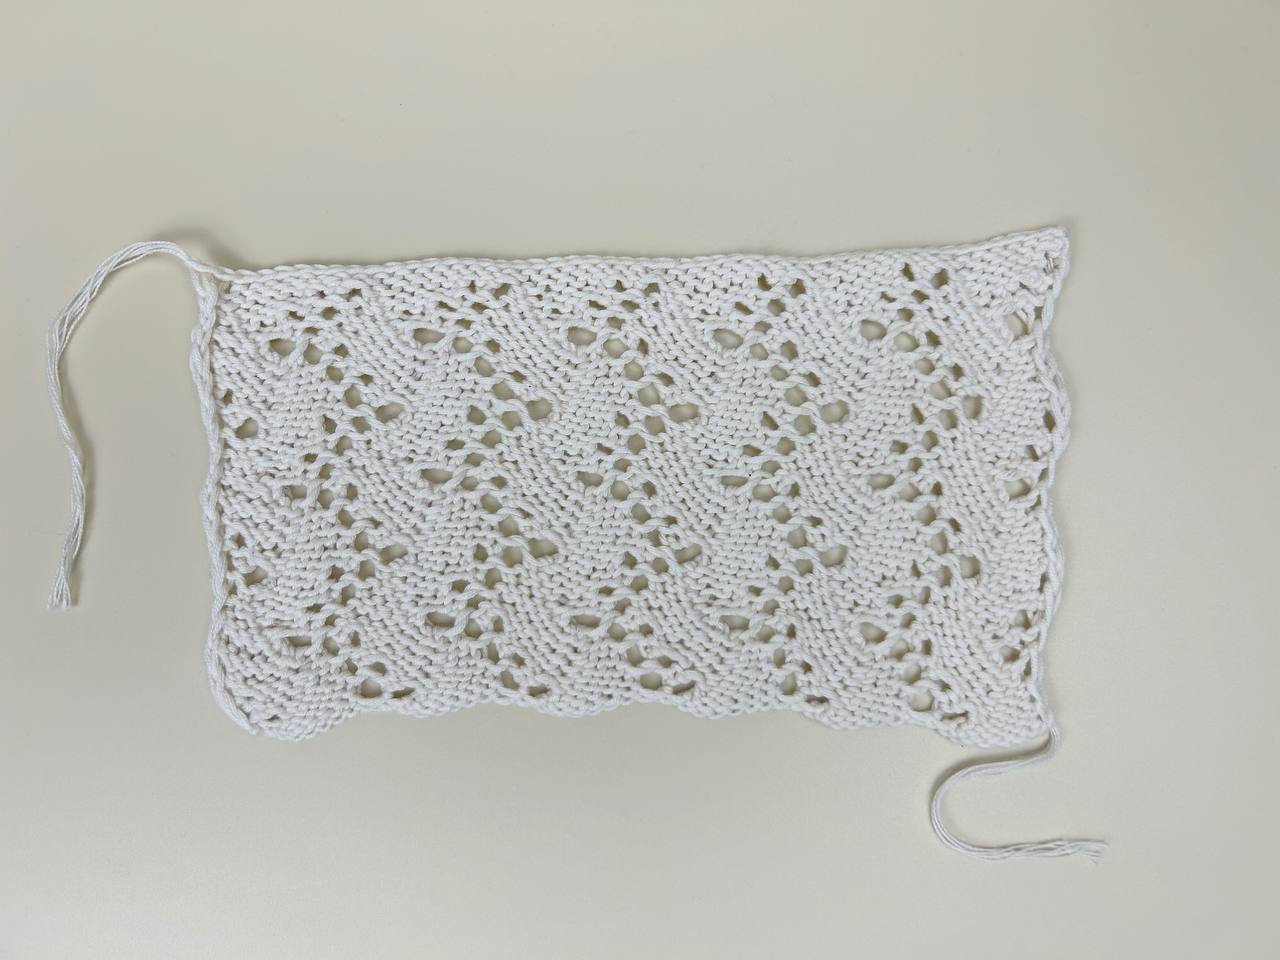
    One of my favorites is the Traveling Vine Stitch – a delicate, flowing design that twists and turns like real vines. The first time I tried it, I was amazed by how a simple combination of stitches could create such an elegant, openwork texture. Now, I want to share this beautiful lace knitting pattern with you. Whether you are new to lace or looking for a fresh challenge, this step-by-step guide will help you master the Vine Lace Pattern with ease. Let’s knit something beautiful together!

    How to knit Traveling Vine Stitch?

    This stitch pattern is multiple of 8 stitch + 2 edge stitches and 12 rows repetition pattern.


    Row 1 (right side): edge stitch, *yarn over, twisted knit stitch, yarn over, knit 2 together left, knit 5*, edge stitch.

    Row 2 (wrong side): edge stitch, *purl 4, purl 2 together right, purl 3*, edge stitch.

    Row 3: edge stitch, *yarn over, twisted knit stitch, yarn over, knit 2, knit 2 together left, knit 3*, edge stitch.

    Row 4: edge stitch, *purl 2, purl 2 together right, purl 5*, edge stitch.

    Row 5: edge stitch, *1 twisted knit stitch, yarn over, knit 4, knit 2 together left, knit 1, yarn over*, edge stitch

    Row 6: edge stitch, *purl 1, purl 2 together right, purl 6*, edge stitch.

    Row 7: edge stitch, *knit 5, knit 2 together right, yarn over, twisted knit stitch, yarn over*, edge stitch.

    Row 8: edge stitch, *purl 3, purl 2 together left, purl 4*, edge stitch

    Row 9: edge stitch, *knit 3, knit 2 together right, knit 2, yarn over, twisted knit stitch, yarn over*, edge stitch.

    Row 10: edge stitch, *purl 5, purl 2 together left, purl 2*, edge stitch.

    Row 11: edge stitch, *yarn over, knit 1, knit 2 together right, knit 4, yarn over, twisted knit stitch*, edge stitch.

    Row 12: edge stitch, *purl 6, purl 2 together left, purl 1*, edge stitch.

    Common questions about the Traveling Vine Stitch:

    1. Is the Traveling Vine Stitch difficult to knit?

    It is an intermediate lace pattern, but with careful stitch counting and practice, even adventurous beginners can master it.

    2. What type of yarn is best for this lace pattern?

    Lightweight yarns like fingering or sport weight work best to showcase the delicate details, but you can experiment with different fibers.

    3. Does this pattern require blocking?

    Yes, blocking helps open up the lace and define the vine-like structure.

    4. Can I knit the Traveling Vine Stitch in the round?

    Yes, but you will need to adjust the pattern slightly to maintain the stitch flow.

    5. How do I fix mistakes in lace knitting?

    Lifelines are very helpful! Otherwise, carefully thinking (undoing stitches one by one) can help fix small mistakes.

    6. Can I use this stitch for scarves, shawls, or sweaters?

    Absolutely! It works beautifully for lightweight scarves, elegant shawls, and decorative sweater panels.

    7. What stitch multiple does the pattern follow?

    Typically, it follows a multiple of 8 stitches plus 2 for balance.

    8. Do I need to use stitch markers for this pattern?

    The are not required but can help separate pattern repeats and prevent mistakes.

    9. How can I adjust the size of my project using this stitch?

    Simply increase or decrease in multiples of the stitch repeat to fit your desired width.

    Like this pattern?

    Consider buying me a coffee